Planting
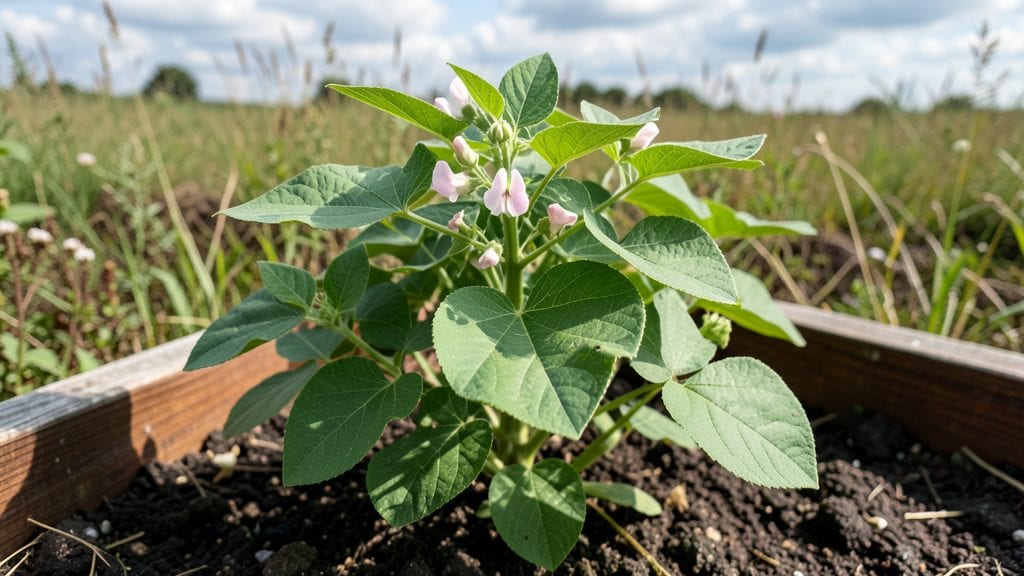
Watch a bean plant sprouting in just 3-5 days—no waiting months for store-bought seedlings. I’ve watched them crack open like tiny green firecrackers, and once you see it, you’ll never buy transplants again.
The secret isn’t fancy equipment but knowing when to soak, how deep to plant, and what temperature speeds things up.
You only need a few basics: dry beans (heirloom or bush varieties work best), a shallow dish or pot, paper towels, and a warm spot. No special soil mix—just damp paper towels or a light potting blend.
The magic happens when you keep things consistently moist and above 70°F. Too cold, and they’ll sulk; too dry, and they’ll shrivel before sprouting.
Within a week, you’ll have sturdy seedlings with true leaves ready for soil. The roots grow fast, so avoid overcrowding—give each seed 1-2 inches of space. If some lag behind, check for uneven moisture or old seeds. A quick soak in warm water can revive stubborn ones before replanting.
This method works for any climate—just adjust timing for cooler springs. Once you’ve seen that first green shoot push through, you’ll be hooked on growing your own. Ready to try?
📚 In This Guide
- What you need
- Instructions
- Tips and common mistakes
- Wrapping up and next steps
What you need
- ● Seeds: ½ cup of non-GMO, organic bean seeds (e.g., mung beans, black beans, or kidney beans). Pro tip: Soak seeds overnight to speed up germination! 💡
- ● Water: 2 cups of room-temperature, filtered water (for water sprouting method).
- ● Container: Water method: A wide-mouth jar (quart-sized) with a mesh lid or cheesecloth.
- ● Soil method: A 6-inch pot with drainage holes or a seed tray.
- ○ Soil (optional for soil method): 2–3 cups of well-draining potting mix (avoid garden soil—it’s too dense!).
- ● Spray bottle: For misting seeds (keeps them hydrated without overwatering).
- ● Grow light: If sprouting indoors near a window with low sunlight.
- ● Humidity dome: To maintain moisture levels for faster growth.
- ● Seedling heat mat: Speeds up germination in cooler climates (70–80°F ideal).
- ● Fertilizer: A balanced, organic fertilizer (like fish emulsion) once seedlings emerge.
Instructions for bean plant sprouting: fast germination in water or soil
Here’s how to get your beans sprouting in just days—no fancy equipment needed.
Choose Your Sprouting Method
Beans sprout fastest in water, but soil gives stronger roots. For water sprouting, soak 4 dry beans in a jar overnight. For soil, fill a small pot with 1 cup potting mix and press a bean 1 inch deep. I prefer water first because it’s quicker—you’ll see tiny white roots in 24 hours. If using soil, keep it moist but not soggy.
For water sprouting, drain the beans after soaking, then place them in a jar with a mesh lid. Leave them at room temperature (around 70°F) in indirect light. For soil, cover the pot with plastic wrap to retain moisture until sprouts appear. Watch for the first signs of life—tiny white sprouts breaking through the shell or soil.
Provide Ideal Conditions for Germination
Beans need warmth and moisture to sprout fast. If using water, rinse the jar twice daily to prevent mold. Keep the jar in a warm spot, like near a sunny window but not in direct sunlight. For soil, place the pot in a warm, shaded area—direct light can dry out the soil too quickly.
You’ll see sprouts in 3-5 days if conditions are right. If they’re slow, check the temperature—beans germinate best between 65-80°F. Avoid cold drafts or sudden temperature drops. Once the sprouts reach 1-2 inches tall, they’re ready for transplanting if using soil, or you can eat them as microgreens if water-sprouted.
Transplant or Harvest at the Right Time
If you started beans in soil, transplant them into a larger container with 2 cups potting mix once they have 2-3 true leaves. Gently dig around the roots to avoid damaging them. For water-sprouted beans, you can harvest them as soon as they’re 1-2 inches tall—they’re perfect for salads or snacks. If you want to grow them further, transfer them to soil at this stage.
When transplanting, bury the stem up to the first set of leaves—this encourages stronger root growth. Water lightly after transplanting and place the pot in bright, indirect light for a week to help them adjust. Avoid overwatering; let the soil dry slightly between waterings to prevent rot.
Maintain Growth for a Healthy Plant
Once your beans are in soil, keep the potting mix evenly moist but not waterlogged. A good rule is to water when the top inch of soil feels dry. Place the pot in full sun (6+ hours daily) to encourage strong growth. You’ll notice new leaves forming within a week—that’s your sign the plant is thriving.
If growing for harvest, watch for flower buds to appear after about 6 weeks. At this point, beans need more space—if they’re still in a small pot, transplant them into a 5-gallon container with fresh potting mix. Keep an eye out for pests like aphids; a quick spray of water usually does the trick if you catch them early.
Tips & tricks for perfect bean plant sprouting
Fast germination is all about consistency—here's how to make every step work for you.
Temperature Control: The 24-hour soak and ideal germination range of 65-80°F are crucial for speed. If your kitchen runs cooler (below 65°F), place your jar on top of the fridge or near a warm spot like a sunny windowsill. For water sprouting, maintain that 70°F room temperature—any colder and germination slows dramatically. I've found that moving the jar to a warmer spot after the overnight soak gives me sprouts in just 2 days instead of 3.
Rinsing Technique: Those twice-daily rinses in Step 2 are non-negotiable for water sprouting. Use a fine-mesh strainer to drain water completely between rinses—standing water leads to mold. I rinse in the morning and evening, then immediately drain and return to the mesh lid. This keeps your beans fresh and prevents that sour smell that ruins the whole batch.
Light Strategy: Indirect light is key during germination. Place your jar near a window but not in direct sunlight, which can overheat the beans. For soil sprouts, keep the pot in a warm, shaded area until you see sprouts. Once they reach 1-2 inches, move them to brighter light—but avoid sudden exposure that can shock tender plants.
Transplanting Timing: When transplanting soil-grown beans, wait until you see 2-3 true leaves, not just the initial sprouts. This ensures the plant has enough energy for the transition. Gently dig around the roots to preserve the delicate root system. I've learned the hard way that forcing an early transplant leads to shock and stunted growth.
Pro Tips for Bean Plant Sprouting
- Fast germination is all about consistency—here's how to make every step work for you.
- Temperature Control: The 24-hour soak and ideal germination range of 65-80°F are crucial for speed.
- Rinsing Technique: Those twice-daily rinses in Step 2 are non-negotiable for water sprouting.
Frequently asked questions
about bean plant sprouting—let’s tackle the curiosities that keep popping up! Whether you're a first-timer or a seasoned gardener, these answers will help you grow confident sprouts.How long does it take for bean seeds to sprout in water?
Most bean seeds (like mung, black, or kidney beans) sprout in 2–5 days when soaked in water. Keep them in a warm, dark place, rinse twice daily, and watch for tiny roots (radicles) breaking through the seed coat. Patience pays off—consistency is key!
Can I plant bean sprouts directly in soil instead of water?
While water sprouting is fastest, you can skip the soaking step and plant seeds ½ inch deep in moist soil. Water lightly, keep soil warm (70–80°F), and sprouts may take 5–10 days to emerge. Soil-grown sprouts are sturdier and ready for transplanting.
What should I do if my bean seeds aren’t sprouting?
Try these fixes:
- Check viability: Test a few seeds in warm water—if they float, they’re likely bad.
- Adjust conditions: Ensure warmth (70°F+), darkness (for water sprouting), and moisture.
- Try scarification: Lightly sand or nick the seed coat to help water penetrate.
Are bean sprouts safe to eat raw, or should I cook them?
Raw bean sprouts (like mung or soy) are edible but may carry bacteria like E. coli. Soak seeds in 1% vinegar solution for 10 minutes to sanitize, then rinse well. For extra safety, lightly steam or blanch before eating.
Can I reuse the water when sprouting beans?
No—always use fresh water for rinsing sprouts to prevent mold or bacterial growth. Drain soaked seeds thoroughly after 8–12 hours, then rinse 2–3 times daily in clean water. A fine-mesh colander works best for drainage!
Wrapping up and next steps
Watching a bean plant sprouting is one of nature’s simplest yet most rewarding experiences! Whether you’re growing them in water or soil, the process is quick, cost-effective, and perfect for beginners. With just a few supplies and patience, you’ll soon be harvesting fresh, nutrient-packed greens or even full-sized plants.
Ready to take the next step? Try planting your first batch today—experiment with different varieties, track your progress, and share your green thumb success with friends! 🌱✨