Vegetables
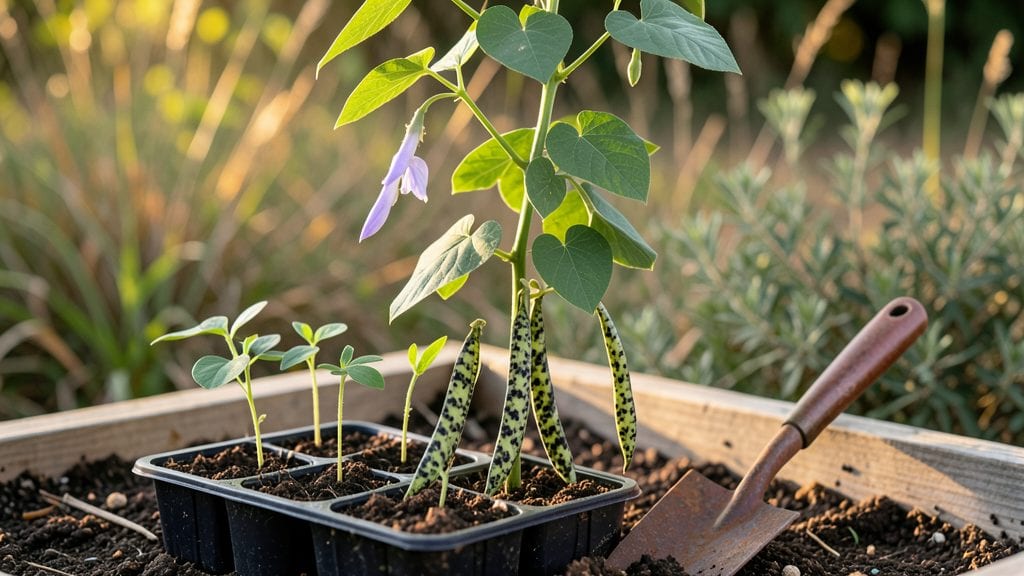
Planting rattlesnake beans is easy—they’ll burst into a jungle-like climb while thriving in just a 3-foot space, fast and dramatic. I planted mine last spring and watched them explode from soil to 6-foot towers in just 60 days.
The secret isn’t fancy soil or perfect timing; it’s knowing how to coax their aggressive growth without sacrificing your small plot.
You’ll need a sturdy trellis or teepee (they’re heavy when loaded with beans), loose soil mixed with compost, and a sunny spot that gets at least 6 hours of light daily.
Water deeply 2-3 times a week once they’re established—dry soil slows them down, and nobody wants slow rattlesnake beans. The beans themselves are striking: deep purple-black pods that turn into speckled seeds, perfect for drying or fresh eating.
Here’s the best part: they’re drought-tolerant once rooted and thrive with minimal fuss. Plant them after your last frost, let them scramble up their support, and harvest pods when they’re firm but still tender.
They’re also nitrogen-fixers, meaning they feed your soil while they grow—free fertilizer for next year’s garden.
Fair warning: these beans get top-heavy and need strong support. If you’re in a windy area, secure that trellis well. For extra drama, pair them with nasturtiums or marigolds—they’ll complement the beans’ bold look while keeping pests at bay. Ready to grow something that looks as good as it tastes?
📚 In This Guide
- What you need
- Instructions
- Tips and common mistakes
- Wrapping up and next steps
What you need
- ● Seeds: 1–2 oz (about 20–40 seeds) of rattlesnake bean seeds (e.g., Phaseolus vulgaris ‘Rattlesnake’). Look for heirloom or organic varieties for best results.
- ● Growing Space: Pole beans thrive vertically! Use a 5–7 ft tall trellis, fence, or sturdy stakes (3–4 per 10 sq ft of garden).
- ● Well-draining soil in a sunny spot (6+ hours of sunlight daily).
- ● Fertilizer: A balanced, organic fertilizer (e.g., 5-5-5 or compost) to enrich soil before planting.
- ● Watering Can or Hose: With a gentle spray nozzle for even moisture.
- ● Garden gloves (to protect hands from seed pods).
- ● Pruning shears (for trimming vines or harvesting).
- ● Mulch (straw or shredded leaves to retain moisture).
- ● Plant labels (to track varieties if growing multiple types).
- ● Climate: Plant after the last frost when soil is at least 60°F (15°C).
- ● Spacing: Sow seeds 4–6 inches apart in rows 18–24 inches apart (or scatter for a bushier look).
- ● Patience: Germination takes 7–14 days—keep soil moist!
Instructions for planting rattlesnake beans: bold, fast-growing pole beans
Here's how to get these dramatic, high-yielding beans growing in record time—no sprawling trellis required!
Choose Your Planting Location and Prepare the Soil
Rattlesnake beans thrive in full sun, so pick a spot that gets at least 6-8 hours of direct sunlight daily. These beans grow fast, so don't wait until late spring—they'll bolt if the ground is still chilly. Work in 2-3 inches of compost into the top 6 inches of soil to give them the nutrients they crave for those bold, speckled pods.
Test your soil's drainage by pressing a finger into the ground—if water pools instead of draining within 10 minutes, amend with sand or perlite to improve aeration. These beans hate soggy feet, and poor drainage slows their incredible growth speed. The ideal soil should feel like a damp sponge when squeezed.
Plant Seeds at the Right Depth and Spacing
Plant 4 seeds per location, spaced 4-6 inches apart in rows 18-24 inches apart. Rattlesnake beans grow upright naturally, but they'll still need support as they reach 6-8 feet tall. Plant seeds 1 inch deep—any deeper and they'll struggle to push through the soil, delaying that fast growth you're waiting for.
Press the soil gently around each seed to ensure good contact, then water deeply to settle everything. I like to use a soaker hose to avoid disturbing the seeds. Once watered, the soil surface should look slightly darker but not glistening. This ensures moisture without creating a muddy crust that can smother seedlings.
Provide Consistent Moisture and Watch for Fast Germination
Keep the soil evenly moist but never soggy—these beans germinate in just 5-10 days under ideal conditions. Water 1 inch per week, more if your area experiences hot, dry spells. You'll know moisture is right when the soil feels damp 1 inch below the surface but not wet to the touch.
Once seedlings emerge, thin to the strongest 2 plants per location. Weak stems won't support the heavy pods, and you want those bold rattlesnake-patterned beans taking center stage. If you see yellowing leaves at the base, it's a sign of overcrowding—remove the weaker plants immediately to redirect nutrients to the winners.
Add Support and Maintain for Bold Harvests
Install 5-6 foot tall trellises or sturdy stakes as soon as plants reach 12 inches tall. Rattlesnake beans climb aggressively, and without support, they'll flop and break under the weight of those dramatic pods. I use bamboo stakes tied with soft twine to avoid damaging the stems.
Fertilize lightly with a balanced organic fertilizer when plants flower to encourage heavy pod production. Watch for white flowers—they'll turn into those signature speckled pods in just 3-4 weeks. Harvest regularly to keep the plants producing; left unchecked, they'll go to seed and stop yielding those bold beans you planted for.
Extend the Season with Fast Successive Plantings
For continuous harvests, plant new seeds every 2 weeks until 6 weeks before your first frost. Rattlesnake beans grow so quickly that you'll have fresh pods ready in just 50-60 days from seed. In warm climates, you can even plant a fall crop for winter harvests—just use row covers to protect tender seedlings from chilly nights.
This is where rattlesnake beans shine: they're one of the fastest-growing pole beans, and their dramatic appearance makes them a showstopper in any garden. With just a little attention to moisture and support, you'll be harvesting those bold, speckled pods in record time—no sprawling vines or complicated trellis systems required!
Tips & tricks for planting rattlesnake beans
Here's how to supercharge your rattlesnake bean garden for those bold, speckled pods in record time!
Speed Up Germination: To ensure those beans pop up in just 5-10 days as promised, soak your seeds overnight before planting. This pre-hydration jumpstarts growth, especially if your soil is dry. I've found that pre-soaked seeds emerge 2-3 days faster, which means earlier harvests of those dramatic pods you're craving. The key is to use room-temperature water for about 8 hours—just enough to soften the seed coats without over-saturating.
Support Strategy: Don't wait until plants reach 12 inches to add support—install your 5-6 foot tall trellises or stakes right when you plant the seeds. This gives the roots immediate structure to climb, preventing the aggressive vines from flopping over later. I use bamboo stakes tied with soft twine because they're sturdy yet gentle on the stems. The earlier you provide support, the straighter your plants will grow, and those bold rattlesnake-patterned pods will stand out dramatically against the trellis.
Watering Wisdom: That 1 inch per week watering guideline is perfect, but timing matters too. Water in the morning so the soil has all day to dry slightly—rattlesnake beans hate soggy feet. I've learned the hard way that evening watering can lead to fungal issues, especially in humid climates. Use a rain gauge to track exactly how much water your garden gets naturally, then supplement as needed to maintain that ideal damp-but-not-wet soil condition 1 inch below the surface.
Fertilizer Timing: When you see those white flowers appear (around 3-4 weeks after planting), that's your cue to apply that balanced organic fertilizer. The key is to use half the recommended dose—too much nitrogen can lead to leafy growth at the expense of pod production. I've found that a light application right when flowers appear, followed by another small dose when pods begin forming, gives the best results for those bold, speckled beans you're growing for.
Pro Tips for Planting Rattlesnake Beans
- Here's how to supercharge your rattlesnake bean garden for those bold, speckled pods in record time!
- Speed Up Germination: To ensure those beans pop up in just 5-10 days as promised, soak your seeds overnight before planting.
- Support Strategy: Don't wait until plants reach 12 inches to add support—install your 5-6 foot tall trellises or stakes right when you plant the seeds.
Frequently asked questions
Got questions about growing rattlesnake beans? You’re not alone—these bold, fast-growing pole beans spark curiosity! Below, we’ve rounded up the most common queries to help you plant with confidence.
When is the best time to plant rattlesnake beans?
Plant rattlesnake beans after the last frost when soil temperatures reach at least 60°F (15°C). They thrive in warm conditions, so aim for late spring to early summer in most climates. In hotter regions, consider a fall planting for a second harvest! Learn more about frost dates in your area.
How long does it take for rattlesnake beans to grow and produce?
These beans are fast growers! From seed to harvest, expect 50–60 days in ideal conditions. You’ll spot early pods in just 4–6 weeks, and the vines can climb aggressively—so provide sturdy trellises early. Patience pays off with a bold, flavorful reward!
Can rattlesnake beans grow in containers or small spaces?
Rattlesnake beans are perfect for compact gardens—they thrive in 5-gallon containers or small raised beds with proper trellising. Just ensure the container has drainage and depth of at least 12–18 inches. A 5-foot trellis will support their vigorous growth beautifully.
What should I do if my rattlesnake beans aren’t producing pods?
Several factors could be at play: poor pollination (hand-pollinate with a brush if needed), overcrowding (thin plants to 4–6 inches apart), or nutrient deficiencies (add compost or a balanced fertilizer). Also, check for pests like bean beetles—neem oil can help! If flowers drop without setting pods, heat stress might be the culprit; provide afternoon shade in extreme heat.
Are rattlesnake beans spicy or hot like chili peppers?
Nope! Despite their name, rattlesnake beans are mild, flavorful pole beans with a meaty, buttery texture—no heat here. Their unique name comes from their snake-like pods and vigor, not spice. Perfect for stir-fries, soups, or fresh snacking!
What can I plant alongside rattlesnake beans for companion planting?
Rattlesnake beans pair well with corn, cucumbers, squash, and herbs like basil or dill—a classic "Three Sisters" combo works great. Avoid planting near onions or garlic, as they can stunt growth. Marigolds nearby deter pests like Mexican bean beetles.
Wrapping up and next steps
Ready to transform your compact garden into a thriving, space-efficient haven? Rattlesnake beans are your secret weapon—fast-growing, bold, and packed with flavor! 🌱 With just a few simple steps, you’ll enjoy a bountiful harvest in no time.
Now that you’re armed with all the tips and tricks, grab those seeds and get planting—your garden (and taste buds) will thank you!
Next step: Mark your calendar for planting season and watch your vertical garden flourish! 🌿