How To
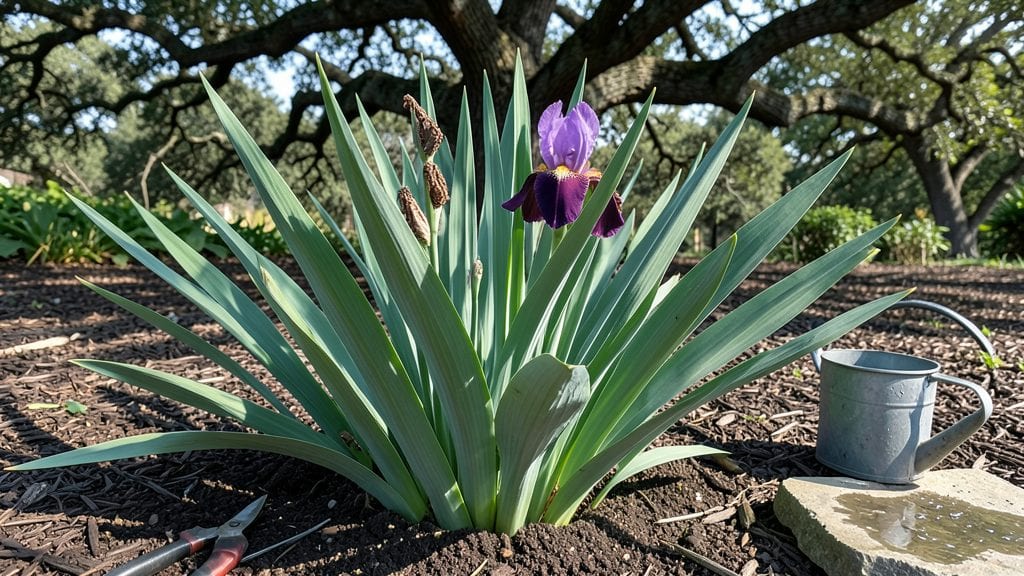
Planting iris tubers in early fall or late winter unlocks those dramatic, sword-like leaves and vibrant blooms that last for weeks. 🌿 I’ve planted mine in both seasons, and the ones I tucked into the ground in October now send up fresh shoots while the snow melts.
The key isn’t just timing—it’s how you prep the soil and position those little rhizomes so they don’t rot or dry out.
You’ll need well-draining soil, a sunny spot with at least six hours of light, and a fork to loosen the ground. Most people overlook the spacing—plant tubers 3 to 4 inches deep and 12 inches apart to give them room to spread.
I’ve seen gardeners crowd them, and by spring, the blooms get cramped and weak. Think of it like giving each tuber its own personal space to shine.
After planting, water lightly but don’t drown them—they hate soggy roots. Within weeks, you’ll spot those signature upright leaves, and by late spring, the blooms will appear like clockwork. The secret to long-lasting color?
Dividing the clumps every 3 to 4 years keeps them vigorous. Trust me, once you see that first flush of purple, blue, or yellow, you’ll never buy cut flowers again.
This method works for both bearded and beardless irises, and it’s just as effective in containers if your yard is rocky. The only real mistake? Planting too deep or in heavy clay. Let’s get those tubers in the ground—your spring garden will thank you.
📚 In This Guide
- What you need
- Instructions
- Tips and common mistakes
- Wrapping up and next steps
What you need
- ● Iris tubers: Healthy, firm rhizomes (avoid soft or mushy ones). Buy 10–20 tubers per 10 sq. ft. for a lush display.
- ● Garden soil: Well-draining, slightly sandy loam (pH 6.0–7.0). Amend clay soil with compost or perlite.
- ● Garden fork or tiller: For loosening soil to a depth of 12–18 inches.
- ● Garden gloves: To protect hands while handling rhizomes and soil.
- ○ Pruning shears: For trimming dead foliage from last season (optional but helpful).
- ○ Mulch (optional but recommended): 2–3 inches of shredded bark or pine straw to retain moisture.
- ● Watering can or hose: With a gentle spray nozzle for post-planting hydration.
- ● Bone meal or phosphorus fertilizer: 1 tbsp per tuber at planting for root growth.
- ● Pest deterrents: Copper tape or diatomaceous earth to protect against slugs/snails.
- ● Stakes or labels: To mark tuber locations (especially useful for large gardens).
- ● Rain gauge or moisture meter: To monitor soil hydration post-planting.
Step-by-step instructions for planting iris tubers
Here's the straightforward method I use to get vibrant, healthy iris blooms every spring.
🌱 Step 1: Choose and Prepare the Planting Site
Iris tubers thrive in full sun with at least 6 hours of direct sunlight daily. Pick a spot with well-draining soil—they hate soggy roots. Work in a 2-inch layer of coarse sand or gravel at the bottom of the planting hole to improve drainage if your soil is heavy clay.
Test your soil's drainage by digging a 12-inch deep hole and filling it with water. If it drains completely within 2 hours, your soil is fine. If not, amend it with 30% compost mixed into the top 6 inches of soil. Iris tubers prefer slightly acidic to neutral soil with a pH between 6.0 and 7.0.
🪴 Step 2: Plant the Tubers at the Right Depth
Handle iris tubers gently—they're delicate. Plant them with the flat side down and the pointy end up. Dig a hole 3-4 inches deep for rhizomes (thick, horizontal tubers) or 2 inches deep for smaller tubers. Space them 12-24 inches apart, depending on the variety—larger types need more room.
Don't bury them too deep; they need sunlight to reach the top. If your soil is loose, you'll see new growth emerging within 2-3 weeks. Cover the tubers with soil, leaving the top slightly exposed. Water lightly after planting to settle the soil around the tubers.
☀️ Step 3: Water and Mulch for Establishment
Water the newly planted tubers deeply once a week during the first 4-6 weeks to encourage root growth. Avoid overhead watering—it can cause fungal diseases. Instead, water at the base with a gentle stream. You'll know the tubers are settling in when new shoots appear, usually in late spring.
Apply a 2-inch layer of mulch around the plants, keeping it 3 inches away from the tubers to prevent rot. Use organic mulch like shredded bark or straw. This helps retain moisture and keeps the soil temperature stable. Avoid synthetic mulches—they can smother the tubers.
✂️ Step 4: Maintain and Encourage Blooms
Once the iris plants are established, water them every 2 weeks unless there's significant rainfall. Iris tubers are drought-tolerant once they're mature, but consistent moisture during the growing season ensures strong blooms. Fertilize lightly in early spring with a balanced, slow-release fertilizer to support new growth.
Deadhead spent blooms by cutting the flower stalk 2 inches above the base to redirect the plant's energy into root and tuber development. This ensures stronger growth and more vibrant blooms next season. Avoid cutting the fan-shaped leaves—they're essential for photosynthesis.
⏰ Step 5: Prepare for Winter and Next Year's Blooms
In late fall, reduce watering as the plants enter dormancy. Stop watering completely once the leaves turn yellow and die back. Cut the leaves back to 2 inches above the soil in late fall or early winter. This helps prevent disease and makes it easier to spot new growth in spring.
Apply a 3-inch layer of mulch around the tubers before the first frost to protect them from freezing temperatures. In USDA zones 3-5, iris tubers can survive winter with adequate mulch. In colder zones, consider covering the bed with a thick layer of straw or leaves for extra insulation.
Tips & tricks for perfect iris planting
These simple strategies will help your iris tubers thrive and deliver stunning blooms year after year.
The Sunlight Secret: While 6 hours of sunlight is the minimum, I always aim for at least 8 hours of direct sun for the most vibrant blooms. Early morning sun is especially beneficial—it helps dry dew quickly, reducing fungal risks. If you're planting in a shady spot, choose varieties like 'Blue Flag' that tolerate partial shade better than others.
Depth Matters: The 3-4 inch depth for rhizomes is critical—burying them too deep smothers the growth points, while planting too shallow exposes them to temperature swings. For smaller tubers, I mark the planting depth with a small stake to avoid over-planting. Remember, the top should always peek above soil level to catch sunlight.
Watering Wisdom: Those first 4-6 weeks of weekly deep watering are non-negotiable. Use a soaker hose or drip irrigation to deliver water directly to the base—this prevents wetting the leaves and reduces disease risk. I always check soil moisture by sticking my finger 2 inches down; if it's dry, it's time to water again.
Mulch Strategy: The 2-inch layer of organic mulch around your plants does more than retain moisture—it regulates soil temperature and suppresses weeds. I keep mulch 3 inches away from the tubers to prevent rot, and always use organic materials like straw or shredded bark. Synthetic mulches can actually smother the delicate growth points.
Pro Tips for Planting Iris Tubers
- These simple strategies will help your iris tubers thrive and deliver stunning blooms year after year.
- The Sunlight Secret: While 6 hours of sunlight is the minimum, I always aim for at least 8 hours of direct sun for the most vibrant blooms.
- Depth Matters: The 3-4 inch depth for rhizomes is critical—burying them too deep smothers the growth points, while planting too shallow exposes them to temperature swings.
Frequently asked questions
Got questions about planting iris tubers? You’re not alone—gardeners often wonder about timing, care, and troubleshooting. Here are answers to the most common queries to help you grow stunning irises with confidence!
When is the best time to plant iris tubers?
Plant iris tubers in early fall (6–8 weeks before the first frost) or late winter/early spring (as soon as the ground is workable). Fall planting gives roots time to establish before winter, while spring planting works in warmer climates. Avoid planting in extreme heat or freezing soil.
How long does it take for iris tubers to bloom after planting?
With proper care, iris tubers typically bloom in 2–3 years after planting. First-year tubers focus on root growth, so patience is key! Well-established clumps may flower sooner, especially if planted in ideal conditions (full sun, fertile soil, and good drainage).
Do iris tubers need a lot of water after planting?
Keep the soil moderately moist (not soggy) for the first 2–3 weeks post-planting to encourage root growth. After that, irises are drought-tolerant—water deeply 1–2 times per week during dry spells. Overwatering can lead to rot, so prioritize drainage in their planting spot.
Can I plant iris tubers in containers instead of the ground?
Yes! Iris tubers thrive in containers with well-draining soil and a depth of at least 6 inches. Use a mix of potting soil and perlite/sand. Place the container in full sun and water sparingly. Just be sure to divide and repot every 2–3 years to prevent overcrowding.
Why aren’t my iris tubers blooming, even after years of planting?
Common culprits include overcrowding (divide clumps every 3–4 years), poor sunlight (irises need 6+ hours of sun daily), or excessive fertilizer (too much nitrogen = leafy growth, fewer blooms). Also, check for pests like iris borers or fungal diseases. Adjust care and monitor for improvements!
Wrapping up and next steps
Planting iris tubers is your golden ticket to a garden bursting with vibrant, long-lasting blooms that’ll turn heads (and maybe even inspire your neighbors to ask for cuttings!). 🌸 With the right timing, soil prep, and a little TLC, you’ll be rewarded with stunning flowers year after year—minimal effort, maximum impact.
Now that you’re armed with all the know-how, there’s only one step left:
- Grab those tubers, dig in, and watch your garden transform!
- Need extra motivation? Join a local gardening group or snap photos of your progress to track your iris’s growth—because every bud is a victory.
Happy planting—your future garden will thank you! 🌱✨