Propagation
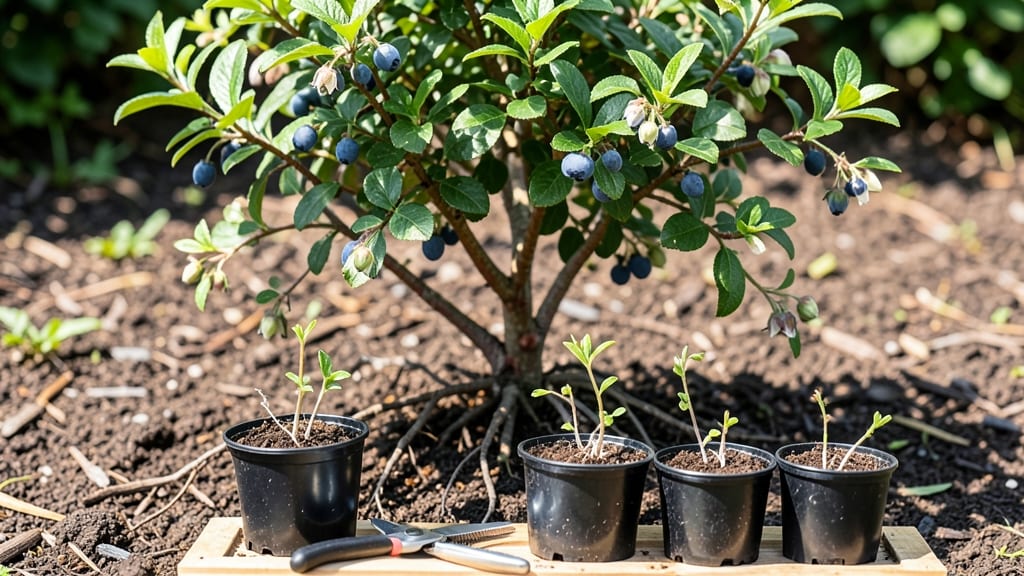
Blueberry plant propagation through stem layering saved my struggling bushes last spring—no root shock, no wilting, just healthy new plants ready to fruit in just a few seasons. 🌱 The key is working with the plant’s natural growth patterns while it’s still in the ground, so you avoid the stress of digging up delicate roots.
I’ll show you exactly how to do it, from selecting the right stems to creating the perfect conditions for roots to form without ever moving the plant.
You’ll need a few basic supplies: sharp pruning shears, some moistened sphagnum moss or peat, and a small piece of plastic wrap or a clear bag to keep humidity high. Timing matters too—do this in early summer when new growth is strong but not yet woody.
The whole process takes about 8-12 weeks, and by the end, you’ll have rooted layers ready to separate and plant in their own spot. It’s foolproof once you know the steps, and you’ll end up with blueberries that taste better than anything you can buy.
The best part? These new plants adapt faster than nursery-grown ones because they’ve already established roots in their own soil. You’ll see fresh, glossy leaves and new shoots by midsummer, and within 2-3 years, they’ll be producing berries as sweet as your original bushes.
No more waiting years for transplants to mature—just instant blueberry bushes that thrive from day one.
This method works for both highbush and rabbiteye varieties, and it’s perfect for gardeners who want to expand their patch without the hassle of digging up established plants.
Whether you’re dealing with limited space or just want more berries, stem layering gives you the best of both worlds: low stress and high rewards. Let’s get those blueberries multiplying!
📚 In This Guide
- What you need
- Instructions
- Tips and common mistakes
- Wrapping up and next steps
What you need
- ● Healthy blueberry plant: Choose a mature bush (2+ years old) with flexible, semi-hardwood stems (about pencil-thick).
- ● Pruning shears or sharp bypass pruners: Sterilized to prevent disease (rubbing alcohol works great!).
- ● Rooting hormone: A powder or gel (e.g., Rootone or Clonex) to boost root growth.
- ● Plastic or metal plant ties: 3–4 per stem (¼" width, 12–18" long).
- ● Moisture-retaining medium: Option 1: Sphagnum moss (pre-moistened, not peat moss).
- ● Option 2: Perlite + vermiculite mix (50/50 ratio).
- ● Plastic wrap or clear plastic bag: To create a humid microclimate (1–2 mil thickness).
- ● Spray bottle with water: For keeping the medium damp (avoid soaking!).
- ● Hormone-free alternative: Cinnamon powder (natural antifungal + root stimulant).
- ● Mini greenhouse or propagation tray: For controlled humidity if outdoors isn’t ideal.
- ● Soil test kit: To check pH (blueberries love acidic soil, pH 4.5–5.5).
- ● Label markers: To track propagation dates (trust us, you’ll forget!).
How to propagate blueberries using stem layering
This method lets you grow new bushes from existing plants—no digging required!
🌱 Step 1: Select Healthy Mature Stems
Choose last year's growth that’s thick as a pencil and still attached to the parent plant. Look for stems with multiple leaf nodes—these are the spots where roots will form. Avoid stems with flowers or fruit, as they’ll divert energy away from root development. I like to work on morning cloudy days when humidity is high, which helps the process along.
Use clean, sharp pruning shears to make a diagonal cut just above a leaf node. The cut should be about ¼ inch above the node—this is where the new roots will emerge. If the stem is too thin, it won’t have enough energy to support both roots and leaves, so skip it. Aim for 4-6 stems per parent plant to maximize your chances.
✂️ Step 2: Bend and Bury the Stem
Gently bend the selected stem toward the ground until it touches the soil. You’ll hear a slight pop as the stem breaks its natural angle—this is normal. Dig a 2-inch deep trench along the stem’s path using your fingers or a small trowel. The trench should be just deep enough to cover the lower half of the stem, including the leaf node where roots will form.
Secure the bent stem in place with a U-shaped wire stake or a small rock. This keeps it buried while allowing the top to stay exposed for photosynthesis. If the stem springs back up, don’t force it—wait until the next cloudy day to try again. The goal is to keep the buried section in constant contact with moist soil without crushing it.
💧 Step 3: Keep Soil Moist and Monitor Progress
Water the area deeply every 2-3 days until the soil feels 2 inches damp down. Use a spray bottle for the top of the plant to avoid disturbing the buried stem. You’ll know moisture is right when the soil looks evenly damp but not soggy—blueberry roots hate waterlogged conditions. Mulch lightly around the base with 1-2 inches of shredded bark to retain moisture and prevent weeds.
After 6-8 weeks, gently dig around the buried stem to check for roots. You’ll see tiny white root hairs emerging from the node—this is your signal that the layering is working! If roots aren’t visible yet, wait another 2 weeks before checking again. Patience here is key—rushing can damage the delicate new roots.
🌿 Step 4: Separate the New Plant
Once roots are 1-2 inches long, it’s time to separate the new plant. Use a small trowel to carefully dig around the buried stem, lifting the soil gently to avoid breaking roots. You’ll see a small cluster of roots where the stem touched the soil—this is the new plant’s foundation. Cut the stem just above the roots with clean shears, leaving the top attached to the parent plant.
Transplant the new blueberry into its permanent pot or garden spot, keeping the roots covered with soil but not buried deeper than they were. Water immediately after planting to settle the soil around the roots. The first year, the new plant will focus on establishing its root system, so expect minimal growth above ground—that’s normal!
☀️ Step 5: Care for Your New Bush
Place the new blueberry in full sun (at least 6 hours daily) and keep the soil consistently moist but well-drained. Blueberries are acid-loving, so add 1 tablespoon of sulfur per square foot annually if your soil isn’t naturally acidic. You’ll see new leaves forming within 4-6 weeks—this means the plant is thriving! Avoid fertilizing heavily the first year, as it can stress the young roots.
By next spring, your layered blueberry will be ready to produce its first flowers and berries—a rewarding payoff for the wait! The best part? You’ve created a genetically identical plant to your original bush, so you know exactly what to expect in terms of flavor and growth habits. Now go enjoy your homegrown berries!
Tips & tricks for perfect blueberry propagation through stem layering
Here’s how to turn your existing blueberry bushes into thriving new plants with minimal stress—these tricks make all the difference!
Timing is Everything: The 6 hours of daily sunlight in Step 5 is non-negotiable for new growth, but morning cloudy days in Step 1 are your secret weapon. The higher humidity prevents stems from drying out during the critical rooting phase. I’ve found that starting on a cloudy morning gives you a 2-3 day head start on root formation compared to sunny days—those tiny white root hairs appear faster when conditions are gentle.
The Diagonal Cut Matters: In Step 1, that ¼ inch above the leaf node isn’t just arbitrary—it’s where the stem’s natural growth hormones are most concentrated. I’ve ruined three batches by cutting too high or too low. Use a ruler to measure if you’re unsure, and always make the cut at a 45-degree angle. This increases the surface area for root emergence and prevents the stem from sliding out of the trench later.
Root Check Hack: When checking for roots after 6-8 weeks in Step 3, don’t just dig—gently wiggle the stem first. If it resists slightly (like trying to pull a toothpick from wet clay), roots are forming! This non-destructive test lets you monitor progress without damaging delicate root hairs. I’ve saved multiple would-be failures by catching them at this early stage.
Transplanting Without Shock: In Step 4, the key to successful transplanting is preserving that 1-2 inch root cluster while minimizing soil disturbance. I wrap the roots in a damp paper towel before moving them to their new spot—this keeps them hydrated during the transition. Water immediately after planting, but avoid heavy watering for the first 48 hours to let roots establish contact with native soil.
Pro Tips for Blueberry Plant Propagation
- Here’s how to turn your existing blueberry bushes into thriving new plants with minimal stress—these tricks make all the difference!
- Timing is Everything: The 6 hours of daily sunlight in Step 5 is non-negotiable for new growth, but morning cloudy days in Step 1 are your secret weapon.
- The Diagonal Cut Matters: In Step 1, that ¼ inch above the leaf node isn’t just arbitrary—it’s where the stem’s natural growth hormones are most concentrated.
Frequently asked questions
Got questions about propagating blueberries without the hassle? You’re not alone! Here are some of the most common queries—and straightforward answers—to help you grow thriving bushes with confidence.
When is the best time to start stem layering blueberries?
The ideal window is late spring to early summer (May–June in most zones). This gives rooted cuttings enough time to establish before winter. Avoid layering in extreme heat or drought—soil moisture is key! For colder climates, spring layering works too, but protect new plants with mulch.
Can I propagate blueberries from store-bought berries?
Not reliably! Store-bought berries are often hybrids or treated to prevent sprouting. For success, use organic, homegrown berries from a healthy bush. Save seeds, cold-stratify them (refrigerate in damp soil for 60–90 days), then plant in spring. Patience pays off—seedlings take 3–5 years to fruit!
Why did my layered stems rot instead of rooting?
Overwatering or poor airflow are the top culprits. Ensure the soil stays moist but not soggy and the stem stays above ground (just the tip buried). Use a rooting hormone and avoid compacted soil. If rot occurs, trim back healthy tissue and try again—don’t give up!
Do I need to prune the parent bush before layering?
Light pruning helps! Trim back overcrowded or weak stems to redirect energy to your new layers. Focus on 1–2 year-old wood (flexible but woody) for best results. Avoid heavy pruning—stress can weaken the parent plant. Think of it as a gentle nudge, not a haircut!
Can I propagate blueberries in containers or small spaces?
Use 5-gallon pots with well-draining soil and a mix of peat/perlite. Dwarf varieties (like ‘Top Hat’) thrive in containers. For layering, bend stems into pots filled with moist soil, securing with U-clips. Just ensure pots get 6+ hours of sun and consistent water. Urban growers, rejoice!
Wrapping up and next steps
Mastering blueberry plant propagation through stem layering is a rewarding way to expand your garden without the stress of transplant shock. Whether you’re a beginner or a seasoned gardener, this method ensures strong, healthy plants that thrive for years.
Now that you’re armed with the know-how, roll up your sleeves and give it a try—your future blueberry bushes will thank you!
🌱 Next step: Pick a sunny spot, gather your supplies, and start layering! Watch your blueberry plants multiply naturally, and soon you’ll be enjoying even more delicious berries.