Pruning
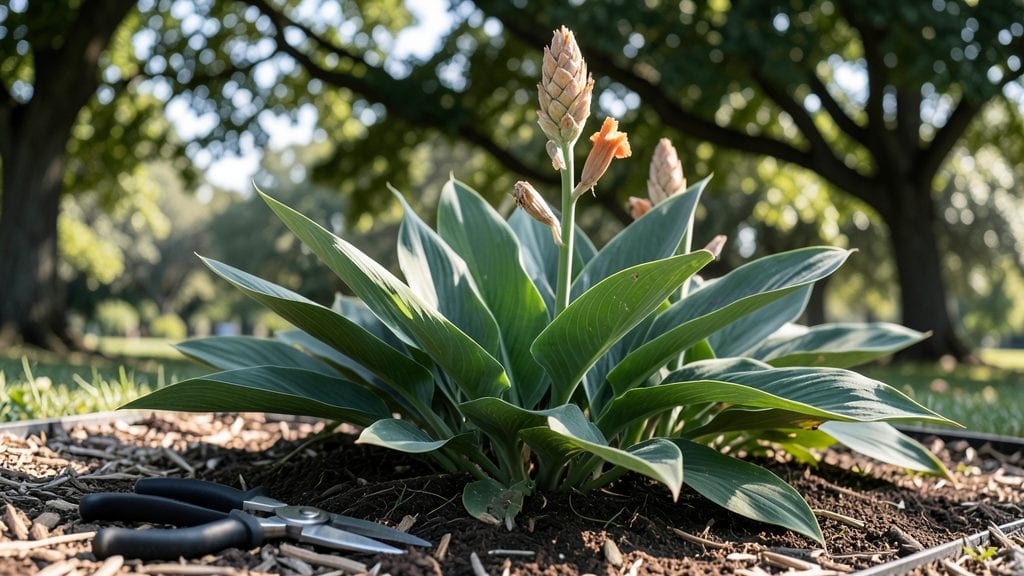
Pruning canna plants transforms them from leggy stalks into bushier, more vibrant showstoppers with stronger stems that support those dramatic blooms all season. 🌿 I’ve seen cannas go from floppy and sad to proud and productive in just a few cuts—it’s like giving them a confidence boost.
The key is timing: prune in early spring to shape new growth or right after flowering to encourage a second wave of blooms.
You’ll need just three things: sharp pruning shears (dull blades tear stems), a small bucket for clippings, and a little patience. Most gardeners overthink it, but the real secret is cutting back by one-third of the plant’s height—never more than that—or you’ll stunt regrowth.
The best part? Those pruned stems often root in water, giving you free new plants for next year.
After trimming, your cannas will rebound with thicker stems and more branches, leading to a explosion of blooms that lasts well into fall. The foliage stays lush and disease-free, too, because you’re improving airflow.
Just avoid pruning when frost is on the horizon—cannas need those leaves to store energy for winter.
Works for both tropical and hardy canna varieties, and the same principles apply whether you’re growing them in the ground or in containers. Here’s how to do it without turning your garden into a disaster zone—promise.
📚 In This Guide
- What you need
- Instructions
- Tips and common mistakes
- Wrapping up and next steps
What you need
- ● Sharp pruning shears – Bypass-style (4–6 inch blades) for clean cuts. Avoid dull blades to prevent tearing.
- ● Hand pruners – Small, ergonomic for trimming smaller stems and leaves (2–3 inch blades).
- ● Garden gloves – Heavy-duty, cut-resistant (e.g., nitrile-coated) to protect hands from thorns or sap.
- ● Disinfectant (70% isopropyl alcohol or bleach solution) – 1 part bleach to 9 parts water to sterilize tools between cuts.
- ● Garden twine or rubber bands – For temporarily securing large stems if needed.
- ● Compost bin or bag – To collect pruned foliage for nutrient recycling.
- ● Loppers – For thicker stems (if your cannas grow unusually large).
- ● Sharp knife or razor blade – For precise cuts on stubborn stems.
- ● Plant food or compost tea – To give your cannas a post-pruning boost.
- ● Spray bottle with water – To mist leaves and reduce stress after trimming.
Instructions for pruning canna plants like a pro
Here’s how to transform leggy cannas into bushier, blooming powerhouses with just a few strategic cuts.
✂️ Step 1: Time Your First Prune for Early Spring Growth
Wait until after the last frost when new shoots emerge from the rhizomes—usually 2-3 weeks into spring. You’ll see fresh, bright green growth pushing through the soil, signaling it’s time to act. This early trim encourages branching rather than letting the plant send all its energy into one tall stem.
Use sharp, clean pruners to cut back any dead or brown stems at the base. Avoid pruning healthy green stems yet—this first pass is just about cleanup. If you’re unsure whether a stem is dead, gently scratch the bark with your fingernail. If it’s green underneath, leave it be.
☀️ Step 2: Pinch Back Leggy Stems for Bushier Foliage
Once your cannas reach 12-18 inches tall, focus on pinching back the top sets of leaves. Look for stems that are growing tall and sparse—these are the ones that need attention. Use your fingers or clean pruners to snip just above a leaf node (the bump where leaves attach). This forces the plant to divert energy into side shoots instead of one elongated stem.
Real talk: Your cannas might look a little rough after this step, but within 2-3 weeks, you’ll see new shoots bursting from the sides. Avoid pinching too close to the base, or you’ll risk damaging the rhizome. Aim for the upper third of the stem for best results.
✂️ Step 3: Deadhead Spent Blooms to Prolong Flowering
As your cannas bloom, remove faded flowers by cutting the stem just below the bloom head. This prevents the plant from wasting energy on seed production and redirects it toward producing more flowers. I like to do this in the early morning when the blooms are still fresh—it makes the task feel less harsh.
Watch for buds forming along the stem after deadheading. These will develop into new flowers within 3-4 weeks. If you notice any stems with only a few small leaves and no buds, trim them back completely—they’re not contributing to the plant’s strength.
🌿 Step 4: Mid-Season Pruning for Airflow and Disease Prevention
Every 4-6 weeks, give your cannas a thorough once-over. Remove any yellowing or diseased leaves immediately—cannas are prone to fungal issues in humid conditions. Cut back any stems that are crossing or rubbing against each other, as this creates wounds where pathogens can enter.
This is also the time to thin out overly crowded stems. If you’re growing cannas in clusters, aim to leave 3-5 strong stems per plant. Weak, spindly growth should be pruned at the base. You’ll know you’ve done it right when you see improved airflow around the foliage—this keeps your plants healthier and more vibrant.
⏰ Step 5: Late-Season Pruning to Prep for Winter
When temperatures drop below 50°F at night, it’s time to start winding down. Cut back all stems to 2-3 inches above the ground, leaving only the rhizomes and a few basal leaves. This helps the plant conserve energy for next year’s growth and reduces the risk of frost damage.
After pruning, add a 2-inch layer of mulch around the base to insulate the rhizomes. I like to use straw or shredded leaves—it keeps the soil temperature stable and protects against freezing. Mark the spot with a stake so you remember where your cannas are planted in the spring.
Tips & tricks for perfect canna plant pruning
These strategic insights will help you transform leggy cannas into lush, vibrant plants with minimal effort.
Timing is Everything: The 2-3 week spring window after last frost is critical for Step 1. I've learned this the hard way—pruning too early can shock new growth, while waiting too long lets the plant become top-heavy. Look for fresh green shoots emerging from the rhizomes as your cue. If you're in a cooler climate, extend this window by 1-2 weeks to account for slower spring warming.
Precision Pinching Technique: In Step 2, when your cannas reach 12-18 inches, focus on pinching just above leaf nodes—not the stem itself. This creates a natural growth point for new shoots. I use my thumb and forefinger for delicate stems and clean pruners for thicker growth. The key is to make clean cuts at a 45-degree angle to prevent water pooling, which can cause rot. You'll notice new shoots emerging within those 2-3 weeks!
Deadheading Strategy: The 3-4 week bloom cycle after deadheading in Step 3 is fascinating. When you remove spent blooms, you're essentially telling the plant to "go again." I've found that deadheading in early morning (when blooms are still turgid) gives the cleanest cuts and prevents sap bleeding. For stubborn blooms, use sharp pruners and make a single clean cut—don't saw back and forth.
Seasonal Pruning Insight: The 50°F nighttime temperature threshold in Step 5 is your signal to prepare for winter. I've discovered that cannas respond beautifully to this late-season trim—it's like giving them a spa treatment before hibernation. When cutting back to 2-3 inches, leave 2-3 basal leaves to continue photosynthesis until frost. The 2-inch mulch layer acts as insulation, maintaining soil temps above freezing.
Pro Tips for Canna Plant Pruning
- These strategic insights will help you transform leggy cannas into lush, vibrant plants with minimal effort.
- Timing is Everything: The 2-3 week spring window after last frost is critical for Step 1. I've learned this the hard ...
- Precision Pinching Technique: In Step 2, when your cannas reach 12-18 inches, focus on pinching just above leaf nodes...
Frequently asked questions
Got questions about canna plant pruning? You’re not alone! Here are some of the most common concerns—plus clear answers to help you trim with confidence.
When is the best time to prune canna plants?
Prune after flowering (late summer to early fall) to encourage new growth and prepare for winter. Light trimming for shape can happen throughout the growing season, but avoid heavy cuts during active bloom. Over-pruning too early may reduce flower production!
What if I prune too much? Can I kill my canna plant?
Cannas are tough! While heavy pruning can stress the plant, they rarely die from it. If you’ve trimmed too aggressively, focus on removing only dead or damaged foliage next time. Fertilize lightly afterward to support recovery. Pro tip: Never cut more than 1/3 of the plant at once.
Should I prune canna plants before winter?
Yes! In colder climates, cut back stems to 6 inches tall after the first frost. In mild zones, reduce foliage by half to prevent disease. Always leave a small base (2–3 inches) to protect the rhizome. Bonus: Mulch heavily to insulate roots!
How do I prune canna plants for more blooms?
To boost flowers, prune spent blooms (deadheading) regularly and trim leggy stems back by 1/3 in early summer. This redirects energy to new growth and buds. Avoid pruning during peak bloom unless removing dead leaves—patience pays off with bigger, healthier flowers!
Can I propagate my canna plant from pruned cuttings?
Use healthy, disease-free stems (4–6 inches long) with at least one node. Dip in rooting hormone, plant in moist soil, and keep warm/humid. Roots typically form in 4–6 weeks. Warning: Cannas are slow to root—don’t rush the process!
Wrapping up and next steps
Mastering canna plant pruning unlocks a world of lush, vibrant blooms and sturdy stems—no green thumb required! By following strategic trimming techniques, you’re not just shaping your plants; you’re inviting them to thrive.
Whether you’re a seasoned gardener or a curious beginner, every snip brings you closer to a showstopping garden.
Ready to level up your canna game? 🌿 Grab your pruners and head outside—your plants are waiting! Start with a single section this week, observe the changes, and let your confidence (and blooms) grow. Happy pruning!