Trees
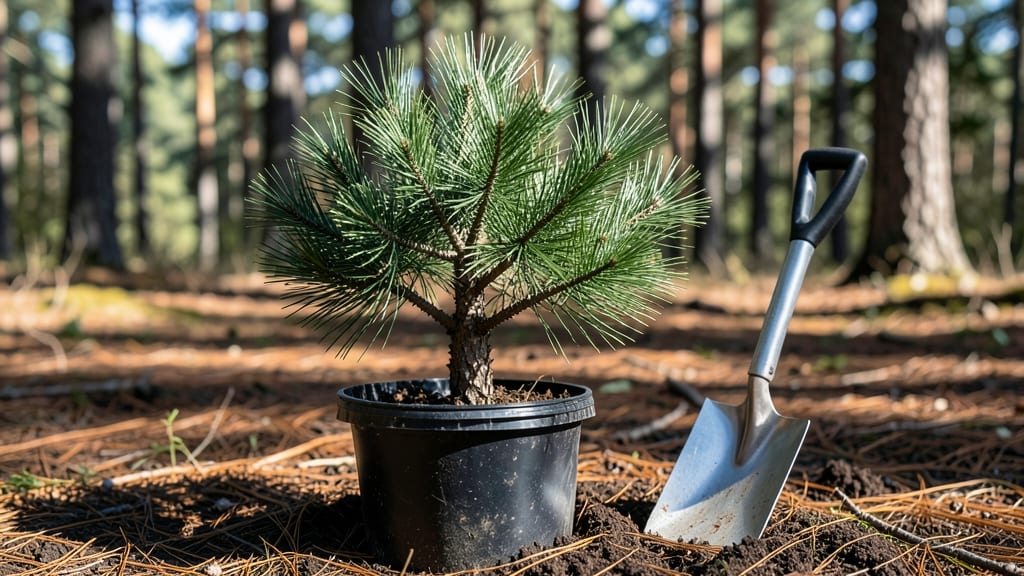
Planting evergreen trees transforms your yard into a lush, four-season retreat—if you nail the spacing and placement. 🌲 I’ve buried more trees than I’d like to admit, but the ones that thrive now follow a simple rule: right plant, right spot, right space. That’s where the magic happens.
The secret isn’t just digging a hole—it’s prepping the soil, picking the right species for your climate, and spacing them so they don’t crowd each other in 10 years.
My front yard now has a pine, spruce, and arborvitae trio that looks intentional, not accidental. The key? Matching their mature width to your yard’s layout before you buy.
You’ll end up with a windbreak that works year-round, privacy that grows with you, and a landscape that stays vibrant even in winter. The best part? Once established, evergreens need less fuss than most plants—just consistent watering and occasional pruning. Let’s get those roots in the ground right.
Works for sun-drenched backyards, shady corners, or even urban spaces with the right dwarf varieties. Here’s how to avoid the mistakes that turn trees into expensive mulch piles.
📚 In This Guide
- What you need
- Instructions
- Tips and common mistakes
- Wrapping up and next steps
What you need
- ● Evergreen tree saplings: Choose 2–5 (depending on your space) of the same or complementary species (e.g., Pinus, Juniperus, or Thuja). Opt for 1–3 gallon containers for mature trees or bare-root for cost-effective options.
- ● Shovel or digging spade: A 16–18" round-point shovel for digging holes (or a matoko for rocky soil).
- ● Garden hose or watering can: For post-planting hydration (aim for 1–2 gallons per tree).
- ○ Mulch (optional but recommended): 3–4 inches of organic mulch (pine straw, wood chips, or shredded bark) to retain moisture and suppress weeds.
- ● Garden gloves: Heavy-duty nitrile or leather gloves to protect your hands from thorns or rough bark.
- ● Pruning shears: Bypass pruners (for clean cuts) to trim damaged branches or roots.
- ● Soil amendment (if needed): Compost or peat moss to improve drainage in clay-heavy soil.
- ● Location scouting: Pick a spot with 6+ hours of sunlight (varies by species) and 6–10 feet of spacing between trees (adjust for mature size).
- ○ Soil test (optional but helpful): Check pH (ideal: 5.0–7.0) and nutrient levels at your local extension office.
- ● Permits (if applicable): Verify local regulations for large trees (10+ feet tall) or protected species.
- ● Weather check: Plant on a cool, cloudy day (avoid extreme heat or frost).
- ● 🌡️ Acclimate container-grown trees by placing them in shade 24 hours before planting.
- ○ ✨ Use a tree stake (optional) for young trees in windy areas—attach loosely to avoid girdling.
- ● 🎯 Label your trees with biodegradable stakes to track growth and care needs.
Step-by-Step guide to planting evergreen trees for year-round beauty
Here’s how to plant evergreens that thrive for decades—with spacing that ensures they grow into a lush, balanced screen.
🌱 Step 1: Choose the Right Location and Dig the Hole
Evergreens need full sun to partial shade, depending on the species—most thrive in at least 6 hours of direct sunlight daily. Avoid low spots where water pools, as soggy roots invite rot. Measure the root ball’s diameter and dig a hole twice as wide (but no deeper) than the container. This prevents root circling and encourages outward growth.
Loosen the soil at the bottom of the hole with a shovel or your hands—this breaks up compaction so roots can penetrate easily. If your soil is heavy clay, amend the bottom 6 inches with 2-3 inches of compost to improve drainage. I always test the hole’s depth by placing the root ball inside; it should sit 1-2 inches above ground level when finished.
🌿 Step 2: Prepare the Tree and Backfill the Hole
Remove the tree from its container and gently tease apart the roots if they’re circling tightly—this prevents girdling as the tree matures. Place it in the hole so the top of the root ball sits level with the surrounding soil (never bury the trunk deeper). Fill the hole with native soil, tamping lightly every 3-4 inches to eliminate air pockets.
Don’t compact the soil aggressively—you want it firm enough to support the tree but loose enough for roots to spread. Water deeply after backfilling to settle the soil around the roots. If the hole settles and exposes roots, add a little more soil, but avoid mounding it around the trunk.
☀️ Step 3: Mulch and Water for Establishment
Spread 2-3 inches of mulch (wood chips or pine straw) in a 3-foot diameter ring around the tree, keeping it 6 inches away from the trunk to prevent moisture buildup that causes rot. Mulch retains soil moisture and regulates temperature, but too much smothers roots. Water the tree deeply once a week for the first month, then taper to every 10-14 days once established—unless your area experiences drought.
Evergreens need consistent moisture, especially in their first year. You’ll know you’re watering correctly when the soil 1-2 inches below the surface stays lightly moist (like a wrung-out sponge). Avoid overhead watering, which can encourage fungal diseases—always water at the base.
✂️ Step 4: Prune for Shape and Health
Skip heavy pruning the first year—focus on removing only dead, broken, or crossing branches that rub together. Use clean, sharp pruners to make cuts just outside the branch collar (the swollen area where the branch meets the trunk). For larger branches, prune in late winter or early spring before new growth begins.
If your tree is leggy or one-sided, you can lightly shape it in early spring, but avoid cutting more than 25% of the foliage in a single season. Evergreens grow slowly, and aggressive pruning stresses them. After pruning, apply a balanced, slow-release fertilizer (10-10-10) to support recovery.
⏰ Step 5: Monitor and Maintain for Long-Term Growth
Check the tree’s water needs monthly—young evergreens wilt quickly when thirsty, and their needles may turn brown at the tips. In winter, water once a month unless you have extreme drought or wind, which dries soil faster. Fertilize annually in early spring with a slow-release, acid-loving plant formula (like 8-4-4) to mimic natural forest conditions.
Watch for pests like spider mites or bagworms, which target evergreens. Treat infestations early with neem oil or horticultural soap—prevention is easier than recovery. With proper spacing and care, your evergreens will grow into a dense, evergreen backdrop that requires minimal upkeep after the first year.
Tips & tricks for perfect evergreen tree planting
Planting evergreens for long-term success isn't just about digging a hole—it's about creating an environment where these trees can thrive for decades. Here are the key strategies I've learned from years of working with evergreens that make all the difference.
Soil Preparation is Everything: In Step 1, when you're loosening the soil at the bottom of the hole, take an extra moment to break up any compacted layers with your hands or a garden fork. This isn't just about drainage—it's about creating a welcoming environment for roots to explore. If your soil is particularly dense, consider adding a layer of coarse sand mixed with compost at the bottom to improve both drainage and aeration. Remember, evergreens hate soggy feet, so we're aiming for soil that's like a well-drained sponge rather than a waterlogged swamp.
Root Ball Placement Precision: During Step 2, when positioning your tree, here's what nobody tells you—use a level to ensure the top of the root ball sits perfectly horizontal. I've seen too many trees planted with a slight tilt that causes uneven growth patterns. Also, when you're testing the depth by placing the root ball in the hole, make sure it sits at that critical 1-2 inches above ground level. This prevents what's called "trunk rot," where buried trunks suffocate over time.
Mulching Like a Pro: The 2-3 inches of mulch in Step 3 is your tree's first line of defense against temperature extremes. But here's the trick: after spreading the mulch, create small channels radiating from the trunk to allow water to reach the roots. This prevents the mulch from acting like a moisture barrier. And if you're using pine straw, fluff it up before spreading—packed pine straw doesn't breathe and can smother roots.
Watering Wisdom: That first month of weekly deep watering in Step 3 is non-negotiable, but here's how to do it right. Use a garden hose with a slow watering attachment or a soaker hose to deliver water directly to the root zone. You'll know you're doing it correctly when water appears at the edges of your 3-foot mulch ring. This ensures the entire root system gets hydrated, not just the surface soil. And when checking soil moisture, use your finger to test 1-2 inches below the surface—this is where the roots are actively growing.
Pro Tips for Planting Evergreen Trees
- Planting evergreens for long-term success isn't just about digging a hole—it's about creating an environment where th...
- Soil Preparation is Everything: In Step 1, when you're loosening the soil at the bottom of the hole, take an extra mo...
- Root Ball Placement Precision: During Step 2, when positioning your tree, here's what nobody tells you—use a level to...
Frequently asked questions
Got questions about planting evergreen trees?
You’re not alone! Here are answers to the most common queries to help you grow a thriving, year-round green landscape with confidence.
When is the best time to plant evergreen trees?
The ideal times are early spring (just as buds swell) or fall (6–8 weeks before frost). These seasons give roots time to establish before extreme heat or cold. Avoid planting in summer heat or winter freezes, as stress can stunt growth or kill young trees.
How far apart should I space evergreen trees?
Spacing depends on the tree’s mature size:
- Small evergreens (e.g., junipers, dwarf pines): 3–6 feet apart
- Medium evergreens (e.g., arborvitae, spruce): 6–10 feet apart
- Large evergreens (e.g., pine, fir, cedar): 10–20+ feet apart
What’s the best way to prevent evergreen trees from dying after planting?
Follow these critical steps:
- Water deeply (1–2 inches per week) for the first year.
- Avoid over-mulching—keep mulch 3–4 inches deep and 6 inches from the trunk.
- Protect from wind with a temporary windbreak if needed.
- Fertilize lightly in spring with a slow-release, balanced fertilizer.
Can I plant evergreens in containers or raised beds?
Yes! Container planting works for dwarf or small evergreens (e.g., Thuja occidentalis ‘Smaragd’), but ensure:
- Drainage holes to prevent root rot.
- Large enough pots (at least 2–3 times the root ball size).
- Well-draining soil mixed with perlite or sand.
What’s a good alternative if my evergreen trees aren’t thriving?
If your evergreens struggle with disease, pests, or poor soil, consider:
- Hardier varieties: Try ‘Emerald Green’ arborvitae (disease-resistant) or ‘Blue Rug’ juniper (drought-tolerant).
- Broadleaf evergreens: Like holly or boxwood, which handle shade better.
- Seasonal swaps: Plant deciduous trees (e.g., oak or maple) for year-round structure, then add ornamental grasses or camellias for winter interest.
Wrapping up and next steps
Planting evergreen trees is a rewarding way to add year-round beauty and privacy to your landscape—no green thumb required! From choosing the right species to mastering spacing and soil prep, these tips ensure your trees thrive for decades.
Whether you’re a first-time gardener or a seasoned pro, your outdoor space is just a shovel’s depth away from transformation.
Ready to get started? Pick your favorite evergreens, mark your planting spots, and dig in! 🌲✨ For extra confidence, sketch a simple layout or consult a local nursery for species tailored to your climate. Happy planting!