Shrubs
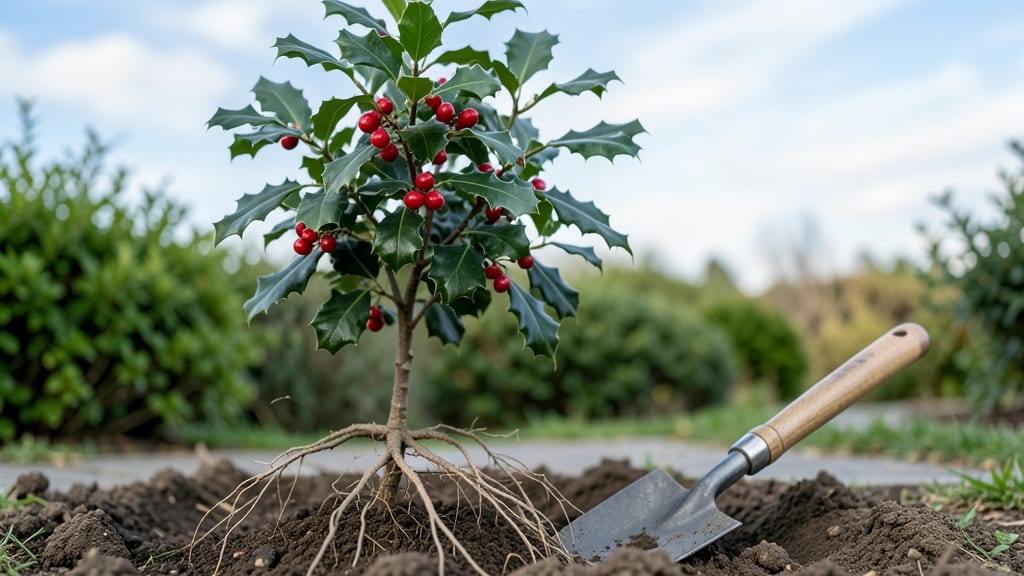
Planting holly bushes creates a lush, year-round privacy screen that never goes out of style. 🌿 I learned the hard way that holly thrives when planted in the right spot with proper prep—my first attempt flopped because I ignored soil drainage.
The key is timing, soil, and spacing, and once you nail those, you’ll have glossy green foliage and bright berries for decades.
Holly bushes love full sun to partial shade and well-draining soil—amend heavy clay with compost before planting. Choose between dwarf varieties like ‘Sky Pencil’ for tight spaces or larger types like ‘Nellie R. Stevens’ for bold hedges.
Spacing matters too: plant them 6–10 feet apart for full coverage, depending on the mature size of your chosen type.
After planting, water deeply to settle the roots and mulch to keep moisture in. The first winter might be tough, but established bushes handle cold like champs. By next spring, you’ll see new growth, and within a few years, your holly hedge will be impenetrable—and stunning.
Works in zones 5–9, though some varieties stretch into zone 4. For faster results, layer multiple plants at different heights. Once planted, holly needs minimal care—just occasional pruning to shape it. Here’s how to do it right from the start.
📚 In This Guide
- What you need
- Instructions
- Tips and common mistakes
- Wrapping up and next steps
What you need
- ● Holly bushes: 3–5 mature plants (depending on desired screen width; spacing 6–10 feet apart). Choose varieties like Ilex opaca (American holly) or Ilex × ‘Nellie R. Stevens’ for fast growth.
- ● Shovel or trowel: A garden spade (for digging) or a hand trowel (for smaller holes).
- ● Compost or well-aged manure: 2–3 gallons per plant to enrich the soil.
- ○ Mulch (optional but recommended): 2–3 inches of pine straw, wood chips, or shredded bark to retain moisture and suppress weeds.
- ● Watering can or hose with a gentle spray nozzle: For post-planting hydration.
- ● Gloves and knee pads: To protect your hands and knees during planting.
- ● Measuring tape or stakes: To mark planting locations and ensure proper spacing.
- ● Soil test kit: To check pH (holly prefers acidic soil, pH 5.0–6.0); amend with sulfur if needed.
- ● Slow-release fertilizer (10-10-10): 1–2 tablespoons per plant at planting time.
- ● Pruning shears: For trimming any damaged branches after planting.
- ● Plant tags or labels: To track varieties and planting dates.
- ● Epsom salt (magnesium sulfate): 1 tablespoon per plant if soil tests show magnesium deficiency.
Instructions for planting holly bushes
Here's the straightforward method I've used to create lush, year-round privacy screens.
🌱 Step 1: Choose and Prepare the Planting Sites
Holly bushes thrive in full sun to partial shade, so pick locations with at least 6 hours of sunlight daily. I always space my plants 6-10 feet apart—closer spacing creates a denser screen but requires more pruning later. Mark each spot with a stake to avoid digging in the wrong place.
Use a shovel to dig holes twice as wide as the root ball and as deep as the container. Loosen the soil at the bottom of the hole with your fingers or a garden fork—this helps roots spread into the native soil instead of circling the root ball. If your soil drains poorly, mix in 2-3 inches of compost to improve aeration.
🪴 Step 2: Remove and Plant Each Holly Bush
Carefully remove each bush from its container, gently squeezing the sides to loosen the root ball. If roots are circling tightly, use your fingers to tease them outward—this prevents "pot-bound" stress later. Place the bush in the hole so the top of the root ball sits level with the surrounding soil (never buried deeper).
Backfill with the native soil, pressing lightly around the edges to remove air pockets. Water deeply right away to settle the soil and eliminate gaps. I like to add 1 inch of mulch around the base (but not touching the trunk) to retain moisture and suppress weeds. Use the 4 gallons of mulch evenly across all four plants.
☀️ Step 3: Water and Maintain for First-Year Growth
Water your holly bushes once a week for the first month, then reduce to every 10-14 days once established. You'll know they need water when the top 2 inches of soil feel dry. Overwatering is the biggest mistake—holly roots rot easily in soggy soil. I always check by sticking my finger in the soil before watering.
Fertilize lightly in early spring with a balanced 10-10-10 formula (use the 1 pound of fertilizer divided among all four plants). Prune only to shape in late winter—never cut into old wood, as holly doesn’t regrow from bare stems. Watch for spider mites on new growth; a strong spray of water usually clears them up before they become a problem.
Tips & tricks for perfect holly bush planting
A few simple tricks will help your holly bushes grow into a thriving, year-round privacy screen with minimal effort.
Sunlight Secret: That 6 hours of sunlight is non-negotiable for healthy holly growth. If your yard has shady spots, choose a more sun-tolerant variety like 'Sky Pencil' holly. I've planted in partial shade before, and while they survive, the berries are sparse and growth is slower. Position your bushes to maximize sun exposure from the start—you can't add it later!
Root Ball Technique: When loosening the root ball in Step 2, be gentle but thorough. I like to run my fingers around the edges of the root ball to encourage roots to spread outward. If roots are tightly circling, make small vertical cuts with a knife to help them expand. This prevents that "pot-bound" stress that can stunt growth for years. Think of it like giving your holly's roots a good stretch after being cooped up in a container.
Soil Prep Tip: The 2-3 inches of compost in poorly draining soil is your best friend. I've seen holly bushes fail because their roots suffocated in compacted, waterlogged soil. If your yard has heavy clay, consider amending the entire planting area with compost before adding the bushes. This creates a root-friendly zone that encourages deeper root growth right from the start.
Watering Wisdom: That once-a-week watering for the first month is crucial, but timing matters too. Water in the morning so the foliage has all day to dry—wet leaves at night invite fungal problems. I set a reminder on my phone for the first few weeks to avoid skipping watering days. And remember, holly roots hate soggy conditions, so always check that top 2 inches of soil before watering again.
Pro Tips for Planting Holly Bushes
- A few simple tricks will help your holly bushes grow into a thriving, year-round privacy screen with minimal effort.
- Sunlight Secret: That 6 hours of sunlight is non-negotiable for healthy holly growth. If your yard has shady spots, c...
- Root Ball Technique: When loosening the root ball in Step 2, be gentle but thorough. I like to run my fingers around ...
Frequently asked questions
Got questions about planting holly bushes? You’re not alone! Here are some of the most common queries—plus quick, actionable answers to help you grow a lush, thriving privacy screen with ease.
When is the best time to plant holly bushes?
The ideal window is early spring or fall (4–6 weeks before the first frost). This gives roots time to establish before extreme heat or cold. Avoid planting in summer’s scorching heat or winter’s frozen ground—your holly will thank you with vibrant growth!
How far apart should I space holly bushes for a privacy screen?
For a dense hedge, plant holly bushes 3–5 feet apart (closer for faster coverage). Mature holly can grow 10–15 feet tall, so leave room for expansion. If you want a tighter screen, opt for dwarf varieties (like ‘Sky Pencil’) and space them 2–3 feet apart.
Can I plant holly bushes in containers instead of the ground?
Holly thrives in large, well-draining containers (at least 18–24 inches deep). Use a high-quality potting mix, and repot every 2–3 years. Just remember: container-grown hollies may need more frequent watering and winter protection in cold climates.
Why are my holly leaves turning yellow or dropping?
Yellowing leaves often signal overwatering, poor drainage, or pests (like spider mites or scale). Check soil moisture—hollies prefer it slightly dry between waterings. If pests are the culprit, treat with neem oil or insecticidal soap. For nutrient issues, amend soil with acid-loving plant fertilizer.
Do holly bushes need male and female plants to produce berries?
Yes! Most holly varieties are dioecious, meaning you need both a male and female plant for berries. For every 6–10 female plants, include 1 male plant (like ‘Southern Gentleman’). If berries aren’t your goal, a single female plant will still give you stunning foliage!
Wrapping up and next steps
Planting holly bushes is a rewarding way to add year-round greenery and natural beauty to your landscape—plus, those bright red berries bring a festive touch! 🎄 With the right location, soil prep, and spacing, you’ll enjoy a lush, low-maintenance privacy screen that thrives for years.
Now that you’re armed with the know-how, there’s no better time to roll up your sleeves and get growing!
🌱 Ready to Plant?
Start by marking your planting spots, then grab your shovel and follow the steps above. Pro tip: Check your local nursery for native holly varieties to ensure the best fit for your climate. Happy planting—and enjoy your future holiday centerpiece! 🌿