Pruning
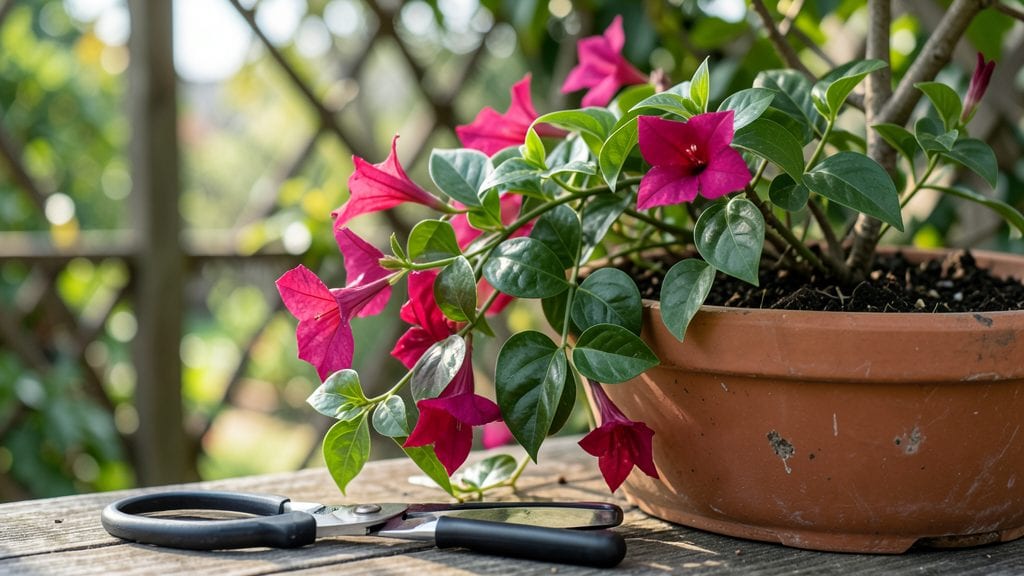
Dipladenia plant pruning transforms a leggy, sparse vine into a bursting wall of blooms by early summer. 🌸 I learned the hard way—skipping pruning means fewer flowers and a tangled mess that blocks sunlight from lower leaves.
The key is timing: prune in early spring just as new growth starts, or after flowering if you’re in a warm climate.
You only need three things: sharp pruning shears, a small bag for clippings, and a clean rag to wipe tools between cuts. Cut back about one-third of the plant’s length to encourage bushier growth, and always prune just above a leaf node where new branches will form.
This isn’t just about shape—it’s about reviving your Dipladenia so it flowers harder next season.
After pruning, give your plant a light drink of water and a balanced fertilizer to reward its effort. The first flush of new growth appears in 2-3 weeks, and by mid-summer, you’ll have a dense, blooming curtain that makes your neighbors jealous.
The secret? Consistency—prune the same way every year, and your Dipladenia will repay you with nonstop color.
For those in colder zones, hold off until after the last frost, and if your plant looks sad after pruning, don’t panic—it’s just rebooting. The worst mistake?
Pruning too late in the season or using dull shears that tear stems. Trust the process, and you’ll have a Dipladenia that blooms like it’s on steroids.
📚 In This Guide
- What you need
- Instructions
- Tips and common mistakes
- Wrapping up and next steps
What you need
- ● Pruning shears – Bypass pruners (sharp, clean, and sterilized with rubbing alcohol or bleach solution) for clean cuts.
- ● Hand pruners – For smaller stems (ergonomic grip recommended for comfort).
- ● Gloves – Garden gloves (nitrile or leather) to protect hands from thorns and sap.
- ● Disinfectant – Rubbing alcohol (70%+), hydrogen peroxide, or bleach solution (1 part bleach to 9 parts water) for sterilizing tools between cuts.
- ● Rag or paper towels – For wiping tools and hands clean.
- ● Trash bag or bucket – To collect pruned branches and debris.
- ○ Sharpie or marker – Optional but helpful for labeling cuttings if propagating.
- ● Loppers – For thicker stems (if your Dipladenia has woody growth).
- ● Horticultural oil or pruning sealant – To prevent disease on larger cuts.
- ● Rooting hormone – If you plan to propagate cuttings.
- ● Spray bottle with water – To mist cuttings if propagating.
- ● Notebook or app – To track pruning dates and plant responses.
Step-by-Step guide to pruning dipladenia for lush, blooming growth
Here's the method I use to keep my dipladenia thriving with vibrant blooms all season long.
✂️ Step 1: Prune After Spring's Last Frost
Dipladenia responds best to pruning right after your area's last frost date, when new growth begins. Grab your sharp pruning shears and cut back about one-third of the plant's height—this encourages fuller growth and more blooms. Focus on removing any dead or leggy stems first; you'll know they're dead if they snap easily when bent.
Make cuts just above a leaf node or bud, at a 45-degree angle. This angled cut helps water run off instead of pooling on the stem. If you see any brown or mushy stems, trim those out completely—they won't recover. I like to prune on a dry morning so the cuts have time to dry before evening moisture sets in.
✂️ Step 2: Shape for Airflow and Light Penetration
Now's the time to give your dipladenia its signature cascading shape. Start by removing any crossing or rubbing branches—they compete for nutrients and can lead to disease. Cut these back to the nearest outward-facing bud to encourage outward growth. You'll see the plant naturally wants to grow in a bushy, rounded form if you guide it properly.
For a fuller look, pinch back the tips of new growth by about half an inch. This may seem counterintuitive, but it triggers the plant to branch out instead of growing long, leggy stems. Watch for new buds forming at the base of where you pinched—these will become your next set of blooms. Avoid cutting into old wood; dipladenia blooms best on new growth.
💧 Step 3: Deadhead Spent Blooms Regularly
Throughout the growing season, you'll want to deadhead blooms as they fade. Use your fingers or small pruners to snip off the spent flower cluster just above the next set of leaves. This simple step prevents the plant from wasting energy on seed production and redirects it to new blooms. I find checking my dipladenia for spent flowers every 3-4 days keeps it looking fresh and encourages continuous flowering.
You'll notice new buds forming within 2-3 weeks of deadheading if the plant is healthy. If you see buds but no flowers, your plant might need more sunlight—dipladenia thrives in bright, indirect light for at least 6 hours daily. A quick move to a sunnier spot can make all the difference in bloom production.
⏰ Step 4: Light Prune for Winter Dormancy
As temperatures drop and growth slows in late fall, give your dipladenia a final light pruning. Remove any remaining dead or diseased stems, and trim back any overly long growth by about 10-15% of the plant's height. This keeps the plant manageable and helps it conserve energy during dormancy. Avoid heavy pruning now—the plant needs all its strength to survive winter.
You'll know you've pruned enough when the plant looks balanced and still has plenty of healthy stems. Dipladenia is fairly forgiving, so don't stress over perfect symmetry. The goal is to remove only what's necessary to keep the plant healthy and ready for spring's new growth. Water less frequently now, letting the soil dry out between waterings to prevent root rot during dormancy.
Tips & tricks for perfect dipladenia pruning
A few simple tricks will help you transform your dipladenia into a blooming powerhouse year after year.
Timing is Everything: The exact timing of your spring prune matters more than you might think. Check your local last frost date and schedule your pruning for about 2-3 weeks after that date when new growth has started but before summer heat arrives. I've learned the hard way that pruning too early can shock tender new shoots, while waiting too long means you're cutting back growth that could have produced more blooms. Watch for fresh green leaves emerging—those are your cue to start!
Tool Technique: Your pruning shears make all the difference. Use clean, sharp shears to make precise cuts without crushing stems. I sterilize my tools with rubbing alcohol between plants to prevent spreading disease. For the 45-degree angle cuts mentioned in Step 1, imagine cutting just above a leaf node while angling the blade slightly downward—this helps water run off and prevents rot. A dull blade will tear stems, making them more vulnerable to infection.
Seasonal Deadheading Strategy: That 3-4 day deadheading schedule in Step 3 works wonders for continuous blooms, but here's the secret: focus on the bottom half of the plant first. Dipladenia tends to bloom more heavily on new growth at the base, so removing spent flowers there encourages the plant to put energy into producing more flowers lower down. You'll notice a dramatic difference in fullness within just a few weeks if you stick to this approach.
Winter Prep Insight: When doing your light winter prune in Step 4, pay special attention to the plant's natural shape. Dipladenia grows in a cascading habit, so aim to maintain that graceful form rather than trying to make it perfectly round. Trim just enough to remove any dead growth or stems that are growing inward—the goal is to create space for air circulation while preserving the plant's natural silhouette. This light approach prevents shock and helps the plant conserve energy for spring.
Pro Tips for Dipladenia Plant Pruning
- A few simple tricks will help you transform your dipladenia into a blooming powerhouse year after year.
- Timing is Everything: The exact timing of your spring prune matters more than you might think.
- Tool Technique: Your pruning shears make all the difference.
Frequently asked questions
Got questions about pruning your dipladenia for lush, continuous blooms?
Here are the answers to the most common concerns—so you can keep your plant thriving with confidence!
When is the best time to prune dipladenia for more flowers?
Prune your dipladenia twice a year for maximum blooms: late winter/early spring (just before new growth starts) to shape the plant, and after heavy flowering (summer) to encourage another flush. Avoid pruning during frost or extreme heat—your plant needs energy to recover!
How much can I cut back my dipladenia without harming it?
You can safely prune up to ⅓ of the plant’s growth in one session. For woody stems, cut just above a leaf node or bud (about ¼ inch above) to encourage branching. Pro tip: If your dipladenia is leggy, prune harder in spring to promote bushier growth!
Can I prune dipladenia in winter? What if it’s cold?
Prune only in mild winter (temperatures above 50°F/10°C). If frost is forecast, wait until spring. Cold stress weakens the plant, making it vulnerable to disease. For potted dipladenia: Move indoors if temps drop below 40°F (4°C) before pruning.
What should I do if my dipladenia doesn’t bloom after pruning?
Lack of blooms often means too little light or over-pruning. Ensure your plant gets 6+ hours of sunlight daily and fertilize lightly with a balanced bloom booster (like 10-10-10) every 4-6 weeks. If you pruned too aggressively, wait until next spring—patience pays off!
Is there a way to prune dipladenia for a specific shape (e.g., bushy or vine-like)?
Yes!
For a bushy look, prune stems back by ⅓ in spring and pinch new growth tips in summer. For a vine-like habit, train one main stem and prune side shoots lightly. Bonus: Use soft ties to guide vines if growing on a trellis!
Wrapping up and next steps
Mastering dipladenia plant pruning is your secret weapon for vibrant, long-lasting blooms! 🌸 By following seasonal guidelines—like trimming after flowering or shaping in early spring—you’ll encourage healthier growth and nonstop color. Remember, consistency and the right tools make all the difference.
Ready to transform your dipladenia into a showstopper? Grab your pruners, dust off your gloves, and get pruning! Your plant (and your garden) will thank you with a burst of beauty.