How To
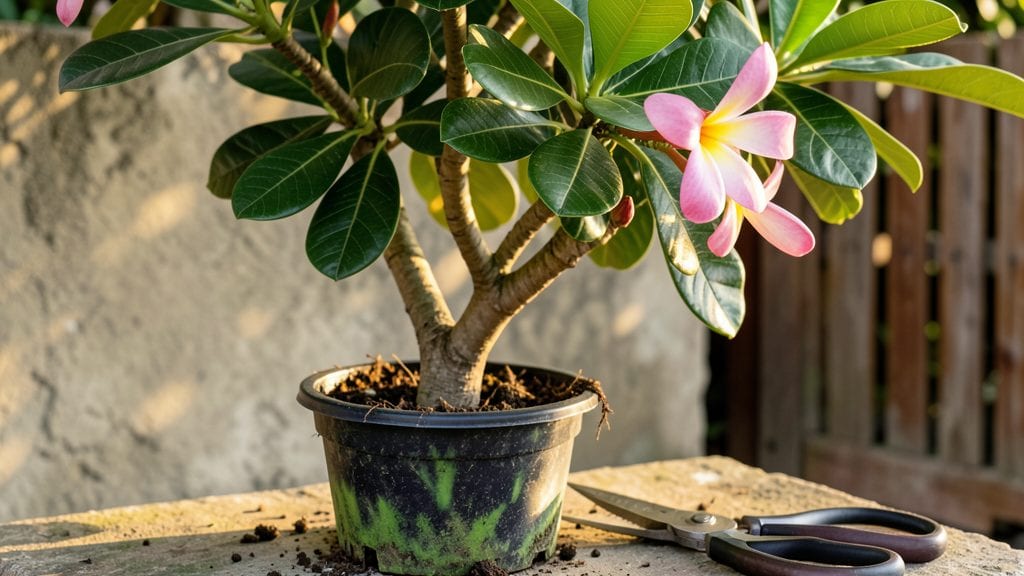
Planting frangipani cuttings lets you multiply those intoxicating blooms without buying new plants. 🌿 I’ve rooted dozens of cuttings over the years, and the key is picking the right time—late spring or early summer when the plant is actively growing.
The process is simpler than it looks, and you’ll end up with lush, fragrant trees that thrive in pots or gardens.
You’ll need sharp pruners, rooting hormone (optional but helpful), small pots or water jars, and a warm, humid spot with bright indirect light. The best cuttings come from healthy, non-flowering stems about pencil-thick and 4–6 inches long.
Cut just below a leaf node at a slight angle—this is where the roots will sprout.
Within 4–8 weeks, you’ll see tiny roots forming, and your cuttings will start looking like miniature trees. Keep the soil lightly moist (not soggy) and mist them daily to maintain humidity.
Once rooted, transplant to larger pots and enjoy watching those signature white-and-pink blooms appear in just a few months.
Works year-round in warm climates, but timing matters—avoid winter cuttings if temps drop below 60°F. Even if some fail, you’ll learn what works for your space, and the success rate improves with practice. Ready to grow your own fragrant forest?
📚 In This Guide
- What you need
- Instructions
- Tips and common mistakes
- Wrapping up and next steps
What you need
- ● Frangipani cuttings: 4–6 healthy, semi-hardwood stems (6–12 inches long) with at least 2–3 leaf nodes. Choose from mature, non-flowering branches.
- ● Rooting hormone: 1 small bottle (powder or gel) to boost root development.
- ● Well-draining potting mix: 1 bag (1–2 cubic feet) of a blend like cactus/succulent mix or perlite + peat moss (50/50 ratio).
- ● Small pots or trays: 4–6 individual 4-inch pots or a single seed tray with drainage holes.
- ● Plastic wrap or humidity dome: To maintain moisture and warmth (e.g., a clear plastic bag or a propagator lid).
- ● Sharp pruning shears or knife: Sterilized to make clean cuts and prevent disease.
- ● Spray bottle: For gentle watering to keep cuttings hydrated.
- ● Watering can or cup: For moistening the potting mix.
- ● Labeling tags: 4–6 small tags + a marker to track cutting varieties.
- ○ Bottom heat mat: To accelerate rooting (optional but speeds up the process!).
- ● Fertilizer (low-nitrogen): A diluted dose of seaweed extract or balanced 10-10-10 fertilizer after roots form.
- ● Grow lights: If propagating indoors with limited sunlight.
- ● Moss or coconut coir: For extra humidity retention around cuttings.
- ● Glove: To protect your hands from sap (frangipani sap can be mildly irritating).
Step-by-Step guide to planting frangipani cuttings
Here's how to root and grow these fragrant tropical beauties with minimal fuss.
🌱 Step 1: Select and Prepare Healthy Cuttings
Choose semi-hardwood cuttings from the current season's growth—look for stems that are about ½ inch thick and 4-6 inches long. The best time is right after flowering when new growth is firm but still pliable. Use sharp pruners to make a clean cut just below a leaf node at a 45-degree angle.
Remove the lower leaves, leaving only a few at the top to reduce moisture loss. Dip the cut end in rooting hormone to encourage faster root development. I like to work in the morning when the plant is hydrated and the air is cool—this helps prevent stress on the cutting.
💧 Step 2: Plant in Well-Draining Medium
Fill a 4-inch pot with a mix of 50% perlite and 50% peat moss—this ensures excellent drainage while retaining enough moisture. Make a hole in the center with your finger and insert the cutting about 2 inches deep, firming the medium gently around it.
Water lightly until the medium feels evenly moist but not soggy. You'll know it's right when water runs out the drainage hole without pooling. Place the pot in a warm, bright spot that gets indirect light—direct sun can scorch tender new growth while it establishes roots.
☀️ Step 3: Maintain Ideal Conditions for Root Development
Keep the medium consistently moist by watering when the top ½ inch feels dry. A humidity dome or plastic bag helps create a tropical environment, but remove it daily for 10 minutes to prevent mold. Roots typically form in 4-8 weeks, though some may take longer.
Watch for new growth at the top—this is your signal that roots are developing below. Avoid fertilizing during this phase; young roots are sensitive to salts. If you notice yellowing leaves, reduce watering slightly—frangipani cuttings rot faster than they root.
✂️ Step 4: Transplant When Roots Establish
Gently remove the cutting from the pot after 8-12 weeks to check for roots. If you see a good network of white roots, it's ready for a larger 6-inch pot with standard potting mix. Harden off by placing it outside in partial shade for 2-3 hours daily over 1 week before full sun exposure.
Once transplanted, water deeply but let the top 1 inch of soil dry between waterings. Your frangipani will reward patience with fragrant blooms within 12-18 months. The key is consistency—keep it warm, well-drained, and protected from cold drafts.
Tips & tricks for perfect frangipani propagation
A few simple tricks that'll make all the difference in your tropical propagation success.
Selection Tip: In Step 1, focus on cuttings that are pencil-thick (about ½ inch) and have a slight sheen—they're the most vigorous. I've found that cuttings from the current season's growth right after flowering root fastest. Avoid woody stems or overly soft new growth, as these struggle to establish roots. The 45-degree angle cut is crucial—it increases surface area for root formation while keeping the cutting stable in the medium.
Medium Mix: The 50/50 perlite-to-peat moss ratio in Step 2 is perfect, but if you're short on peat moss, you can substitute with coco coir for similar moisture retention. The key is that mix should feel like a damp sponge—not wet, not dry. I like to test it by squeezing a handful: water should drip out slowly, not pool. This balance prevents both root rot and dehydration during the critical 4-8 week rooting phase.
Rooting Environment: For Step 3, I've had the best luck with a clear plastic bag instead of a humidity dome—it lets me see condensation levels and new growth without opening it daily. The 10-minute daily airing prevents mold while maintaining that tropical humidity. If your kitchen stays consistently warm (70-75°F), you can skip the humidity cover entirely and just keep the pot on a pebble tray with shallow water.
Transplant Timing: When checking roots in Step 4, look for white, fibrous roots at least 1-2 inches long. I pull a few gently—if they resist, roots are established. Don't wait until you see roots through the pot bottom, as this often means they've already grown too large for the small pot. The 1-week hardening period is non-negotiable—sudden sun exposure can scorch leaves that have been protected indoors.
Pro Tips for Frangipani Cutting Planting
- A few simple tricks that'll make all the difference in your tropical propagation success.
- Selection Tip: In Step 1, focus on cuttings that are pencil-thick (about ½ inch) and have a slight sheen—they're the most vigorous.
- Medium Mix: The 50/50 perlite-to-peat moss ratio in Step 2 is perfect, but if you're short on peat moss, you can substitute with coco coir for similar moisture retention.
Frequently asked questions
Got questions about propagating frangipani from cuttings? You’re not alone! Here are some of the most common concerns—and straightforward answers—to help you grow these fragrant beauties with confidence.
When is the best time to take frangipani cuttings?
The ideal time is during the spring or early summer, when new growth is active but before extreme heat sets in. Avoid winter, as frangipani are semi-dormant and cuttings root poorly. If you’re in a tropical climate, aim for the wet season when humidity is naturally higher.
How do I know if my frangipani cutting is healthy enough to root?
Look for semi-hardwood cuttings—about 6–12 inches long with 3–4 leaf nodes and a pencil-thick stem. Avoid woody or overly soft growth. Healthy cuttings should feel firm but flexible, not mushy or brittle. A small leaf at the base (called a "heel") can boost rooting success!
Why won’t my frangipani cutting root? Troubleshooting tips.
Frangipani cuttings can be finicky! Common issues include:
- Rot: Overwatering or poor drainage. Let the soil dry slightly between waterings.
- No roots: Low humidity or temperature swings. Use a plastic bag tent or mist daily.
- Yellow leaves: Too much direct sun. Provide bright, indirect light until rooted.
Patience is key—rooting can take 4–8 weeks!
Can I grow frangipani from cuttings indoors?
Yes, but it’s challenging due to their tropical needs. Use a grow light (12+ hours/day), maintain 70–80°F humidity with a humidifier, and keep soil consistently moist. A sunny windowsill won’t cut it—frangipani thrive on heat and humidity like their outdoor counterparts.
What’s the easiest alternative if frangipani cuttings fail?
Try seed propagation (slower but rewarding) or buy a small potted frangipani from a nursery. For instant blooms, opt for air-layering—a method where you encourage roots to form on a branch while still attached to the parent plant before cutting. It’s 90%+ successful with frangipani!
Wrapping up and next steps
Growing frangipani from cuttings is a rewarding way to expand your tropical garden with minimal effort! 🌺 With the right tools, timing, and care, you’ll soon enjoy fragrant blooms that bring a piece of paradise to your space.
Now that you’re equipped with the know-how, why not start your first cutting today? Grab those sharp pruners, pick a healthy branch, and dive into propagation—your future frangipani tree is just a few steps away!
Pro tip: Document your progress with photos—it’s the perfect way to track growth and celebrate small victories along the way! ✨