Landscaping
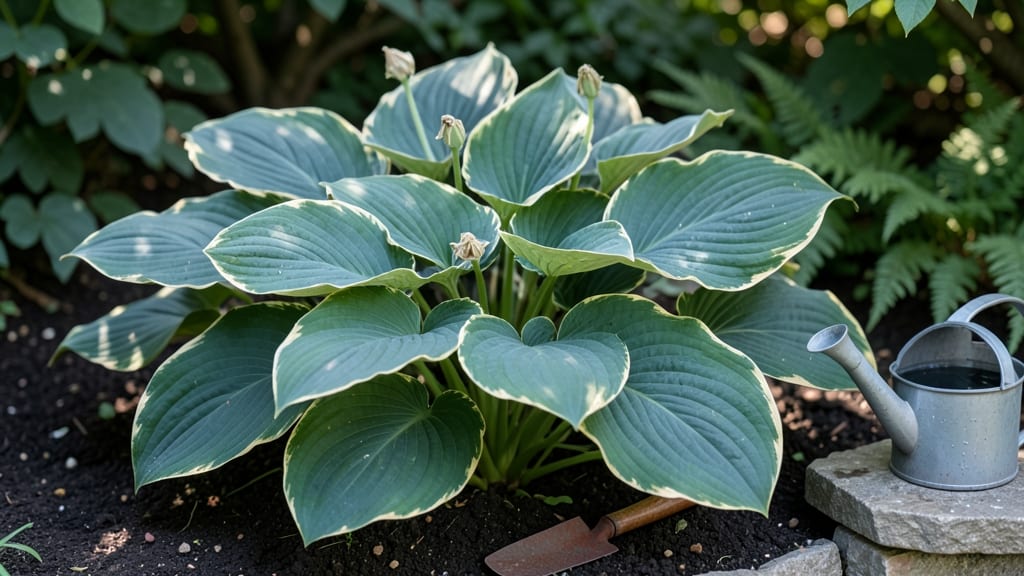
This hosta plant landscaping staple creates the kind of lush, velvety green that makes neighbors stop and stare—because its bold foliage turns shady corners into dramatic focal points, whether as centerpieces or understory layers. other plants fade.
The secret lies in pairing them right: pair blue-green hostas with silver foliage for contrast, or mix chartreuse varieties with deep-red heucheras for a jewel-toned effect. Spacing matters too—plant them 12-24 inches apart for mature size, and group odd numbers (3, 5, or 7) for natural-looking drifts.
They thrive in partial to full shade, making them perfect for woodland gardens or north-facing borders.
You’ll end up with a garden that stays stunning from spring’s first flush of growth through winter’s dormant crowns. The key is choosing varieties with different heights and leaf shapes—some frilly, some broad—to create movement.
Mulch well in summer to keep roots cool, and watch as your shady spots become the envy of the neighborhood.
Works for cottage gardens, modern landscapes, or even container arrangements on patios. Let’s make your shade garden the showstopper it deserves to be.
📚 In This Guide
- What you need
- Instructions
- Tips and common mistakes
- Wrapping up and next steps
What you need
- ● Hosta plants: Choose 3–5 varieties (e.g., Hosta 'Blue Angel', 'Francee', or 'Patriot') for texture and color contrast. Buy 1–2 plants per square foot of space.
- ● High-quality soil: 2–3 bags of peat moss or compost (1 cubic yard per 100 sq. ft.) to improve drainage and fertility.
- ● Organic mulch: 1–2 bags of shredded bark or pine straw (2–3 inches deep) to retain moisture and suppress weeds.
- ● Slow-release fertilizer: 1 bag of balanced 10-10-10 or 20-20-20 (apply at planting and mid-season).
- ● Garden trowel or transplant spade (for digging holes).
- ● Garden gloves (to protect hands from soil and sharp edges).
- ● Pruners (for trimming dead leaves or overgrowth).
- ● Watering can or hose with a gentle spray nozzle (hostas hate soggy roots!).
- ○ Optional but helpful: Soil pH test kit (hostas prefer 6.5–7.5).
- ● Edging tool (to define plant beds neatly).
- ● Decorative stones or mulch dye (for a polished look).
- ● A shady or partially shaded spot (dappled sunlight is ideal).
- ● Well-draining soil (amend clay soil with perlite or sand if needed).
- ● Time to commit: Hostas thrive with consistent moisture (water 1–2 times per week, more in extreme heat).
How to design a stunning hosta plant landscaping display
Hostas thrive where others falter, turning shady corners into lush, textured focal points.
Assess Your Shady Garden Spaces
Start by mapping your garden’s light conditions—hostas prefer partial to full shade, meaning 3-6 hours of dappled sunlight daily. Walk through your space at different times of day to identify areas with filtered light or deep shade, noting where moisture lingers after rain. I always sketch a rough layout, marking zones with morning sun (ideal for variegated varieties) versus afternoon shade (better for solid-colored leaves). Avoid spots where water pools for more than 24 hours—hostas hate soggy roots.
Consider mature plant sizes too. A giant hosta like 'Blue Angel' needs 3-4 feet of clearance, while petite 'Halcyon' stays compact at 12-18 inches. Measure existing plants and structures to plan spacing that prevents future crowding. I like to group hostas by height—tall varieties at the back, medium in the middle, and low-growing types like 'Pandora' in the front. This creates natural layers and draws the eye through the garden.
Prepare Soil for Optimal Hosta Growth
Hostas demand rich, well-draining soil with a slightly acidic to neutral pH (6.0-7.5). Amend native soil with 3-4 inches of compost and 1-2 inches of peat moss or coconut coir to improve moisture retention and fertility. I dig in a 5-10-10 fertilizer at planting time (follow package rates) to give them a nutrient boost. For heavy clay soil, mix in sand or perlite to prevent compaction—hostas hate roots suffocating in dense, waterlogged earth.
Test your soil’s moisture level before planting. Stick your finger 2 inches deep—if it feels dry, water thoroughly before installing. Hostas prefer consistently moist (but not soggy) conditions, so mulch heavily with 3-4 inches of shredded bark or wood chips after planting. This conserves moisture, suppresses weeds, and protects roots from temperature swings. I always mulch in early spring and late fall to maintain steady soil conditions year-round.
Plant Hostas for Maximum Impact
Dig holes twice as wide as the root ball but only as deep as the top of the root crown—planting too deep suffocates the plant, while too shallow exposes roots to drying. Gently loosen roots if they’re circling tightly in the container, then position the hosta so the crown sits just above soil level. Backfill with native soil mixed with compost, tamping lightly to eliminate air pockets. Water deeply immediately after planting to settle the soil and eliminate gaps.
Arrange hostas in odd-numbered clusters (3, 5, or 7 plants) for visual appeal. For example, place three 'June' hostas in a triangular formation around a boulder or tree base, then add two 'Patriot' hostas nearby for contrast. Mix textures—pair glossy-leaved varieties like 'Francee' with matte-finished types like 'Guacamole'. I also interplant with ferns, astilbes, or heucheras to extend the season’s interest, as hostas slow down in winter but stay evergreen in mild climates.
Maintain Hostas for Long-Term Beauty
Water newly planted hostas every 2-3 days until established, then taper to once weekly during dry spells, checking soil moisture 1 inch deep with your finger. Overhead watering can cause fungal issues, so I use drip irrigation or soaker hoses placed at the base. Fertilize in early spring with a balanced 10-10-10 and again in mid-summer with a low-nitrogen, high-potassium formula (like 5-10-15) to encourage strong foliage and disease resistance.
Divide hostas every 3-5 years in early spring or fall when they become overcrowded. Dig up the clump, separate into 3-5 inch sections with 3-5 leaves each, and replant immediately. I always discard the center portion—it’s often weak and rarely produces strong new growth. Deadhead spent flower stalks in late summer to redirect energy into leaf production. In winter, remove any yellowed or damaged leaves but leave healthy foliage for insulation.
Extend the Season with Companion Plantings
Hostas shine year-round when paired with spring bulbs, summer perennials, and winter interest plants. Tuck daffodils or crocuses among hostas in early spring for a burst of color before the foliage fills in. In summer, add astilbes, hellebores, or Japanese painted ferns for height and texture contrast. For winter, plant ornamental grasses or evergreen shrubs like inkberry holly nearby to maintain structure when hostas go dormant.
Prune hostas minimally—remove only yellowed or damaged leaves in early spring. If slugs become an issue, apply copper tape barriers or diatomaceous earth around plants at dusk when slugs are most active. I’ve found that planting hostas near garlic or chives deters pests naturally. Finally, rotate varieties annually to keep the display dynamic—swap out a few plants each year to introduce new colors, sizes, and textures without overwhelming the space.
Tips & tricks for perfect hosta plant landscaping
Creating a stunning hosta display isn't just about planting—it's about understanding their unique needs and maximizing their natural beauty.
Light Assessment: When mapping your garden's light conditions in Step 1, pay special attention to tree canopies that shift with seasons. What appears as full shade in summer may receive morning sun in winter. I've found that variegated hostas like 'Halcyon' actually benefit from this seasonal light variation—they develop deeper colors when exposed to more sunlight. Mark your layout with both current and seasonal light patterns to ensure year-round appeal.
Soil Preparation Strategy: In Step 2, don't just amend the planting hole—improve the entire planting area. Hostas have extensive root systems that spread horizontally, so mix compost and organic matter into the top 12 inches of soil where you'll plant. This creates a nutrient-rich zone that supports their growth for years. For heavy clay soils, incorporate sand or perlite at a 1:1 ratio with native soil to improve drainage without compromising moisture retention.
Planting Depth Technique: The planting depth in Step 3 is crucial—positioning the crown just above soil level prevents rot while allowing roots to establish properly. Here's a pro tip: After planting, gently press the surrounding soil to create a slight basin around each plant. This helps direct water straight to the roots during irrigation, reducing runoff and ensuring consistent moisture at the root zone.
Seasonal Maintenance Calendar: Create a simple maintenance schedule based on Step 4's recommendations. Mark your calendar for early spring fertilization, mid-summer feeding, and late summer deadheading. I've found that adding a layer of fresh mulch in both early spring and late fall creates a protective barrier that maintains even soil temperatures and conserves moisture throughout the growing season.
Pro Tips for Hosta Plant Landscaping
- Creating a stunning hosta display isn't just about planting—it's about understanding their unique needs and maximizing their natural beauty.
- Light Assessment: When mapping your garden's light conditions in Step 1, pay special attention to tree canopies that shift with seasons.
- Soil Preparation Strategy: In Step 2, don't just amend the planting hole—improve the entire planting area.
Frequently asked questions
Got questions about transforming your shady garden with hosta plant landscaping? You’re not alone! Here are some of the most common queries—plus expert answers to help you grow a thriving, low-maintenance oasis.
What’s the best time of year to plant hostas?
Plant hostas in early spring or early fall when soil temperatures are cool (50–60°F). Avoid extreme heat or frost, as these can stress young plants. Spring planting gives them time to establish roots before summer, while fall planting lets them settle before winter dormancy. Pro tip: Water deeply after planting to reduce transplant shock!
How much shade do hostas really need?
Hostas thrive in partial to full shade (2–6 hours of sunlight daily). Too much sun (especially in hot climates) can scorch leaves, while deep shade may lead to leggy growth. For best results, place them under dappled light from trees or on north-facing slopes. Varieties like ‘Halcyon’ tolerate more sun, while ‘Francee’ prefers filtered light.
Why are my hosta leaves turning yellow or brown?
Yellowing leaves often signal overwatering or root rot, while brown edges usually mean underwatering or sunburn. Check soil moisture—hostas like consistently moist (not soggy) soil. Fungal issues (like slug damage) can also cause browning. Fix it: Adjust watering, mulch to retain moisture, and relocate if sun exposure is too harsh.
Can I grow hostas in containers?
Hostas adapt well to containers, making them perfect for patios, balconies, or small spaces. Use a well-draining mix (add perlite or compost) and a pot with drainage holes. Choose compact varieties like ‘Blue Mouse Ears’ for smaller pots. Remember: Containers dry out faster—water regularly and fertilize monthly during growing season.
How do I protect hostas from pests like slugs and deer?
Slugs and deer love hostas! Deter slugs with copper tape barriers or organic slug bait (like diatomaceous earth). For deer, use repellents with rotten eggs or hot pepper or plant hostas near deer-resistant companions like ferns or astilbe. Bonus tip: A 3-foot-tall fence can also keep critters at bay.
What are some low-maintenance alternatives to hostas for shade?
If hostas feel too high-maintenance, try these shade-loving stars:
- Ferns (e.g., Maidenhair or Ostrich): Lush, textured, and pest-resistant.
- Hellebores (Lenten roses): Bloom early, drought-tolerant once established.
- Astilbe: Feathery plumes add color with minimal fuss.
- Lungwort (Pulmonaria): Hardy, spreads slowly, and attracts pollinators.
Most prefer similar shade and moisture levels to hostas!
Wrapping up and next steps
Hostas are the unsung heroes of shady landscapes—offering year-round texture, ease of care, and stunning foliage that transforms dull spaces into lush retreats. Whether you’re a beginner or a seasoned gardener, their versatility makes them a must-have for adding depth, color, and life to your outdoor oasis. 🌿
Ready to dive in? Start by sketching your design, gathering supplies, and planting your first hosta this weekend—your garden will thank you! For extra inspiration, explore hosta varieties or join local gardening groups to swap tips and photos. Happy planting! 🌱