Propagation
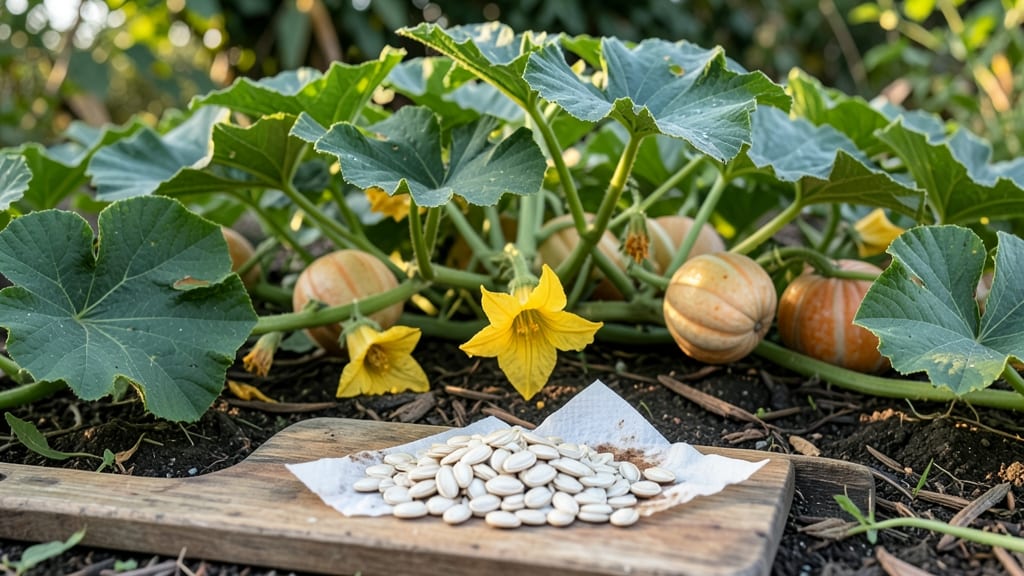
Cleaning pumpkin seeds for planting isn’t just about saving scraps—it’s your ticket to growing heirloom pumpkins next summer. 🌱 I’ve learned the hard way that skipping this step leads to moldy messes or seeds that refuse to sprout.
The process takes less than an hour, but proper prep means the difference between a thriving garden and wasted effort.
You only need a few simple supplies: a bowl of water, a colander, some paper towels, and a warm, dry spot. The key is patience—rinsing seeds thoroughly removes the sticky pulp that traps moisture, while letting them dry completely prevents rot.
I’ve even saved seeds from store-bought pumpkins this way, and they’ve germinated just as well as homegrown ones.
Once dried, store them in an airtight container in the fridge until planting season. Properly cleaned seeds stay viable for up to five years, so you’re not just preparing for this year’s garden—you’re stocking up for future harvests.
The first green shoots appear within a week of planting, and before you know it, you’ll have vines stretching across your garden.
If your seeds develop mold or smell funky during drying, don’t toss them—just spread them out in a single layer and give them extra time. A little extra care now means fewer headaches later. Ready to turn those pumpkin guts into next year’s garden stars?
📚 In This Guide
- What you need
- Instructions
- Tips and common mistakes
- Wrapping up and next steps
What you need
- ● Fresh pumpkin or squash: Choose a ripe, organic pumpkin (or any squash variety) with healthy, plump seeds.
- ● Sharp chef’s knife or serrated knife: For slicing open the pumpkin cleanly.
- ● Large bowl: A deep, wide bowl (preferably non-reactive, like stainless steel or glass) to hold the pulp and seeds.
- ● Water: Enough to fill the bowl halfway (room temperature or warm).
- ● Colander or fine-mesh strainer: With small holes (1–2 mm) to rinse seeds thoroughly.
- ● Paper towels or clean kitchen towels: For drying seeds (use unbleached, seed-safe towels if possible).
- ● Small plate or tray: To air-dry seeds in a single layer.
- ○ Fine-mesh sieve or sifter (optional but helpful): To separate seeds from pulp more easily.
- ● Rubber gloves: To keep hands clean while handling pulp.
- ● Small paintbrush or soft toothbrush: For gently scrubbing stubborn pulp off seeds.
- ● Food-safe bleach solution (1 tsp bleach per gallon of water): For sanitizing seeds if disease prevention is a concern.
- ● Seed-saving envelope or jar: To store cleaned seeds in a cool, dry place until planting.
- ● Label and marker: To track seed varieties (especially useful if saving multiple types!).
Step-by-step instructions for cleaning pumpkin seeds for planting
Here's how to turn store-bought pumpkin seeds into healthy planting stock—no special tools needed.
🌱 Step 1: Scoop and Rinse the Seeds
Cut open your pumpkin and scoop out the stringy pulp with a spoon, being careful not to damage the seeds. Place the pulp and seeds in a large bowl and add 2-3 inches of warm water. Let it sit for 5-10 minutes—this softens the pulp so it washes away easily. You'll see the seeds sink to the bottom while the pulp floats.
Gently swirl the water with your hands, breaking up the pulp further. Drain the water through a fine-mesh strainer or colander, letting the seeds catch while the pulp and debris wash away. Rinse the seeds in the strainer under cool running water for 30 seconds to remove any lingering pulp residue. This step ensures clean seeds that won't rot in the soil later.
💧 Step 2: Dry the Seeds Thoroughly
Spread the rinsed seeds in a single layer on a clean kitchen towel or paper towels. Fold the edges of the towel to create a little tray, making sure the seeds aren't touching each other. Let them air-dry in a warm, dry place for 24-48 hours. You'll know they're dry enough when they feel firm and papery to the touch—no moisture should remain.
If you're in a humid climate, speed up drying by placing the towel with seeds in a sunny spot (but avoid direct sun, which can overheat them). Over-drying won't hurt, but under-drying can lead to mold or slow germination. Test a few seeds by gently squeezing—they should feel dry and crisp, not damp at all.
⏰ Step 3: Store Until Planting or Germinate Immediately
Once fully dry, transfer the seeds to a small paper envelope or airtight container. Store them in a cool, dark place like a pantry or fridge until ready to plant. Properly stored, they'll stay viable for 3-5 years, though I like to plant them within a year for the best germination rates. Label the container with the pumpkin variety and date to keep track.
If you're planting right away, skip storage and move straight to sowing. Pumpkin seeds germinate best at 70-90°F soil temperatures, so wait until after the last frost date in your area. Plant them 1 inch deep in well-draining soil, spacing them 2-3 feet apart—they'll need room to grow into vines. Water gently after planting to settle the soil around them.
Tips & tricks for perfect pumpkin seed cleaning
These simple tricks will help you turn store-bought pumpkin seeds into planting-ready gems without any fuss.
Soak Time Secret: The 5-10 minute soak in Step 1 is your best friend for separating pulp from seeds. If your seeds are particularly fibrous, extend the soak to 12-15 minutes—just keep an eye on them to avoid over-soaking, which can start breaking down the seed shells. Warm water works better than cold because it helps dissolve the pulp faster.
Drying Strategy: The 24-48 hour drying window is flexible depending on your climate. In dry conditions, you might hit perfect dryness in 24 hours, while humid areas may need the full 48 hours. I've found that placing a small fan nearby speeds up drying without over-drying. Just make sure seeds aren't touching—crowded seeds trap moisture and can develop mold.
Storage Wisdom: For long-term storage beyond the recommended 3-5 years, consider vacuum-sealing your seeds. This extends viability to 7-10 years while protecting them from moisture and pests. I always store mine in the fridge for maximum freshness, especially if I'm not planting them within a year.
Planting Prep: Before planting, give your seeds a quick 10-minute soak in warm water to jumpstart germination. This mimics natural spring rains and helps break seed dormancy. Just make sure to plant them immediately after soaking—they'll be ready to grow!
Pro Tips for Clean Pumpkin Seeds For Planting
- These simple tricks will help you turn store-bought pumpkin seeds into planting-ready gems without any fuss.
- Soak Time Secret: The 5-10 minute soak in Step 1 is your best friend for separating pulp from seeds.
- Drying Strategy: The 24-48 hour drying window is flexible depending on your climate.
Frequently asked questions
Got questions about cleaning pumpkin seeds for planting?
You’re not alone! Here are answers to the most common concerns—so you can prep those seeds like a pro and get your garden growing.
Do I need to remove the seed coat (pellicle) before planting?
Nope! The thin, papery seed coat (pellicle) is essential for germination—it protects the seed until it’s ready to sprout. Only remove it if you’re saving seeds for long-term storage (to prevent mold). For planting, leave it intact!
How long can I store cleaned pumpkin seeds before planting?
Cleaned seeds stay viable for 4–6 weeks in a cool, dry place (like a paper bag in the fridge). After that, germination rates drop. For best results, plant them within 1–2 weeks of cleaning. Pro tip: Label your seeds with the date to track freshness!
Can I use pumpkin seeds from store-bought pumpkins?
Store-bought pumpkins (like carving pumpkins) work great for planting—just avoid seeds from sugar pumpkins (they’re often treated to prevent sprouting). Rinse them thoroughly to remove any residual soap or preservatives from processing.
What if my seeds mold or smell bad after cleaning?
Mold or a sour smell means moisture got trapped during drying. Discard those seeds immediately—moldy seeds won’t germinate and can contaminate your soil. To prevent this, spread seeds in a single layer and dry them in a well-ventilated spot (like a mesh bag) for 3–5 days.
Can I skip the soaking step if I’m in a hurry?
Soaking seeds for 12–24 hours speeds up germination by softening the seed coat, but it’s optional. If you’re impatient, try a quick soak (4–6 hours) or plant them dry—just water consistently afterward. For faster results, soak them overnight!
Wrapping up and next steps
Cleaning pumpkin seeds for planting is a simple yet rewarding process that sets the stage for a thriving garden! By following these three easy steps—removing pulp, drying thoroughly, and storing properly—you’ll give your seeds the best chance to sprout into healthy plants.
Whether you’re a seasoned gardener or just starting out, this method ensures you’re ready to plant with confidence.
Now that your seeds are prepped and ready, it’s time to take the next step! Research the ideal planting conditions for your pumpkin variety—like sunlight needs, soil type, and spacing—and get your garden plot prepared. Happy planting, and may your pumpkins grow big and bright! 🌱✨