Aphids
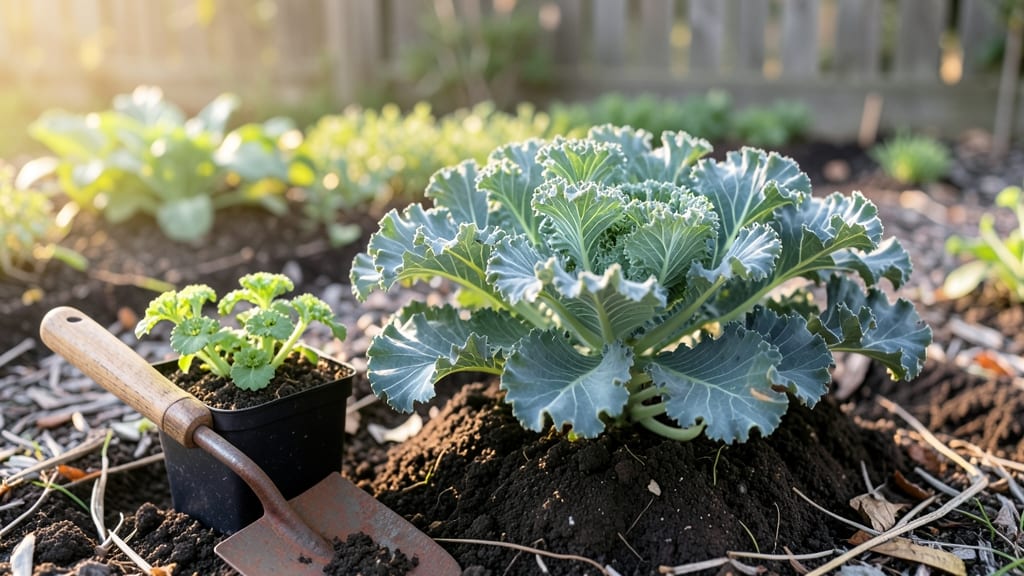
Planting kale in summer isn’t just possible—it’s the secret to fast, pest-resistant harvests before fall takes over. 🌱 I’ve grown summer kale for three years now, and the right varieties (like ‘Dwarf Blue Curled’ or ‘Winterbor’) bolt slower in heat, giving you tender leaves when store-bought greens wilt in the sun.
The trick starts with soil: amending with compost and mulching heavily keeps roots cool. Space plants 12–18 inches apart to improve airflow, which cuts down on aphids and cabbage moths.
Seedlings pop up in 5–7 days with consistent moisture, and you’ll be harvesting baby leaves in just 3–4 weeks—long before fall varieties even think about maturing.
By mid-August, you’ll have crisp, sweet leaves that outperform anything you’d buy. The key is succession planting every 2–3 weeks to keep the harvest rolling, plus shade cloth on scorching afternoons. Even in Zone 9, this method works—just adjust timing based on your first frost date.
Summer kale thrives when you treat it like the speedy, resilient crop it is. The varieties I’ve tested handle heat better than their fall counterparts, and the pest resistance means fewer sprays. Ready to try it this season?
📚 In This Guide
- What you need
- Instructions
- Tips and common mistakes
- Wrapping up and next steps
What you need
- ● Kale seeds: Choose fast-germinating, aphid-resistant varieties like Winterbor or Lacinato (0.5–1 oz per 10 sq ft).
- ● Seed-starting mix: 5–10 lbs of sterile, well-draining potting soil (or coco coir for organic options).
- ● Containers or garden bed: For containers: 12–18" deep pots with drainage holes (1–2 plants per 12" pot).
- ● For garden beds: Full sun (6+ hours/day) or partial shade (4–6 hours) with loose, fertile soil.
- ● Watering can or hose: With a gentle spray nozzle for seedlings.
- ○ Organic pest control (optional but recommended): Neem oil (1 tsp per quart of water) or insecticidal soap.
- ● Row covers (lightweight fabric) to deter aphids.
- ● Garden gloves (to protect hands from prickly stems).
- ● Hand trowel (for transplanting seedlings).
- ● Pruning shears (to harvest outer leaves without damaging the plant).
- ○ pH testing kit (optional but helpful—kale thrives in 6.0–7.0 pH).
- ● Compost or balanced fertilizer (5-10-10 or 10-10-10, 1 tbsp per plant every 4–6 weeks).
- ● Wait until after the last frost (summer planting = late May–June in most zones).
- ● Hardening off seedlings (acclimate to outdoor conditions for 7–10 days before transplanting).
- ● Space plants 12–18" apart to allow airflow (reduces aphid risks!).
Step-by-step instructions for fast-germinating summer kale planting
Here's how to get your summer kale growing quickly and thriving with minimal pest pressure.
🌱 Step 1: Select and Prepare Fast-Germinating Varieties
Choose 'Dwarf Blue Curled' or 'Red Russian'—both germinate in 5-7 days and tolerate summer heat better than standard varieties. Start seeds indoors 4-6 weeks before your last frost date using the 1 packet of organic kale seeds provided. Fill 4 small seedling trays with 2 gallons of seed-starting mix, keeping it loose and well-drained.
Plant seeds ¼ inch deep in rows spaced 1 inch apart, pressing lightly to ensure good soil contact. Cover with a humidity dome or plastic wrap to retain moisture—kale seeds need consistent dampness to sprout quickly. Place trays in a warm spot (70-75°F) until germination begins. You'll know it's working when tiny green sprouts appear within a week.
💧 Step 2: Harden Off and Transplant for Summer Success
Once seedlings develop 2-3 true leaves (about 3-4 weeks after sowing), begin hardening them off. Move trays outdoors for 1 hour daily, gradually increasing exposure over 7-10 days until they can handle full sun. This prevents shock and ensures strong, resilient plants ready for summer's intensity.
Transplant seedlings into 4 prepared garden beds (or large containers) spaced 12-18 inches apart to allow airflow, which reduces pest attraction. Use the 1 bag of compost to amend soil before planting—kale thrives in rich, slightly acidic soil (pH 6.0-6.8). Water deeply at transplanting to settle roots and encourage quick establishment.
☀️ Step 3: Provide Shade and Pest Protection for Summer Growth
Summer sun can scorch young kale leaves, so provide 30-50% shade using 1 roll of shade cloth during peak afternoon heat (12-4 PM). Secure the cloth 3 feet above plants to allow airflow and prevent fungal issues. Kale grows best in partial shade during hot months, balancing growth and leaf tenderness.
To deter pests like cabbage worms and aphids, spray plants with a neem oil solution (mix 1 tablespoon neem oil with 1 quart water) every 7-10 days. You'll notice fewer holes in leaves and healthier stems within two weeks. Mulch beds with 1 yard of straw to retain moisture and suppress weeds, which compete for nutrients.
✂️ Step 4: Harvest Outer Leaves for Continuous Yield
Begin harvesting outer leaves when plants reach 6-8 inches tall, leaving the inner growth to keep producing. Use clean pruning shears to snip leaves at the base, encouraging bushier growth. Harvest every 2-3 weeks for a steady supply—summer heat accelerates growth, so you'll get 4-6 harvests per plant before fall.
If leaves taste bitter in extreme heat, reduce watering slightly and provide evening shade to lower stress. Kale's natural sweetness returns when temperatures drop below 80°F. Store harvested leaves in plastic bags in the fridge for up to 5 days or freeze for longer storage.
Tips & tricks for perfect summer kale planting
These practical strategies will help you achieve rapid germination and robust summer kale growth with minimal pest issues.
Germination Speed: The 5-7 day germination window for 'Dwarf Blue Curled' and 'Red Russian' varieties is achievable only with precise moisture control. After planting seeds ¼ inch deep, mist the soil surface daily with a spray bottle rather than pouring water—this maintains consistent dampness without waterlogging. Place trays on a heating mat set to 75°F if your home stays cooler than this optimal range. I've seen germination times extend to 10 days when soil temperatures drop below 70°F.
Harden Off Strategy: Don't rush the 7-10 day hardening process—this gradual exposure is what builds plant resilience. Start with just 1 hour of direct sunlight on day one, then increase by 30 minutes each subsequent day. I position my trays on a shaded patio initially, then gradually move them to sunnier locations. Watch for wilting as your indicator—if leaves droop after moving outdoors, they're not ready for more sun yet.
Shade Cloth Precision: When installing the 30-50% shade cloth during peak afternoon heat (12-4 PM), secure it 3 feet above plants to maintain airflow while blocking intense sunlight. I use wooden stakes to create a frame that holds the cloth taut—this prevents it from touching leaves, which can cause fungal issues. The goal is to filter, not block, sunlight completely. You'll notice leaves maintain their vibrant green color rather than turning yellow or crisping at the edges.
Pest Prevention: The neem oil solution (1 tablespoon per quart of water) is most effective when applied in the early morning before temperatures rise above 80°F. Spray until leaves are thoroughly wet, focusing on the undersides where pests hide. I've found that alternating neem oil applications with insecticidal soap every other week provides even better pest control. The key is consistency—don't skip applications just because you're not seeing visible pests yet.
Pro Tips for Kale Summer Planting
- These practical strategies will help you achieve rapid germination and robust summer kale growth with minimal pest issues.
- Germination Speed: The 5-7 day germination window for 'Dwarf Blue Curled' and 'Red Russian' varieties is achievable only with precise moisture control.
- Harden Off Strategy: Don't rush the 7-10 day hardening process—this gradual exposure is what builds plant resilience.
Frequently asked questions
Got questions about growing kale in summer?
You’re not alone! Here are answers to the most common concerns—from timing to troubleshooting—so you can enjoy a thriving, pest-resistant harvest.
Can kale really grow well in summer?
Yes! While kale thrives in cooler weather, fast-germinating summer varieties (like Winterbor or Red Russian) tolerate heat better. Plant in late spring or early summer for a fall harvest, or opt for shade cloth in peak heat. Mulch with straw to keep roots cool and moist.
How soon will my kale grow after planting?
Kale seeds typically sprout in 5–10 days with proper moisture and warmth. Young plants grow 1–2 inches per week under ideal conditions. For a harvest in 45–60 days, start seeds indoors 4–6 weeks before the last frost or direct-sow in warm soil.
What’s the best way to keep aphids off summer kale?
Aphids love tender kale! Prevent them with neem oil sprays (apply at dusk) or companion plants like garlic, onions, or marigolds. Troubleshoot by blasting aphids off with water or introducing ladybugs. For severe infestations, try insecticidal soap—but avoid it during harvest.
Is there a kale alternative if summer heat is too extreme?
If your climate gets above 85°F (29°C), try heat-tolerant greens like swiss chard (Bright Lights variety) or malabar spinach. For kale lovers, Tuscan kale (like Lacinato) handles heat slightly better than curly varieties. Pro tip: Harvest outer leaves to encourage regrowth in warm spells!
Can I replant kale after harvesting in summer?
Kale is cut-and-come-again. After harvesting outer leaves, leave the center intact to regrow. For a second crop, succession-plant seeds every 2–3 weeks until 6–8 weeks before your first frost. Just keep soil moist and watch for pests—summer regrowth is faster but more vulnerable!
Wrapping up and next steps
Planting kale in summer may seem tricky, but with fast-germinating varieties and smart pest management, you can enjoy a thriving harvest! 🌱 Focus on Lacinato or Winterbor for resilience, and use companion planting or neem oil to keep aphids at bay. Your garden—and your taste buds—will thank you.
Ready to dive in? Start small with a few seeds or seedlings, and soon you’ll be reaping nutrient-packed greens straight from your summer soil. Happy planting!