Propagation
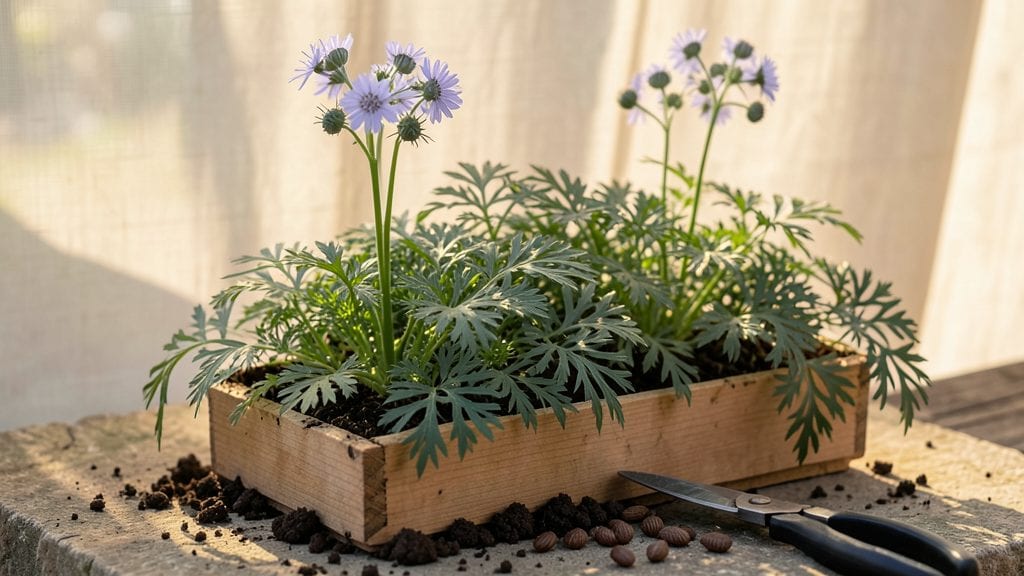
Planting nigella seeds unlocks a garden that looks like scattered black jewels against velvet petals—unexpected, bold, and effortlessly dramatic. ✨ I’ve grown them for years, and the secret isn’t complicated: these finicky-looking seeds actually thrive with minimal fuss once you nail a few key steps.
The trick starts with timing and soil. Sow nigella seeds directly outdoors in early spring or late summer, when soil temperatures hover around 50–60°F—they despise heat and won’t germinate if planted too early or too late.
A well-draining mix of compost and garden soil, with seeds spaced 6–12 inches apart and pressed just ¼-inch deep, gives them the best start. Patience is key: germination can take 2–4 weeks, but the wait pays off with lacy foliage and striking blooms.
Once sprouted, these seedlings are surprisingly tough. They handle light frost surprisingly well, making them ideal for spring or fall planting in most climates. Water sparingly—too much moisture causes rot—then step back and watch as they self-seed like clockwork.
By midsummer, your garden will be dotted with velvet-black seed pods that catch the light like tiny mirrors.
Here’s the best part: nigella’s year-round drama continues even after the blooms fade. The seed pods stay decorative until frost, and the plants reseed themselves, often popping up in new spots the next year. For a foolproof way to add texture and intrigue, this is the one to try.
📚 In This Guide
- What you need
- Instructions
- Tips and common mistakes
- Wrapping up and next steps
What you need
- ● Nigella seeds: Choose a variety like Nigella damascena (Love-in-a-Mist) or Nigella sativa (Black Cumin). Aim for 1–2 grams per square foot (about 50–100 seeds for a small patch).
- ● Well-draining potting soil or garden soil: Mix with 20–30% perlite or sand if your soil is heavy (Nigella hates soggy roots!).
- ● Containers or garden bed: Containers: Use 6–12-inch pots with drainage holes (3–5 seeds per pot).
- ● Garden bed: Pick a sunny spot (full sun to partial shade) with 6+ hours of light daily.
- ● Watering can with a fine rose nozzle: Nigella seeds need gentle moisture—no blasting!
- ○ Garden gloves (optional but recommended): Protect your hands from prickly seed pods later on.
- ● Compost or slow-release fertilizer: Mix 1 tbsp per square foot into the soil for extra nutrients (skip if soil is rich).
- ● Mulch (straw or shredded leaves): Helps retain moisture and suppress weeds—1–2 inches thick.
- ● Plant markers: Label your varieties (Nigella can self-seed wildly!).
- ● Dried flower preservative: If harvesting for crafts, use silicagel packets to keep blooms crisp.
- ● Bird netting (early spring): Protect seedlings if birds love your seeds as much as you do!
Step-by-Step instructions for planting Nigella seeds
Here's the straightforward method I've used to grow these striking annuals reliably—no fuss, just bold results.
🌱 Step 1: Choose the Perfect Planting Location
Nigella thrives in full sun with at least 6 hours of direct light daily. I always pick the sunniest spot in my garden because these seeds need warmth to germinate reliably. The soil should be well-draining—Nigella despises soggy roots, so avoid low-lying areas where water pools.
Test your spot by pressing your finger 1 inch deep into the soil. If it feels compacted or clay-heavy, mix in 2-3 inches of compost to loosen it. The ideal planting bed should crumble easily between your fingers and drain within 30 minutes after watering.
🌱 Step 2: Scatter Seeds Directly in the Garden
Nigella seeds are tiny but hardy—no need for indoor starting or delicate handling. Scatter them ¼ inch deep in late spring after the last frost, when soil temperatures reach 60°F or warmer. I like to sprinkle them 12-18 inches apart in loose clusters, mimicking their natural growth pattern.
Don't worry about spacing too precisely. Nigella self-seeds generously, so you'll have volunteers popping up for years to come. Lightly cover the seeds with soil and pat the area gently—just enough to settle the mix without burying them too deep.
💧 Step 3: Water Gently and Maintain Consistent Moisture
Keep the soil evenly moist but never soggy during germination, which takes 2-3 weeks. I use a fine-mist spray bottle to avoid disturbing the tiny seeds. You'll know moisture is right when the soil surface looks slightly damp but not glistening.
Once seedlings appear, reduce watering to once a week unless your climate is extremely hot or dry. Nigella is remarkably drought-tolerant once established—overwatering is far more dangerous than underwatering. You'll see the first true leaves emerge as small, rounded shapes about 1-2 inches tall.
☀️ Step 4: Support Growth and Prevent Overcrowding
Thin seedlings to 6-8 inches apart when they reach 3 inches tall, leaving the strongest stems. I use small scissors to snip unwanted plants at soil level, then scatter the clippings around the base of remaining seedlings—they'll root and create new plants.
Nigella grows best with minimal interference. Avoid fertilizing—these plants prefer lean soil. You'll notice the distinctive lacy foliage developing as they mature, followed by those signature black seed pods that add dramatic texture to any garden.
✂️ Step 5: Harvest and Enjoy Year-Round Interest
Leave seed pods on the plant until they turn completely black and dry. They make stunning cut flowers and add visual interest to winter arrangements. Cut stems when pods are fully mature but before they split open—this prevents self-seeding where you don't want it.
Nigella's beauty doesn't end with the flowers. The seeds themselves are edible (though bitter) and can be sprinkled on salads. I always leave a few pods to dry on the plant—they'll reseed naturally, giving you free plants for years to come.
Tips & tricks for perfect Nigella seeds planting
Between us, these tiny seeds pack a big punch—here's how to turn them into garden showstoppers with minimal effort.
Soil Test Tip: That 1-inch soil test in Step 1 is your best friend. If you're unsure about drainage, do the 30-minute water test: Pour a gallon of water on the spot and time how long it takes to drain. Clay soil? Mix in that 2-3 inches of compost—Nigella will reward you with lush growth.
Timing Secret: Don't rush the 2-3 week germination window in Step 3. Patience pays off—these seeds need consistent moisture without being soggy. I've seen germination fail when people watered daily instead of maintaining even dampness. Think "slightly damp sponge," not "wet towel."
Thinning Strategy: When you thin to 6-8 inches apart in Step 4, save those cuttings! Scatter them around the base of remaining plants—they'll root and create new volunteers. This free propagation is one of Nigella's best-kept secrets for expanding your garden effortlessly.
Harvesting Hack: For those dramatic black seed pods in Step 5, harvest when they're completely dry but before they split open. Bundle stems and hang them upside down in paper bags to collect seeds naturally. The pods will release seeds into the bag as they mature further.
Pro Tips for Nigella Seeds Planting
- Between us, these tiny seeds pack a big punch—here's how to turn them into garden showstoppers with minimal effort.
- Soil Test Tip: That 1-inch soil test in Step 1 is your best friend.
- Timing Secret: Don't rush the 2-3 week germination window in Step 3.
Frequently asked questions
Got questions about growing nigella seeds? You’re not alone—these striking black seeds can be a little mysterious! Here are answers to the most common queries to help you cultivate confidence (and drama) in your garden.
When is the best time to plant nigella seeds?
Nigella seeds thrive in cool weather, so plant them 2–3 weeks before your last frost date in spring or 6–8 weeks before your first frost in late summer/early fall. They’ll bolt in heat, so avoid planting after summer begins. For year-round blooms, stagger plantings every 4–6 weeks.
How long does it take for nigella seeds to germinate?
Germination is slow but steady—expect seeds to sprout in 2–4 weeks under ideal conditions (consistent moisture, 60–70°F soil). Thin seedlings to 12–18 inches apart once they’re 2–3 inches tall. Patience pays off with those signature lacy blooms!
Can I grow nigella seeds indoors for transplants?
Yes! Start seeds indoors 4–6 weeks before your last frost in biodegradable pots. Use a light, well-draining mix and keep soil moist (not soggy). Harden off seedlings for a week before transplanting outdoors. Pro tip: Nigella hates root disturbance, so direct sowing is easier!
Why aren’t my nigella seeds sprouting?
Common culprits:
- Too much heat (seeds need cool temps to germinate).
- Dry soil—keep seeds consistently moist until sprouts appear.
- Old seeds (viability drops after 2–3 years).
- Depth issues—plant seeds ¼ inch deep; deeper = slower germination.
Are nigella seeds edible, or just for show?
Both! While nigella (Nigella sativa) seeds are edible (used in baking and teas), the ornamental Nigella damascena (love-in-a-mist) is non-toxic but not culinary-grade. All parts are safe for pollinators—just don’t eat them unless you’ve confirmed the variety!
Wrapping up and next steps
Growing nigella seeds is like adding a touch of whimsical elegance to your garden—easy, rewarding, and full of surprises! 🌿 Whether you’re drawn to their delicate blooms, edible seeds, or self-seeding magic, these bold beauties thrive with minimal effort. Now that you’re armed with the right materials and answers, it’s time to roll up your sleeves and plant!
Start small—try a few pots or a sunny patch in your garden—and let nigella’s charm grow on you.
Once you see those lacy flowers and glossy seeds popping up, you’ll be hooked! Next step: Share your nigella journey with fellow gardeners or experiment with new varieties to keep the fun going. Happy planting! 🌸