Propagation
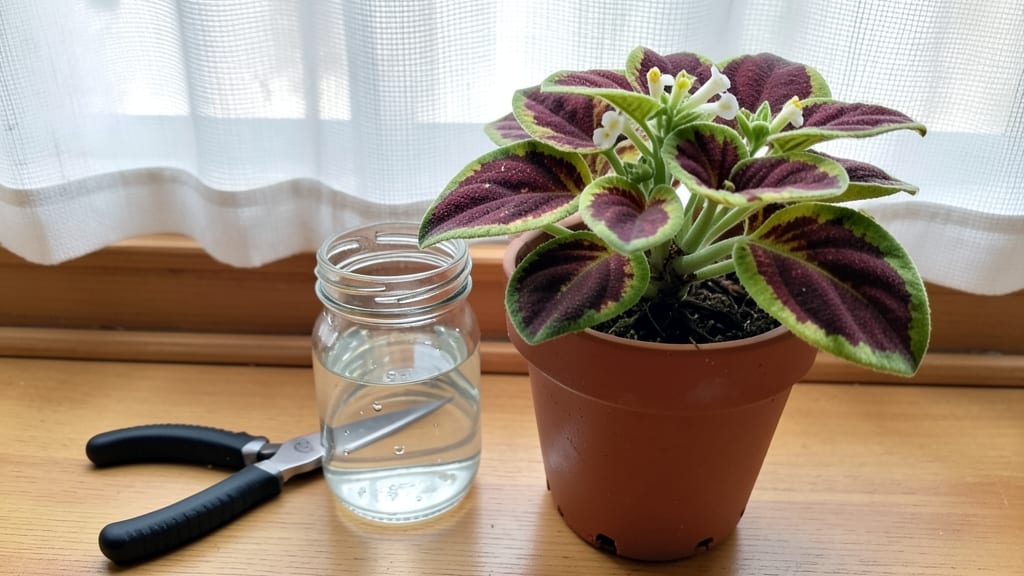
Plant cutting propagation turns scraps into thriving plants—no fancy greenhouses required. 🌱 I’ve multiplied my favorite herbs and shrubs this way, and the best part? You can do it year-round with just a few simple tools.
The science behind it is straightforward once you know the tricks, like when to cut, what medium to use, and how to keep your new plants happy until roots form.
Most people think propagation needs special equipment, but you only need sharp scissors, clean containers, and a rooting hormone for stubborn plants. I’ve rooted cuttings in everything from water glasses to perlite trays, and even my black thumb has seen success.
The key is matching the right plant to the right method—succulents love dry perlite, while mint thrives in water.
Within weeks, you’ll watch tiny roots emerge and new growth sprout, giving you free plants that outperform store-bought seedlings. Imagine filling your garden with exact copies of your best performers—or sharing cuttings with neighbors who’ll be jealous of your green thumb.
This method saves money, space, and time compared to buying new plants every season.
Whether you’re reviving a dying herb or expanding your garden for free, propagation is the ultimate gardener’s hack. Let’s get those cuttings rooted so you can enjoy the payoff all year long.
📚 In This Guide
- What you need
- Instructions
- Tips and common mistakes
- Wrapping up and next steps
What you need
- ● Healthy parent plant: Choose disease-free, non-flowering stems (4–6 inches long) with at least 2–3 leaf nodes.
- ● Sharp pruning shears or knife: Sterilized with rubbing alcohol to prevent contamination (1 pair).
- ○ Rooting hormone (optional but recommended): Powder or gel (e.g., Clonex or Dip ‘N Grow).
- ● Well-draining propagation medium: Perlite or vermiculite (sterile, 1–2 cups)
- ● Sphagnum moss (pre-moistened, 1 small bag)
- ● Sand or coconut coir (for succulents, 1–2 cups)
- ● Clear plastic bag or propagator: To create a humid environment (1–2, depending on volume).
- ● Small pots or containers: 3–4 inch pots with drainage holes (quantity based on cuttings).
- ● Water (for misting or soaking): Room-temperature, filtered if possible.
- ● Heat mat: Speeds up rooting for finicky plants (e.g., orchids or ferns).
- ● Grow lights: LED or fluorescent (12–16 hours/day) for low-light setups.
- ● Label markers: To track plant varieties and dates.
- ● Fungicide (e.g., hydrogen peroxide 3%): Diluted (1:9 ratio) to prevent rot.
- ● Spray bottle: For gentle misting (8–12 oz).
Step-by-Step instructions for plant cutting propagation
Here’s how to turn scraps into thriving new plants—no fancy tools required!
🌱 Step 1: Select Healthy Stems for Cutting
Choose stems that are 4-6 inches long with at least 2-3 sets of leaves. Look for thick, green growth—avoid woody or yellowing stems. I always pick from the tip of a healthy branch because these have the most growth energy. Use clean, sharp scissors (or pruning shears) to make a 45-degree angle cut just below a leaf node. This angle increases surface area for root growth.
If your plant has flowers or buds, snip them off—you want all the plant’s energy focused on rooting, not blooming. Here’s the thing: morning cuts work best because the plant has the whole day to recover before nightfall. Place your cuttings in a glass of room-temperature water immediately to keep them hydrated while you prep the rooting medium.
💧 Step 2: Prepare the Rooting Medium
Fill a small pot or container with moistened perlite or vermiculite—these materials hold moisture while allowing airflow. I like to mix equal parts perlite and peat moss for a balance of drainage and moisture retention. Wet the medium until it’s damp but not soggy—squeeze a handful, and if water drips out, it’s too wet. Too much moisture leads to rot, and you’ll lose your cutting before roots even form.
Make a hole in the medium with your finger or a pencil, about 1-2 inches deep. Gently tap the sides of the container to settle the mix—this prevents air pockets that could suffocate developing roots. Here’s a pro tip: warm the medium slightly by placing the pot in a sunny window for an hour before planting. Warmth speeds up root growth, and you’ll see roots in half the time.
☀️ Step 3: Plant and Maintain Humidity
Dip the cut end of your stem into rooting hormone (optional but helpful for faster results). Then, insert the cutting into the hole, pressing lightly to secure it. Leave only the top set of leaves above the soil line—this prevents the stem from rotting. Cover the pot with a clear plastic bag or humidity dome to trap moisture. Place the setup in bright, indirect light—no direct sun yet, or the plastic will act like a greenhouse and overheat your cutting.
Check the medium every 2-3 days—it should stay lightly moist. Mist the inside of the plastic occasionally to maintain humidity. You’ll know it’s working when tiny roots appear through the sides of the pot in 3-6 weeks. Don’t rush to remove the plastic—wait until you see new leaf growth, which means the cutting has successfully established roots.
✂️ Step 4: Transition to Soil and Care for New Plants
Once roots are 1-2 inches long and new leaves appear, it’s time to transplant. Gently remove the cutting from the rooting medium and place it in a small pot with well-draining potting mix. Water lightly to settle the soil, but don’t drown it—overwatering now can shock the new roots. Keep the pot in bright, indirect light for a week to help the plant adjust before moving it to full sun.
Here’s where it gets exciting: fertilize lightly after 4 weeks with a balanced, water-soluble fertilizer diluted to half strength. Your new plant is now ready to grow into a full-sized beauty! Real talk: patience pays off—some cuttings root in 2 weeks, others take 8. Don’t compare your progress to others; just keep the conditions consistent, and you’ll have a thriving new plant in no time.
Tips & tricks for perfect plant cutting propagation
Here's what I wish I knew before I started propagating—these tricks will help you avoid common pitfalls and get the best results!
The Cutting Angle Matters: That 45-degree angle in Step 1 isn't just for looks—it increases surface area for root growth by about 30%! Use a ruler as a guide if you're not comfortable eyeballing it. I learned this the hard way after struggling with slow rooting on straight cuts. Also, always make your cut just below a leaf node—this is where roots naturally emerge from the stem.
Rooting Hormone Hack: While rooting hormone is optional, I've found that using a powdered hormone gives better results than gel for most cuttings. Dip the cut end for just 2-3 seconds—longer doesn't help and can actually inhibit growth. For stubborn plants like mint or coleus, I double-dip for faster results. The hormone helps cells divide more quickly, which is why you'll often see roots in half the time when using it.
Lighting Strategy: Bright, indirect light is crucial in Step 3, but here's the thing: east-facing windows are ideal because they provide gentle morning light without harsh afternoon sun. If you don't have good natural light, a grow light on a timer (12-16 hours/day) works wonders. Too much direct sun can cause the plastic to act like a greenhouse, overheating your cuttings. I've seen cuttings wilt dramatically when exposed to midday sun through plastic—so keep them away from south-facing windows.
Transplant Timing: Wait until you see new leaf growth before transplanting in Step 4—this is your plant's way of saying "I'm ready!" Roots might be visible, but new leaves mean the cutting has successfully established its own energy production. I've transplanted too early and lost cuttings because they weren't ready to support themselves. Also, when transplanting, water lightly but thoroughly—you want the soil to be moist but not soggy, especially since new roots are delicate.
Pro Tips for Plant Cutting Propagation
- Here's what I wish I knew before I started propagating—these tricks will help you avoid common pitfalls and get the b...
- The Cutting Angle Matters: That 45-degree angle in Step 1 isn't just for looks—it increases surface area for root gro...
- Rooting Hormone Hack: While rooting hormone is optional, I've found that using a powdered hormone gives better result...
Frequently asked questions
Got questions about propagating plants from cuttings? You’re not alone! Here are some of the most common concerns—and their solutions—to help you master stem-cutting propagation like a pro.
What’s the best time of year to take plant cuttings?
The ideal time depends on your climate and plant type, but spring to early summer is usually best. During this period, plants are actively growing, making it easier for cuttings to root. In warmer climates, you can propagate year-round, while cooler regions may need to wait until temperatures rise above 50°F (10°C). Avoid winter dormancy—roots won’t form well!
How do I know if my cutting will root successfully?
Look for healthy, disease-free stems with at least 2-3 sets of leaves (or nodes). Softwood cuttings (new growth) root faster than hardwood, but avoid woody or overly mature stems. A quick test: If the stem snaps with a slight bend (not a clean break), it’s likely the right stage. Pro tip: Use a sharp, sterilized tool to make clean cuts at a 45° angle for maximum rooting success!
Should I use water or soil for propagating cuttings?
It depends on the plant! Water propagation works well for easy-rooters like pothos or mint, but it can lead to rot or weak stems for woody plants. Soil (or a rooting medium) is better for succulents, herbs, and shrubs. For best results, try a mix of perlite, peat, or coconut coir to keep moisture balanced while allowing airflow.
Why did my cuttings rot instead of rooting?
Overwatering or poor airflow are the top culprits! Ensure your cuttings have indirect light and a humid environment (like a plastic bag or propagator). If using water, change it every 2-3 days to prevent bacteria. For soil, keep it moist but not soggy—think "damp sponge," not swamp. Pro tip: Trim any yellowing leaves to reduce stress and improve rooting chances!
Can I propagate houseplants in winter?
Yes, but with adjustments! Many houseplants (like snake plants or ZZ plants) can root in winter if you provide warmth (70-75°F / 21-24°C) and bright, indirect light. Avoid drafts or cold windowsills. If your home is chilly, use a heat mat under the propagator or extend grow lights. Patience is key—rooting may take longer, but it’s totally doable!
Wrapping up and next steps
Mastering plant cutting propagation is like unlocking a green thumb superpower—you’re now equipped to grow vibrant new plants year-round with minimal effort! 🌱 Whether you’re a beginner or a seasoned gardener, the science of stem cuttings makes expanding your garden effortlessly rewarding. Ready to put your new skills to work?
🌿 Your Next Step: Experiment & Expand!
Start small—try propagating a single cutting from your favorite houseplant or herb. Track your progress, tweak techniques, and soon, you’ll be sharing (or gifting!) lush new plants with friends. Happy growing!