Vegetables
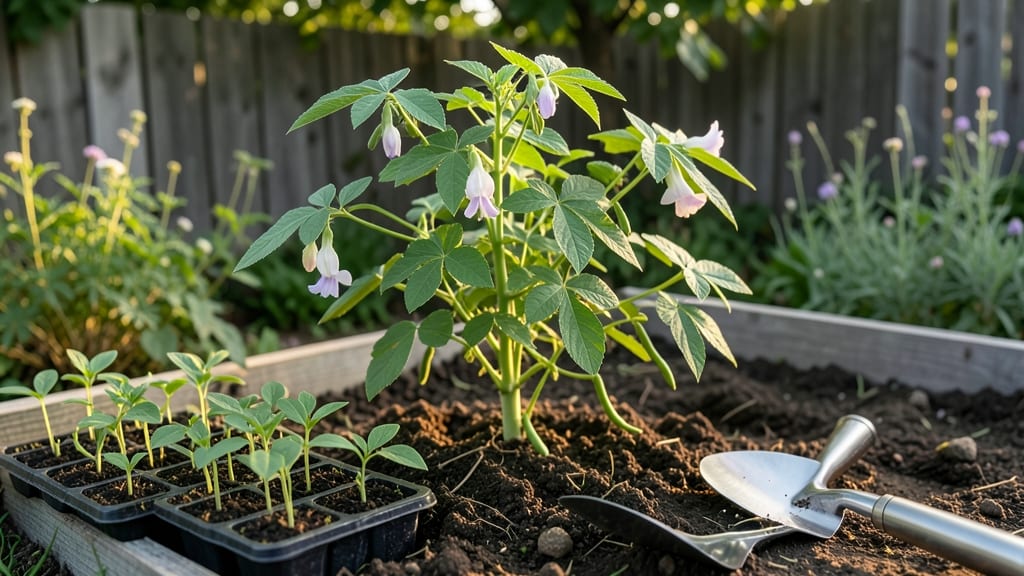
Planting snap beans means turning a patch of soil into a sweet, green harvest within just 60 days—if you nail a few key steps. I’ve watched my garden go from bare earth to a jungle of vines producing pods so tender they snap with a satisfying pop.
The trick isn’t magic; it’s timing, soil, and a little patience.
Start with warm soil—beans need temperatures above 60°F to germinate—and work in compost for loose, fertile ground. Plant seeds 1 inch deep, 3-4 inches apart, and watch for those first leaves in about a week.
Bush beans stay compact, so they’re perfect for small gardens or containers, while pole varieties need trellises to climb.
By mid-summer, you’ll be harvesting pods every few days, their crisp texture and buttery flavor beating anything store-bought. The key is consistent moisture—never let the soil dry out—and watch for pests like Mexican bean beetles. A quick spray of soapy water keeps them at bay.
Works in zones 3-10, though cooler climates benefit from starting seeds indoors. Whether you’re growing Blue Lake or Romano varieties, this method delivers reliable results. Ready to get those seeds in the ground?
📚 In This Guide
- What you need
- Instructions
- Tips and common mistakes
- Wrapping up and next steps
What you need
- ● Snap Bean Seeds: 1–2 lbs (or ~200–400 seeds, depending on variety). Choose bush beans (compact, 45–60 days to harvest) or pole beans (vining, 50–70 days). Popular picks: Blue Lake, Contender, or Provider.
- ● Well-draining soil: pH 6.0–7.0. Amend with compost (2–3 inches mixed into top 6–12 inches of soil) for nutrients.
- ● Fertilizer: Balanced 10-10-10 or 5-10-10 (organic options like fish emulsion or cottonseed meal work too). Apply at planting and again when flowers appear.
- ● Water: Consistent moisture (1–1.5 inches per week). A drip irrigation system or soaker hose is ideal.
- ● Garden bed or containers: For bush beans, use 3–4 feet of space per plant (or 1 foot apart in rows 18–24 inches apart). Containers need at least 10–12 inches of depth.
- ● Trellis or stakes: 5–6 foot tall for pole beans (use galvanized wire, bamboo, or netting).
- ● Garden trowel or transplanting tool for planting seeds.
- ● Mulch (straw or grass clippings) to retain moisture and suppress weeds.
- ● Seedling heat mat (if starting indoors in cool climates).
- ● Row covers to protect young plants from pests or frost.
- ● Bean supports (like tomato cages) for bush beans in windy areas.
- ● Organic pest control: Neem oil or diatomaceous earth for aphids/beetles.
Step-by-Step instructions for planting snap beans
Here’s how to grow vigorous snap bean plants that produce sweet, plump pods all season long.
Prepare the Soil for Optimal Growth
Choose a planting site with full sun—at least 6-8 hours of direct sunlight daily. Snap beans thrive in well-draining soil with a pH between 6.0 and 7.0. Work in a 2-inch layer of compost into the top 6 inches of soil to improve fertility and aeration. Avoid fresh manure, as it can cause the plants to produce too many leaves instead of pods.
Loosen the soil to a depth of 12 inches using a garden fork or tiller. This helps roots penetrate deeply, which is especially important for bush varieties that don’t climb. If your soil is heavy clay, mix in 1-2 inches of coarse sand or perlite to improve drainage. The soil should crumble easily when moist but not feel sticky or compacted.
Plant Seeds at the Right Depth and Spacing
Plant seeds 1 inch deep and 3-4 inches apart in rows that are 18-24 inches apart. For bush varieties, space rows 2-3 feet apart to allow for easy harvesting and airflow. If you’re growing pole beans, plant seeds near 5-6 foot tall trellises or stakes, spacing them 4-6 inches apart along the row.
Drop 3-4 seeds per planting spot and cover lightly with soil. Press gently to ensure good seed-to-soil contact. Thin seedlings to the strongest 1-2 plants per spot once they reach 2-3 inches tall. Water the soil thoroughly after planting to encourage germination, but avoid soaking the seeds themselves.
Provide Consistent Water and Mulch for Healthy Vines
Keep the soil evenly moist but not soggy—snap beans are sensitive to both drought and waterlogged roots. Water 1 inch per week, increasing to 1.5 inches during flowering and pod development. Water at the base of the plants in the early morning to reduce disease risk and allow foliage to dry quickly.
Apply a 2-inch layer of organic mulch, such as straw or shredded leaves, around the base of the plants. This helps retain moisture, suppress weeds, and keep soil temperatures stable. Avoid piling mulch directly against the stems, as this can trap excess moisture and invite rot.
Support and Maintain Plants for Maximum Yield
If growing pole beans, provide trellises or sturdy stakes as soon as the plants reach 6 inches tall. Gently weave vines through the trellis or tie them to stakes with soft plant ties. This keeps plants upright, improves airflow, and makes harvesting easier. Bush varieties don’t need support but benefit from occasional staking if they topple in wind or rain.
Fertilize lightly 4-6 weeks after planting with a balanced, low-nitrogen fertilizer (such as 5-5-5). Too much nitrogen encourages leafy growth at the expense of pods. Watch for pests like bean beetles or aphids—handpick larger insects or spray with neem oil if needed. Remove any yellow or diseased leaves promptly to prevent spread.
Harvest at Peak Sweetness for Best Flavor
Harvest snap beans when pods are 4-6 inches long and crisp, usually 50-60 days after planting. Check plants every 2-3 days—overripe pods quickly become tough and stringy. Use a sharp knife or pruners to cut stems, leaving ½ inch of stem attached. This encourages more pods to form.
Continue harvesting until the first frost, which signals the end of the season. If you’re growing bush beans, you’ll get most of your yield in a 2-3 week window. Pole beans produce over a longer period, so keep picking to encourage continuous production. Store freshly harvested beans in the refrigerator for up to 5 days or blanch and freeze for longer storage.
Tips & tricks for planting snap beans
These simple strategies will help you avoid common mistakes and maximize your snap bean harvest from start to finish.
Soil Preparation Insight: In Step 1, when loosening soil to 12 inches deep, focus on breaking up any hardpan layers that might restrict root growth. I like to test soil moisture by squeezing a handful—it should hold together but not feel sticky. If your soil is sandy, you can add a bit more compost (up to 3 inches) to help retain moisture during dry spells. This extra effort pays off with stronger plants that produce more pods.
Planting Depth and Spacing: The 1-inch planting depth in Step 2 is crucial—seeds need darkness to germinate, but planting too deep can delay sprouting. For bush varieties, I recommend spacing rows 24 inches apart instead of the minimum 18 inches to give plants more room to breathe, especially in humid climates. This reduces disease risk and makes harvesting much easier later on.
Watering Wisdom: When increasing water to 1.5 inches during flowering in Step 3, pay attention to when you water. Early morning is ideal, but if you must water later, do it by mid-afternoon to allow foliage to dry before evening. I've found that using a soaker hose or drip irrigation right at the base of plants prevents wetting the leaves, which helps avoid fungal diseases like rust that can devastate snap bean crops.
Harvesting Timing: The 50-60 day window in Step 5 is your sweet spot for harvesting. I start checking plants every 2 days at 45 days to catch the first pods. The key visual cue is pods that are bright green and snap easily when bent—this is when they're at peak sweetness. Waiting just 1-2 extra days can turn crisp pods into tough, stringy ones that lose their sweet flavor.
Pro Tips for Planting Snap Beans
- These simple strategies will help you avoid common mistakes and maximize your snap bean harvest from start to finish.
- Soil Preparation Insight: In Step 1, when loosening soil to 12 inches deep, focus on breaking up any hardpan layers t...
- Planting Depth and Spacing: The 1-inch planting depth in Step 2 is crucial—seeds need darkness to germinate, but plan...
Frequently asked questions
Got questions about growing snap beans? You’re not alone!
Here are answers to the most common queries—from timing to troubleshooting—to help you grow a thriving crop.
When is the best time to plant snap beans?
Snap beans thrive in warm soil (at least 50°F) and are frost-sensitive. Plant them 2–3 weeks after your last frost date in spring or 8–10 weeks before your first fall frost for a second harvest. In hot climates, opt for late summer planting to avoid heat stress.
How long does it take for snap beans to grow?
From seed to harvest, snap beans typically take 50–60 days for bush varieties and 55–65 days for pole beans. Start checking for pods 10–14 days after flowering—harvest regularly to encourage more production!
Can I plant snap beans in containers or small spaces?
Bush beans grow well in 5-gallon containers (1 plant per 4–6 inches of space), while pole beans need trellises or tall pots (12+ inches deep). Just ensure they get 6–8 hours of sun daily and well-draining soil.
What should I do if my snap beans get holes or yellow leaves?
Holes? Likely bean beetles or slugs—handpick pests or use row covers. Yellow leaves? Check for overwatering, poor drainage, or nutrient deficiency (try a balanced fertilizer). Rotate crops yearly to prevent soil-borne diseases.
Do snap beans need full sun, or can they tolerate partial shade?
Snap beans prefer full sun (6+ hours/day), but they’ll tolerate 4–6 hours in partial shade, especially in hot climates. In shady spots, yields may drop, and pods could taste milder. If shade is unavoidable, choose compact varieties like ‘Blue Lake’.
Wrapping up and next steps
Planting snap beans is a rewarding journey that yields crisp, flavorful pods—perfect for fresh eating or preserving! 🌱 With the right soil, spacing, and care, you’ll enjoy a bountiful harvest in just 60-70 days.
Whether you’re a beginner or seasoned gardener, these tips ensure your beans thrive from seed to table.
Ready to dive in? Start by prepping your garden beds this week, then watch your snap beans grow into a delicious, homegrown success! 🌟