Picking
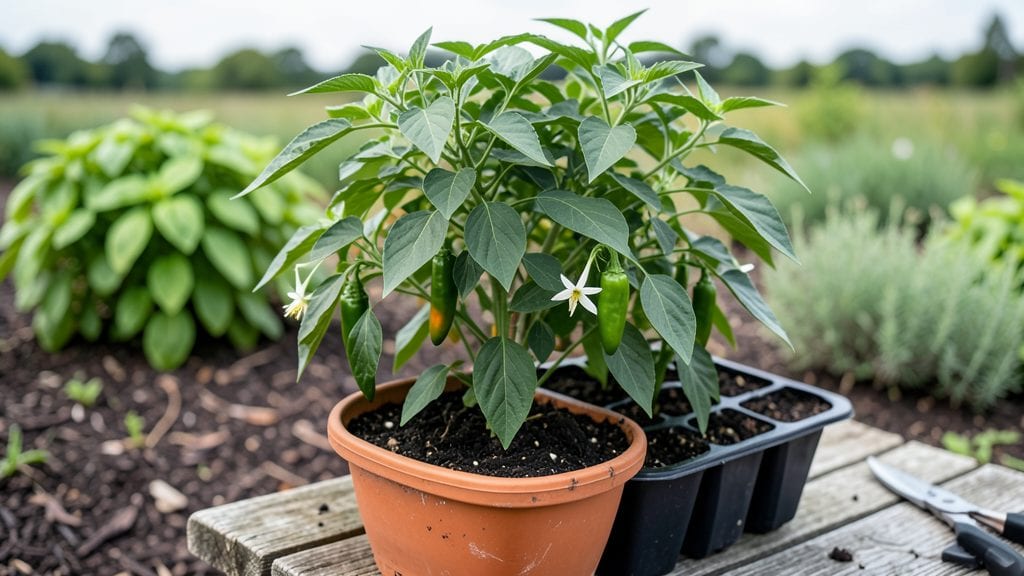
Planting Anaheim peppers is the fastest way to turn your garden into a salsa factory. 🌱 I’ve grown them every year since my first attempt—back when I accidentally planted them too late and still got a harvest—and now I know the exact timing and tricks that guarantee 60-day harvests even for beginners.
The key starts with warm soil and full sun: these peppers won’t tolerate cold or shade. Use well-draining soil mixed with compost, plant seeds ½ inch deep, and space them 12-18 inches apart—closer for containers.
Water consistently but avoid soggy soil, which causes rot. Most gardeners skip this step and end up with leggy plants.
By day 30, you’ll see sturdy green plants with tiny flowers. Prune suckers (those little shoots in the joint) to focus energy on peppers, and watch as long, glossy pods form.
A single plant yields 10-20 peppers, perfect for roasting, stuffing, or drying. The first harvest comes just as summer heats up—no waiting until fall.
Works in raised beds, containers (5-gallon pots minimum), or in-ground gardens. If you’re in a short season, start seeds indoors 8-10 weeks before last frost—that’s how I got my first harvest in Zone 5. Here’s how to nail every step without the guesswork.
📚 In This Guide
- What you need
- Instructions
- Tips and common mistakes
- Wrapping up and next steps
What you need
- ● Anaheim pepper seeds – 5–10 seeds per plant (or 1–2 plants per person if you’re sharing the harvest!). Choose heirloom or hybrid varieties based on your preference.
- ● Well-draining potting mix – 5–10 lbs (for containers) or enrich your garden soil with compost (1–2 lbs per square foot). Anaheims hate soggy roots!
- ● Containers or garden bed – Containers: 5–7 gallon pots (1 per plant) with drainage holes.
- ● Garden beds: Full sun (6+ hours/day) and space 18–24 inches apart.
- ● Fertilizer – Balanced 10-10-10 or organic options like fish emulsion (apply at planting and every 4–6 weeks).
- ● Watering can or hose with gentle nozzle – Aim for 1–1.5 inches of water per week (more in extreme heat).
- ○ Gloves – Protect your hands from prickly stems (optional but highly recommended!).
- ● Trowel or hand shovel – For transplanting seedlings or amending soil.
- ● Pruning shears – To trim leggy plants or remove damaged leaves.
- ○ Stakes or cages (optional) – If your plants grow tall (4–5 feet), support them to prevent toppling.
- ○ Row cover or shade cloth (optional) – For early planting in cooler climates (40–50°F nights).
- ● Warmth! Anaheims love heat—wait until soil temps are 60°F+ (use a soil thermometer if unsure).
- ● Patience – Germination takes 7–14 days in warm soil (80–90°F).
- ● Sunlight – No shortcuts here: full sun is non-negotiable.
Step-by-Step instructions for planting Anaheim peppers
Here’s the foolproof method I’ve used for years to grow bold, flavorful Anaheim peppers—ready for harvest in just 60 days.
🌱 Step 1: Prepare the Soil and Planting Site
Choose a location with full sun exposure (6-8 hours daily) and well-draining soil. Anaheims thrive in soil with a pH between 6.0 and 7.0. Before planting, loosen the top 12 inches of soil with a garden fork or tiller to improve aeration and root penetration.
Amend the soil with 2-3 inches of compost and a handful of balanced organic fertilizer (like 5-5-5) per plant. Work it into the soil until it’s dark and crumbly. Avoid fresh manure—it can burn tender pepper roots. If your soil drains poorly, mix in 1 part perlite or coarse sand per 3 parts soil to prevent waterlogging, which Anaheims despise.
🌱 Step 2: Plant Transplants at the Right Depth and Spacing
Plant your Anaheim pepper transplants after the last frost date, when soil temperatures reach at least 60°F. Dig a hole just deep enough to bury the plant up to its first set of true leaves—no deeper, or the stem may rot. Space plants 18-24 inches apart in rows 24-36 inches apart to allow airflow and prevent disease.
Gently remove the transplant from its container, tease the roots apart if they’re circling, and place it in the hole. Fill the hole with soil, pressing lightly to eliminate air pockets. Water deeply right after planting to settle the soil and encourage root contact. Mulch around the base with 2-3 inches of straw or shredded leaves to retain moisture and suppress weeds.
☀️ Step 3: Water and Fertilize for Optimal Growth
Water Anaheim peppers at the base once a week (or more frequently in extreme heat) to keep the soil consistently moist but never soggy. Aim for 1 inch of water per week, delivered directly to the soil—not the leaves—to prevent fungal diseases like powdery mildew. You’ll know you’re nailing it when the top 1-2 inches of soil feel damp but not wet.
Fertilize lightly every 3-4 weeks with a balanced organic fertilizer (like fish emulsion or worm castings) to support steady growth. Stop fertilizing once peppers begin to form—too much nitrogen late in the season leads to leafy growth at the expense of fruit. Watch for dark green, glossy leaves and sturdy stems; these are signs your plants are thriving.
✂️ Step 4: Prune and Support for Maximum Yield
Remove any suckers (the small shoots that form in the leaf axils) to redirect the plant’s energy into fruit production. Pinch off suckers when they’re still small—no longer than 2-3 inches—to avoid stressing the plant. If your Anaheims grow tall (some varieties reach 3-4 feet), provide support with stakes or cages early to prevent stems from snapping under the weight of peppers.
Prune any yellow or diseased leaves immediately to improve airflow and reduce the risk of infection. You’ll see stronger, bushier plants with fewer but larger peppers when you keep up with this maintenance. Harvest peppers when they reach 5-8 inches long and turn a vibrant green—this ensures peak flavor and encourages the plant to produce more fruit.
🌿 Step 5: Harvest and Extend the Season
Pick Anaheim peppers in the morning when they’re cool and crisp. Use a sharp knife or pruning shears to cut stems, leaving a small portion attached to the plant. This minimizes damage and encourages faster regrowth. You’ll know they’re ready when the peppers feel firm and the skin is smooth—never harvest when wet, as this can promote rot.
To extend the harvest season, protect plants from early frosts with row covers or move potted Anaheims indoors to a sunny windowsill. With proper care, a single plant can yield 10-20 peppers, giving you plenty for fresh eating, roasting, or preserving. Store harvested peppers in a cool, dark place for up to 2 weeks or freeze them whole for later use.
Tips & tricks for perfect Anaheim pepper planting
Growing Anaheim peppers to their full potential takes more than just planting—it’s about understanding the subtle details that turn good harvests into exceptional ones. Here’s what I’ve learned after years of trial and error in my own garden.
Soil Temperature is Non-Negotiable: The instructions call for soil temperatures of at least 60°F before planting, and this isn’t just a suggestion—it’s critical. Cold soil slows root development and makes transplants vulnerable to rot. I always check soil temperature with a thermometer for 3 consecutive days at 60°F before planting. If your soil is cooler, wait it out—rushing leads to weak plants that struggle to establish. Remember, Anaheims are tropical plants at heart and won’t tolerate chilly conditions.
Mulching Strategy for Consistent Moisture: While the instructions mention 2-3 inches of straw or shredded leaves for mulching, I’ve found that adding a thin layer of compost on top of the mulch creates a "mulch blanket" that retains moisture while preventing soil compaction. This is especially important in Step 3 when you’re aiming for that 1 inch of water per week. The compost layer also slowly releases nutrients as it breaks down, giving your plants a steady food supply between fertilizing sessions.
Pruning Timing for Maximum Yield: In Step 4, the instructions mention removing suckers when they’re no longer than 2-3 inches, but here’s the secret timing: do this pruning in the morning hours when the plants are fully turgid with water. Pruned tissue heals faster in cooler morning conditions, and you’ll see new growth appear within 3-5 days. I also recommend using sharp, sterilized pruning shears to prevent introducing diseases through open wounds on the plant.
Harvesting Technique for Longer Production: When harvesting in Step 5, I’ve found that cutting stems just above a leaf node (where leaves attach to the stem) rather than at the base encourages more vigorous regrowth. This simple adjustment can extend your harvest window by 2-3 weeks compared to cutting at the stem base. Plus, it keeps the plant’s energy focused on producing more fruit rather than trying to heal from a severe cut.
Pro Tips for Planting Anaheim Peppers
- Growing Anaheim peppers to their full potential takes more than just planting—it’s about understanding the subtle details that turn good harvests into exceptional ones.
- Soil Temperature is Non-Negotiable: The instructions call for soil temperatures of at least 60°F before planting, and this isn’t just a suggestion—it’s critical.
- This is especially important in Step 3 when you’re aiming for that 1 inch of water per week.
Frequently asked questions
Got questions about growing Anaheim peppers? You’re not alone—these fiery (but mild!) peppers are a gardener’s favorite, but they do come with a few quirks. Below, we’ve rounded up the most common questions to help you grow a thriving crop with confidence.
When is the best time to plant Anaheim pepper seeds?
Anaheim peppers thrive in warm soil, so wait until after the last frost (when nighttime temps stay above 50°F/10°C) to transplant seedlings outdoors. If you’re starting seeds indoors, begin 8–10 weeks before the last frost for a head start. They’re heat-lovers—don’t rush it!
How long does it take for Anaheim peppers to mature?
With the right conditions, Anaheim peppers typically mature in 60–90 days from transplanting. Early varieties can be ready in as little as 60 days, while larger peppers may take closer to 3 months. Keep an eye on color—green turning to red or purple signals ripeness!
Can I grow Anaheim peppers in containers, or do they need a garden bed?
Anaheim peppers adapt well to containers 12–18 inches deep with good drainage. Just ensure the pot gets 6–8 hours of sunlight daily and use a high-quality potting mix. Containers work great for balconies or small spaces—just avoid overcrowding (space plants 18–24 inches apart).
What should I do if my Anaheim pepper plants get pests or diseases?
Common pests like aphids or spider mites can stress your plants, but neem oil or insecticidal soap works wonders. For fungal issues (e.g., powdery mildew), improve airflow and avoid overhead watering. Rotate crops yearly to prevent soil-borne diseases. Healthy soil + consistent care = fewer problems!
Are Anaheim peppers hot? Can I grow milder or hotter varieties?
Anaheim peppers are mild (500–2,500 Scoville units), perfect for stuffing, salsas, or roasting. For hotter peppers, try jalapeños (2,500–8,000 SHU) or serranos (10,000–23,000 SHU). If you want milder heat, harvest greener—they’re less spicy when unripe!
Wrapping up and next steps
Planting Anaheim peppers is a rewarding journey that brings bold flavors to your table in just 60 days! With the right soil, sunlight, and care, you’ll enjoy a bountiful harvest of versatile peppers perfect for stuffing, salsas, or grilling. Don’t wait—start your seeds or transplants today!
🌱 Your Next Step:
Ready to dive in? Grab your seeds, mark your calendar, and get growing! Whether you’re a seasoned gardener or a curious beginner, Anaheim peppers are a fun, fast, and flavorful project. Happy planting—your future meals will thank you! 🌶️✨