Shrubs
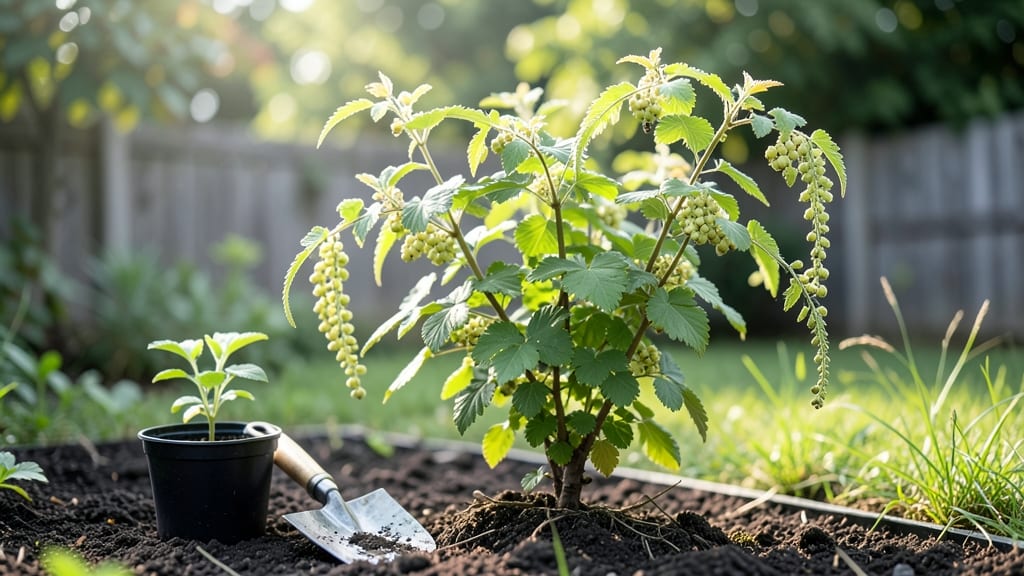
Planting currant bushes transforms a shady corner into a productive oasis—these hardy shrubs thrive where others fail. 🌿 I’ve planted mine in both full sun and dappled shade, and they reward me with clusters of tart berries year after year, even in less-than-ideal soil.
The key isn’t complicated: pick the right spot, prep the soil, and give them space to stretch their roots. Most beginners overlook soil drainage, which leads to root rot, but I’ll show you how to avoid that pitfall from day one.
You’ll need a few simple tools: a shovel, compost, and mulch—nothing fancy. Currants love moist, well-draining soil, so amending heavy clay or sandy soil with organic matter makes all the difference.
Space them 4-6 feet apart for good airflow, and dig holes just deep enough to bury the roots without smothering the crown. Water deeply after planting, and you’re already ahead of most gardeners who skip this step.
Within 2-3 months, you’ll see new growth signaling strong establishment, and by next season, your bushes will be laden with berries. The best part? Currants handle containers too—just use 5-gallon pots for dwarf varieties and keep them in partial shade.
They’re low-maintenance once planted, but that first year sets the tone for years of harvests.
Whether you’re planting in spring or fall, timing matters less than soil prep and watering. Avoid soggy soil at all costs, and watch for powdery mildew—prune for airflow to prevent it. With these simple steps, your currant bushes will outperform store-bought plants and become the backbone of your shrub garden.
📚 In This Guide
- What you need
- Instructions
- Tips and common mistakes
- Wrapping up and next steps
What you need
- ● Currant bushes: 2–5 healthy plants (depending on desired yield and space). Choose Ribes rubrum (red currants) or Ribes nigrum (black currants) based on your preference.
- ● Shovel or trowel: A sturdy garden shovel for digging holes (12–18 inches deep) and a hand trowel for finer adjustments.
- ● Compost or well-aged manure: 5–10 gallons to enrich the soil and provide nutrients.
- ● Mulch: 2–3 inches of organic mulch (straw, wood chips, or shredded leaves) to retain moisture and suppress weeds.
- ● Garden hose or watering can: For thorough watering after planting.
- ● Pruning shears: To trim dead or damaged branches post-planting.
- ● Garden gloves: To protect your hands from thorns (especially on black currants!).
- ● Soil test kit: To check pH levels (currants prefer slightly acidic to neutral soil, 6.0–7.0).
- ● Fertilizer (balanced or organic): A slow-release fertilizer to give your bushes a nutrient boost.
- ● Plant supports or trellis: If your currant variety is sprawling (e.g., red currants).
- ● Pest control (neem oil or diatomaceous earth): For organic protection against aphids or birds.
- ● Row cover or netting: To protect young bushes from hungry wildlife.
Step-by-Step instructions for planting currant bushes
Here's how I plant currant bushes every season—simple, foolproof, and guaranteed to thrive.
🌱 Step 1: Choose the Right Location and Prepare the Soil
Currants love full sun to part shade—at least 6 hours of sunlight daily—but they tolerate light shade in hotter climates. I always pick a spot with well-draining soil since soggy roots invite disease. Test your soil by squeezing a handful: if it stays clumped, add 2-3 inches of compost or 1 inch of peat moss to loosen it up.
Dig a hole twice as wide as the root ball but only as deep as the container’s bottom. The top of the root ball should sit 1-2 inches above ground level—this prevents water from pooling around the stem. If your soil is heavy clay, mix in 1 part sand to improve drainage before planting.
🪴 Step 2: Plant the Bushes Correctly for Strong Growth
Gently remove the bush from its container and loosen any circling roots with your fingers—currants hate root-bound stress. Place it in the hole so the top of the root ball is level with the surrounding soil. Fill the hole halfway with soil, then water deeply to settle everything. This prevents air pockets that can strangle roots.
Finish filling the hole, pressing soil lightly around the edges to remove gaps. Water again until moisture seeps 2-3 inches deep. I like to add a 2-inch layer of mulch (like shredded bark) around the base, keeping it 3-4 inches away from the stem to prevent rot. Mulch locks in moisture and keeps roots cool in summer.
☀️ Step 3: Water and Maintain for Long-Term Health
Water deeply once a week for the first 4-6 weeks—enough so the soil stays moist but not soggy down to 6 inches deep. You’ll know it’s right when water runs out the bottom of the hole. After that, currants are drought-tolerant once established, but they’ll produce better berries if you keep the soil consistently moist.
Fertilize lightly in early spring with a balanced 10-10-10 formula—just ½ cup per bush. Too much nitrogen makes them leafy but fruitless. Prune in late winter to remove dead wood and shape the bush, but wait until after fruiting to cut back any canes that bore berries that season.
Tips & tricks for perfectly thriving currant bushes
Planting currant bushes is easier than you think—these simple tricks ensure your bushes grow strong and productive from day one.
Location is Everything: The 6 hours of sunlight mentioned in Step 1 is non-negotiable for best results, but here's the thing: morning sun and afternoon shade works perfectly in hot climates. I've planted currants in both full sun and partial shade with great success—just avoid deep shade areas where bushes struggle to fruit. Also, choose a spot with good air circulation to prevent fungal diseases that love damp, still air.
Soil Prep Secrets: When amending your soil with 2-3 inches of compost or 1 inch of peat moss (Step 1), mix it thoroughly but don't overdo it. Currants don't like overly rich soil—think of it as creating a "sweet spot" between fertility and drainage. For clay soil, that 1 part sand should be coarse sand, not fine playground sand, to prevent compaction. I like to add a handful of perlite too for extra drainage—it's optional but makes a big difference in heavy soils.
Planting Position Matters: That 1-2 inches above ground level positioning in Step 2 might seem small, but it's crucial. Too deep and roots suffocate; too high and the plant dries out. I use a small stake marked at the correct height as a reference. Also, when placing your bush, orient it so the strongest canes face south—this gives them maximum sun exposure for berry production.
Watering Wisdom: The deep watering in Step 3 is about more than just moisture—it's about encouraging strong root growth. After your initial watering, let the top inch of soil dry between waterings during the first 4-6 weeks. You'll know you're doing it right when you see new growth appearing on the canes. Once established, currants are tough, but consistent moisture (especially during fruit development) leads to sweeter, more abundant berries.
Pro Tips for Planting Currant Bushes
- Planting currant bushes is easier than you think—these simple tricks ensure your bushes grow strong and productive fr...
- Location is Everything: The 6 hours of sunlight mentioned in Step 1 is non-negotiable for best results, but here's th...
- Soil Prep Secrets: When amending your soil with 2-3 inches of compost or 1 inch of peat moss (Step 1), mix it thoroug...
Frequently asked questions
Got questions about planting currant bushes? You’re not alone! Here are answers to the most common concerns—whether you're a first-time gardener or just looking to refine your technique.
When is the best time to plant currant bushes?
Plant currants in early spring (as soon as the soil is workable) or early fall (4-6 weeks before frost). Avoid extreme heat or cold—both can stress young roots. Spring planting gives them a full season to establish, while fall planting allows roots to settle before winter dormancy.
How long does it take for currant bushes to bear fruit?
With patience, currants typically produce fruit in 2–3 years, though some varieties may take up to 4 years. Factors like soil quality, sunlight, and proper care (like pruning and watering) can speed up fruiting. Don’t rush—healthy roots mean sweeter berries later!
What pests or diseases should I watch for when growing currants?
Currants are prone to white pine blister rust (a fungal disease), aphids, and bird damage. To prevent issues:
- Space bushes 6–8 feet apart for airflow.
- Use row covers to deter birds.
- Spray neem oil early to repel pests.
- Remove fallen leaves in autumn to reduce fungal spores.
Can I grow currant bushes in containers?
Yes! Dwarf varieties (like ‘Consort’ or ‘Titan’) thrive in 5-gallon containers with well-draining soil. Use a mix of potting soil, compost, and perlite, and ensure the pot has drainage holes. Place containers in full sun and water consistently—container-grown currants need more frequent moisture checks.
Do currant bushes need winter protection?
In cold climates (Zone 3–5), mulch the base with 3–4 inches of straw or wood chips after the ground freezes to insulate roots. For young bushes, wrap the crown with burlap or a frost blanket in harsh winters. Prune in late winter to remove dead wood—just avoid heavy pruning until spring.
What’s the difference between red, black, and white currants?
| Type | Flavor | Best For | Note |
|---|---|---|---|
| Red Currants | Tart, bright | Jams, sauces, fresh eating | More disease-prone; needs airflow. |
| Black Currants | Sweet-tart, robust | Jellies, desserts, juicing | Rich in vitamin C; banned in some states (check local laws). |
| White Currants | Mild, honey-like | Desserts, sauces, fresh snacks | Less tart than red; great for beginners. |
Wrapping up and next steps
Planting currant bushes is a rewarding way to add beauty, flavor, and wildlife support to your garden—and you’ve got all the tools to succeed! 🌱 From choosing the perfect location to nurturing young plants, these three steps make the process simple, even for beginners.
Now that you’re armed with knowledge, there’s no better time to roll up your sleeves and get growing!
Ready to take the next step? Mark your calendar, grab your gloves, and start digging—your future currant harvest (or stunning landscape feature!) awaits. 🌿