Blooming
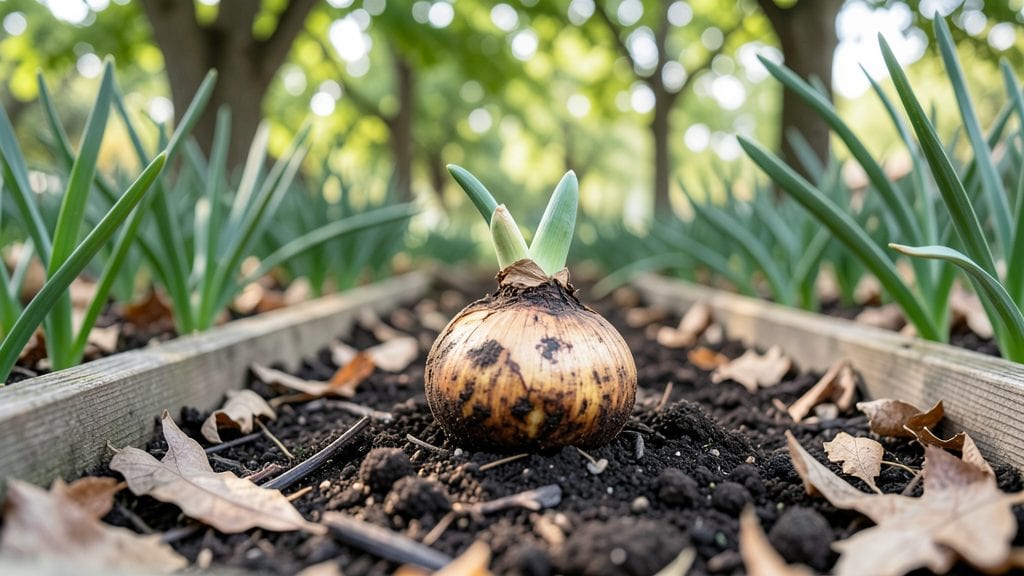
Planting hyacinths outdoors delivers those jaw-dropping purple spikes that make every spring unforgettable. 🌸 I’ve turned my front yard into a parade of color by following three straightforward steps—no fancy tools or green thumbs required.
The real secret? Getting the timing, soil, and depth just right so the bulbs wake up hungry for blooms.
You’ll need well-draining soil, a sunny spot with morning light, and a trowel—plus a little patience. Most people overlook the soil prep, but amending with compost makes all the difference.
Plant bulbs 6 inches deep and 4-6 inches apart in fall, and by spring, you’ll have a fragrant explosion of color that lasts weeks. Even my first attempt produced blooms that had neighbors stopping to ask questions.
What you’ll end up with is a garden that smells like spring before the first warm day arrives. The bulbs multiply over time, so each year you get more blooms for less effort.
Just avoid soggy soil and crowded clumps, and you’re golden. The payoff? A showstopping display that’s easier than you’d think.
Works in zones 3-9 and thrives in containers too—perfect for small spaces or urban gardens. Once you’ve mastered this, you’ll never buy hyacinths at the store again. Here’s exactly how to make it happen without the guesswork.
📚 In This Guide
- What you need
- Instructions
- Tips and common mistakes
- Wrapping up and next steps
What you need
- ● Hyacinth bulbs: Choose healthy, firm bulbs (size 12-14 cm or larger for best blooms). Quantity: 1 bulb per 4-6 inches of space (or follow spacing guidelines for your variety).
- ● Well-draining potting soil or garden soil: Mix in compost or organic matter (1 part compost to 3 parts soil) for nutrient-rich soil. Quantity: Enough to fill your planting area to 2-3 inches above the bulbs.
- ● Garden trowel or bulb planter: A sharp, sturdy trowel (6-8 inches long) for digging holes with clean edges.
- ● Garden gloves: Nitrile or leather gloves to protect your hands from dirt and sharp bulb edges.
- ● Watering can or hose with a gentle spray nozzle: For deep but controlled watering (avoid blasting bulbs).
- ○ Mulch (optional but recommended): Straw, shredded bark, or pine needles (2-3 inches thick) to insulate bulbs and retain moisture.
- ● Sunlight: Full sun to partial shade (6+ hours of sunlight daily for vibrant blooms).
- ● Climate: Plant in fall (6-8 weeks before first frost) for optimal root growth before winter.
- ● Soil temperature: Below 60°F (15°C)—hyacinths need a cooling period to bloom.
- ● Drainage: Avoid soggy soil! Ensure your garden bed or container has drainage holes if using pots.
- ● Bulb fertilizer: A slow-release bulb fertilizer (like 10-10-10) mixed into the soil at planting time.
- ● Plant markers: Biodegradable labels to track varieties (especially if planting multiple colors!).
- ● Pest deterrents: Copper tape or diatomaceous earth to prevent slugs/snails from munching on bulbs.
- ● Container gardeners: Large pots (at least 6 inches deep) with drainage for urban planting.
Step-by-Step instructions for planting hyacinths outdoors
Here's how to plant these fragrant bulbs for showstopping spring color—no fuss, just results.
🌱 Step 1: Choose the Right Spot and Prepare the Soil
Hyacinths thrive in full sun to partial shade, with at least 6 hours of sunlight daily. Pick a location where they'll get morning sun and afternoon shade if your climate runs hot. The soil should drain well—hyacinths rot quickly in soggy ground. If your soil is heavy clay, mix in 2-3 inches of compost to improve drainage and fertility.
Loosen the soil to a depth of 12 inches with a garden fork or trowel. Break up any compacted layers so roots can push through easily. The ideal planting time is 6-8 weeks before your first expected frost, when soil temperatures drop below 60°F. This gives bulbs time to establish roots before winter dormancy.
🪴 Step 2: Plant Bulbs at the Correct Depth and Spacing
Hyacinth bulbs should go in 6 inches deep and 4-6 inches apart. Dig holes with a bulb planter or trowel, placing the bulb with its pointed end facing upward. If you're unsure which end is up, the roots will naturally grow downward. I like to plant them in small groups of 3-5 for a natural, clustered look—this mimics their wild growth patterns.
Cover the bulb completely with soil and press gently to eliminate air pockets. Water thoroughly after planting to settle the soil and encourage root growth. You'll see tiny green shoots emerge in early spring, signaling the bulb has successfully rooted. Avoid fertilizing at planting—hyacinths store all their energy in the bulb and don't need extra nutrients to establish.
☀️ Step 3: Mulch and Maintain Through the First Season
Spread a 2-inch layer of mulch over the planting area to protect bulbs from freezing temperatures and retain moisture. Use shredded bark or straw—avoid dense mulch that could suffocate emerging shoots. In late winter, when you see the first signs of green growth, remove half the mulch to allow shoots to push through easily.
Water moderately during the growing season, keeping the soil evenly moist but not soggy. You'll know it's time to water when the top 1-2 inches of soil feel dry to the touch. Stop watering completely once the foliage yellows and dies back in early summer. This signals the bulb is storing energy for next year's blooms. Resist the urge to cut back the leaves—let them photosynthesize until they turn brown naturally.
Tips & tricks for perfect hyacinth planting
These simple tricks will help you grow showstopping hyacinths with minimal effort—no green thumb required.
Soil Preparation Secret: The 12-inch deep loosening in Step 1 isn't just about depth—it's about creating air pockets. Use a garden fork to gently break up the soil rather than digging aggressively. Think of it like fluffing a pillow: you want soft, airy soil that roots can easily penetrate. If your soil is particularly dense, add an extra inch of compost to help with drainage.
Planting Depth Visual: For the 6-inch planting depth in Step 2, here's my trick: hold the bulb next to your hand. The top of the bulb should align with the base of your thumb when your fingers form a "C" shape around it. This ensures consistent depth without guessing. Remember, deeper isn't better—hyacinths need that specific depth to thrive.
Mulch Timing: That 2-inch mulch layer in Step 3 is crucial, but timing matters. Apply it right after planting while the soil is still moist from watering. This creates a protective barrier immediately. In late winter, when you see those first green shoots, remove about half the mulch—this prevents suffocation while still protecting roots from temperature swings.
Watering Wisdom: The top 1-2 inches of soil being dry is your cue, but don't rely solely on feel. I keep a small trowel handy to check moisture levels. Water deeply but infrequently—hyacinths hate soggy conditions. Once the foliage yellows, cut back completely on watering. This signals the bulb to focus on storing energy for next year's blooms rather than growing leaves.
Pro Tips for Planting Hyacinths Outdoors
- These simple tricks will help you grow showstopping hyacinths with minimal effort—no green thumb required.
- Soil Preparation Secret: The 12-inch deep loosening in Step 1 isn't just about depth—it's about creating air pockets.
- Planting Depth Visual: For the 6-inch planting depth in Step 2, here's my trick: hold the bulb next to your hand.
Frequently asked questions
Got questions about planting hyacinths outdoors?
You’re not alone! Here are answers to the most common concerns—from timing to troubleshooting—to help you grow vibrant blooms with ease.
When is the best time to plant hyacinths outdoors?
Plant hyacinth bulbs in fall (6–8 weeks before the first frost) for spring blooms. In warmer climates (zones 7–9), plant in late fall or early winter. Avoid planting in summer—they need cold dormancy to thrive!
Can I plant hyacinths in pots instead of the ground?
Hyacinths grow beautifully in containers (6+ inches deep) with drainage holes. Use well-draining potting mix, and plant 3–4 bulbs per 6-inch pot. Just move pots to a cool, dark spot after planting until spring.
Why aren’t my hyacinths blooming?
Common culprits:
- Not enough sunlight (they need 6+ hours daily).
- Poor drainage (waterlogged soil rots bulbs).
- Overcrowding (plant bulbs 4–6 inches apart).
- Lack of winter chill (they need cold dormancy).
What’s the best companion plant for hyacinths?
Pair hyacinths with low-growing perennials like heuchera, ajuga, or creeping thyme to avoid shading. Avoid tall plants—they’ll compete for sunlight and nutrients. For a pop of color, try tulips or daffodils nearby!
Can I replant hyacinth bulbs after they bloom?
Yes! After blooms fade, let foliage die back naturally (6–8 weeks). Dig up bulbs, store them in a cool, dry place, and replant next fall. This rejuvenates bulbs and encourages bigger blooms. Pro tip: Fertilize lightly in spring to boost next year’s flowers!
Wrapping up and next steps
Planting hyacinths outdoors is a rewarding way to welcome vibrant spring blooms into your garden with minimal effort! 🌸 With the right soil, sunlight, and timing, these fragrant flowers will thrive and brighten up your landscape in no time. Now that you’re equipped with the know-how, why not grab those bulbs and get growing?
- Next step: Mark your calendar for fall planting (or spring in mild climates) and prepare your garden bed—your future floral display is just a few months away!