Orchid Care
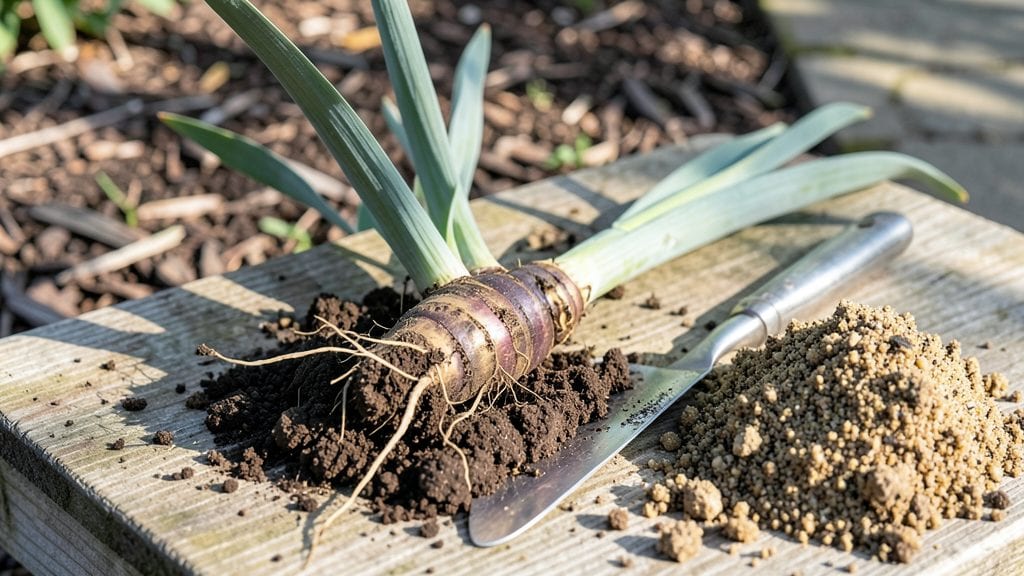
Planting iris roots in early fall gives them time to establish before winter’s chill—something I learned after my first batch of spring-planted irises flopped. The secret isn’t just digging a hole; it’s about soil prep, root orientation, and knowing when to stop fussing.
I’ve planted dozens since then, and the ones that follow these steps bloom like clockwork by May.
You’ll need a sunny spot with well-draining soil (irises hate soggy roots), a shovel, and a handful of compost mixed in. Dig holes 12 inches deep and 12 inches apart—enough room for roots to spread without crowding.
The rhizomes (those thick, fleshy roots) should sit just above soil level, never buried deep. Too much dirt smothers them; too little leaves them exposed.
After planting, water lightly to settle the soil, then mulch with 2-3 inches of straw to protect roots through winter. No need for fancy fertilizers the first year—just let them focus on growing.
By spring, you’ll see sword-like leaves emerging, and by late spring, those classic iris blooms appear like magic. Patience pays off here.
For experienced gardeners, divide clumps every 3-4 years to prevent overcrowding, and fertilize lightly in early spring. Beginners? Stick to the basics—good soil, proper depth, and a little winter mulch. That’s all it takes for irises to thrive and multiply for years.
📚 In This Guide
- What you need
- Instructions
- Tips and common mistakes
- Wrapping up and next steps
What you need
- ● Iris rhizomes: Healthy, firm roots (1-3 per hole, depending on size). Pro tip: Choose rhizomes with at least one fan of leaves and visible buds!
- ● Garden soil: Well-draining, slightly sandy loam (or amend clay soil with compost/sand). Aim for 10-20 gallons per 10 sq ft.
- ● Shovel or trowel: A 6-inch garden trowel for precision or a broad shovel for larger beds.
- ● Garden gloves: Heavy-duty to protect hands from sharp rhizome edges.
- ● Bone meal or balanced fertilizer (5-10-5): 1-2 tbsp per rhizome to boost root growth.
- ● Watering can or hose: With a gentle spray nozzle for even moisture.
- ○ Mulch (optional but recommended): 2-3 inches of straw or shredded bark to retain moisture and suppress weeds.
- ● Soil pH test kit: Irises thrive in 6.0-7.0 pH—adjust with lime or sulfur if needed.
- ● Root stimulator: Like mycorrhizal fungi or kelp meal to supercharge growth.
- ● Row marker flags: To label varieties if planting multiple types.
- ● Knee pads: For comfort during long planting sessions!
Instructions for planting iris roots: a seasonal timeline
Here’s the straightforward approach I use to ensure irises thrive and bloom reliably each spring.
Prepare the Planting Site in Early Fall
Choose a location with full sun exposure—at least 6 hours of direct sunlight daily—and well-draining soil. Irises hate soggy roots, so avoid low spots where water pools. If your soil is heavy clay, mix in 2-3 inches of coarse sand or perlite per planting hole to improve drainage. I like to test drainage by digging a 6-inch deep hole, filling it with water, and watching how quickly it drains—if it takes more than 30 minutes, amend the soil further.
Loosen the soil to a depth of 12 inches with a garden fork or tiller. This breaks up compacted layers and encourages root growth. Work in a 2-inch layer of compost to provide nutrients without overwhelming the irises. The goal is loose, airy soil that mimics their natural habitat in meadows and prairies.
Divide and Inspect the Roots Before Planting
Inspect your iris roots for any signs of rot, mushy spots, or pest damage—discard any that look unhealthy. Healthy roots should be firm with fleshy, white rhizomes (the thick, horizontal stems) and tight, brownish-purple buds at the top. If your clump is overcrowded (more than 3-4 fans per rhizome), gently separate them with your hands or a clean knife, ensuring each division has at least one fan of leaves and a healthy bud. I always plant the largest, most vigorous divisions first—they establish faster and bloom more reliably.
Trim any damaged or overly long roots with sterilized pruners, cutting at a 45-degree angle to reduce water pooling. This step prevents disease and encourages the plant to focus energy on new growth. Avoid cutting healthy roots—only remove what’s clearly compromised.
Plant the Rhizomes at the Correct Depth and Angle
Position each rhizome so the top third is exposed—this means about one-third of the rhizome should sit above the soil line. Planting too deep suffocates the buds and delays blooming, while burying them too shallowly exposes them to rot. Dig a hole 2-3 inches deep and place the rhizome with the buds facing upward and the roots fanning downward. Space rhizomes 12-18 inches apart in rows, allowing room for future growth.
Gently firm the soil around the rhizome but avoid compacting it—you want the roots to settle naturally. Water lightly after planting to help the soil settle, but don’t soak it. Overwatering at this stage can cause the rhizomes to rot before they establish. A good rule of thumb is to water just enough to moisten the soil 1-2 inches deep—no more.
Mulch and Protect Through Winter
Apply a 2-inch layer of mulch around the base of the plants, keeping it 3-4 inches away from the rhizomes to prevent rot. I use straw or shredded leaves because they break down slowly and improve soil structure over time. Mulching now insulates the roots from extreme temperature swings and retains moisture during dry spells. In colder climates, add an extra 1-2 inches of mulch in late fall to protect against freezing.
Label your planting spots if you have multiple varieties—iris blooms vary so much that you’ll forget which is which next spring! I use biodegradable plant markers tucked into the soil beside each clump. Avoid heavy fertilizers in the first year; irises prefer lean soil. Instead, side-dress with a light application of compost in early spring once new growth appears.
Monitor and Maintain for First-Year Establishment
Water deeply once a week during the first growing season, aiming for 1 inch of water per week. Irises are drought-tolerant once established, but young plants need consistent moisture to develop strong roots. You’ll know you’re watering correctly when the soil 1-2 inches below the surface feels evenly moist but not soggy. Avoid overhead watering, which can encourage fungal diseases—water at the base instead.
In late spring, as the foliage begins to yellow and die back, cut it back to 6 inches tall but leave the leaves until they turn brown naturally. This might seem counterintuitive, but the leaves feed the rhizomes for next year’s blooms. If you remove them too early, you’ll sacrifice next season’s flowers. Once the leaves are completely brown and crispy, you can trim them down to 2 inches above the rhizome for a clean look.
Tips & tricks for planting iris roots
These little details make all the difference between irises that struggle and ones that thrive year after year. I've learned these through trial and error over many spring gardens.
Soil Test First: Before amending your soil in Step 1, grab a handful of your native soil and squeeze it tightly. If it holds its shape for more than 30 minutes after the drainage test, you definitely need that 2-3 inches of sand or perlite. The goal is soil that crumbles easily when dry—this mimics the loose, airy conditions irises love in their natural prairie habitats. I've seen irises rot in heavy clay because the roots couldn't breathe properly.
Division Timing: When dividing crowded clumps in Step 2, aim to do this in early fall when the foliage has died back but before the first hard frost. This gives the new divisions 4-6 weeks to establish roots before winter. I've made the mistake of waiting too late—those late-divided rhizomes often freeze or fail to root properly. If you must divide in spring, do it immediately after blooming when the leaves are still green and actively growing.
Planting Angle Matters: In Step 3, that 45-degree angle when cutting roots isn't just for looks—it prevents water from pooling on the cut surface. Think of it like creating a little roof to shed water. When positioning the rhizomes, make sure the buds point slightly upward (about 15 degrees) rather than perfectly vertical. This subtle angle helps rainwater run off instead of sitting on the buds, which would cause rot.
Mulch Strategy: The 2-inch layer of mulch in Step 4 is perfect, but here's what I've learned about placement: keep that mulch mound about 3-4 inches away from the actual rhizome base. Too close and you'll suffocate the plant. I like to create a little donut shape of mulch around each plant, leaving the center area bare. This prevents rot while still protecting the roots from temperature swings. In particularly cold climates, I'll add that extra 1-2 inches only after the ground freezes to avoid encouraging rot before winter.
Pro Tips for Planting Iris Roots
- These little details make all the difference between irises that struggle and ones that thrive year after year.
- Soil Test First: Before amending your soil in Step 1, grab a handful of your native soil and squeeze it tightly.
- Division Timing: When dividing crowded clumps in Step 2, aim to do this in early fall when the foliage has died back but before the first hard frost.
Frequently asked questions
Got questions about planting iris roots? You’re not alone—even experienced gardeners have curiosities! Here are some of the most common concerns, answered in plain terms to help you get those irises thriving.
When is the best time to plant iris roots?
The ideal window is late summer to early fall (August–October), giving roots time to establish before winter. If you miss this, plant in early spring (March–April) before new growth starts. Avoid planting in hot summer months—roots can dry out or rot.
How do I know if my iris roots are healthy before planting?
Healthy iris roots should be plump, firm, and white or light tan. Avoid roots that are shriveled, mushy, or black—these signal rot or pest damage. Trim any dry, brown tips with clean shears, but leave the main root structure intact.
Can I plant iris roots in winter? What if I live in a cold climate?
Winter planting is risky unless your climate is mild (Zone 7+). In colder areas, plant in early fall and mulch heavily (3–4 inches) to protect roots. If you must plant in winter, do so in snow-free, thawed soil and cover with straw until spring.
What if my iris roots don’t bloom the first year?
Don’t panic! Iris roots often take 1–2 years to establish and bloom. Focus on well-draining soil, full sun (6+ hours/day), and minimal fertilizer (too much nitrogen = more leaves, fewer flowers). Patience pays off!
Are there alternatives to planting bare iris roots?
Yes! You can plant iris rhizomes (the thick, horizontal roots) or even potted irises (transplant in spring/fall). For instant color, try bearded iris divisions—just ensure each section has fan-shaped leaves and a root system.
My iris leaves are turning yellow—what’s wrong?
Yellowing leaves often mean overwatering, poor drainage, or fungal issues. Check soil moisture (roots should be slightly firm, not soggy) and ensure your planting spot has sandy or gravelly soil. If fungus is suspected, treat with neem oil or copper fungicide.
Still stumped? Drop your question in the comments—we’re happy to help your irises get their bloom on!
Wrapping up and next steps
Planting iris roots is your ticket to a show-stopping spring display—just follow the right steps, and you’ll be rewarded with vibrant blooms year after year! 🌸 Whether you’re a beginner or a seasoned gardener, timing, soil prep, and patience are your best friends.
Now that you’re armed with the know-how, grab those rhizomes and get ready to transform your garden into a colorful paradise.
Your next step? Mark your calendar for early fall or late winter planting and watch your irises thrive! 🌱 Need extra help? Check out our FAQs or dive into aftercare tips to keep those blooms coming back bigger and brighter.