Pruning
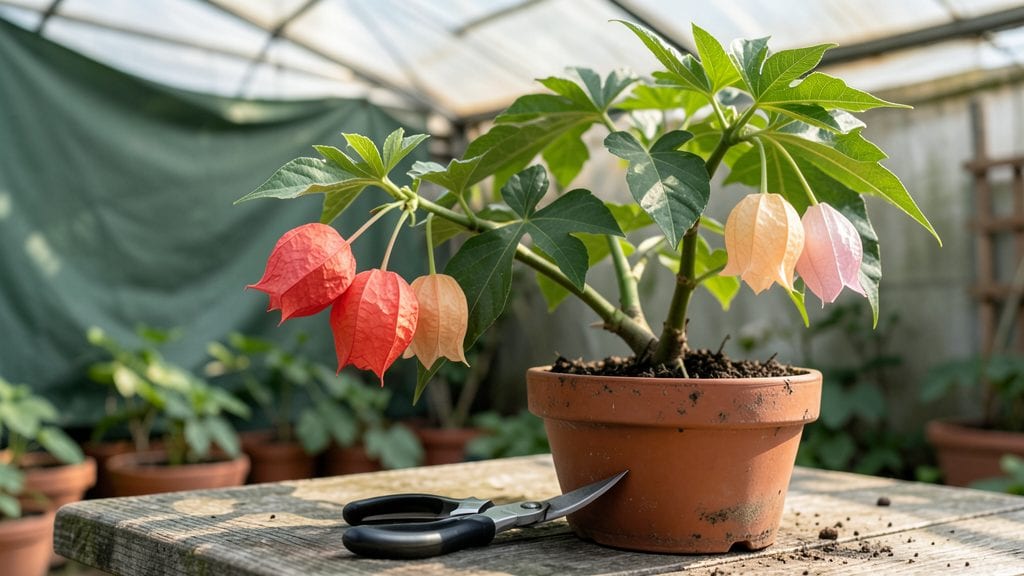
Pruning abutilon plants transforms them from straggly shrubs into year-round blooming showstoppers—and the secret lies in timing and technique. 🌿 I’ve pruned these vibrant "Chinese lantern" plants for years, and the difference between a leggy mess and a bushy, flower-covered beauty comes down to three key cuts: shaping in early spring, light trims after blooms, and a hard reset if they get too wild.
The payoff? Flowers from late spring through frost, with minimal deadheading needed.
The tools you’ll need are simple: clean, sharp pruners (dull blades crush stems), a small pair of scissors for delicate work, and a spray bottle of diluted rubbing alcohol to sterilize between cuts. Abutilons respond best to cuts just above a leaf node—this encourages new growth where you want it.
For overgrown plants, don’t panic: you can safely remove up to one-third of the plant in a single session, though I recommend spreading it over two sessions if it’s severely neglected.
What you’ll end up with is a plant that stays compact, produces more flowers than foliage, and recovers quickly after trims. The flowers—those bright, lantern-shaped blooms—will appear within 4-6 weeks of pruning, and the plant’s natural shape becomes more defined with each trim.
Even if you’ve let yours get out of control, a strategic approach can revive it in just a few months.
This method works for all abutilon varieties, whether grown in containers or garden beds, and adapts to different climates—just adjust timing slightly for early or late frosts. The key is consistency: a little attention now means nonstop color all season long. Ready to give your abutilon the pruning it deserves?
📚 In This Guide
- What you need
- Instructions
- Tips and common mistakes
- Wrapping up and next steps
What you need
- ● Pruning shears: Sharp, bypass-style shears (4-6" blades) for clean cuts. Dull blades crush stems—avoid at all costs!
- ● Hand pruners: Small, ergonomic pruners (3-4") for tight spaces or delicate trims.
- ● Disinfectant: 70% isopropyl alcohol or rubbing alcohol to sterilize tools between cuts (prevents disease spread).
- ● Gloves: Garden gloves (nitrile or leather) to protect hands from thorns and sap.
- ● Sharpie or marker: For labeling cuttings if propagating.
- ○ Bucket or tray: To collect clippings (optional but handy for composting or propagation).
- ● Loppers: For thicker stems (if your abutilon has woody growth).
- ● Rooting hormone: To boost success if propagating from cuttings.
- ● Hose or spray bottle: To rinse tools and clean sap off hands.
- ● Plant tie or twine: For supporting leggy stems post-prune (if needed).
- ● Notebook: To jot down pruning notes (e.g., "pruned in March—bloomed by May!" for tracking growth).
Step-by-Step guide to pruning abutilon for continuous blooms
Here's my foolproof method for keeping your abutilon lush and flowering year-round.
✂️ Step 1: Understand the Right Time to Prune
Prune your abutilon in early spring before new growth begins—that’s when the plant is most resilient. You can also do a light trim in late summer to encourage another flush of blooms. Never prune in fall or winter, as the plant needs its energy to store for next year’s growth. Look for new buds forming at the leaf nodes—these are your signal that it’s time to shape the plant.
If you miss the spring window, don’t panic. Abutilons are forgiving, but avoid heavy pruning after mid-summer, as the plant won’t have enough time to recover before dormancy. Instead, focus on deadheading spent blooms throughout the season to keep flowers coming.
✂️ Step 2: Sterilize Tools and Remove Dead or Weak Growth
Before you cut, sterilize your pruning shears with rubbing alcohol to prevent disease spread. Start by removing any dead, diseased, or crossing branches—these compete with healthy growth and can invite pests. Cut back to a leaf node (the bump where leaves and stems meet) just above a set of healthy leaves. This ensures the plant can regenerate new growth from that point.
If a branch is woody or bare, trim it back to a spot where you see green growth or buds. Avoid leaving stubs—always make clean cuts at a 45-degree angle just above a node. This encourages the plant to branch out and fill in more densely.
✂️ Step 3: Shape the Plant for Airflow and Light Penetration
Step back and assess the plant’s shape. Abutilons respond well to open, rounded forms, so aim to create a balanced silhouette with space between branches. Focus on inner growth—this is where light and air struggle to reach, leading to leggy or sparse blooms. Trim back one-third of the oldest growth to encourage new, vigorous shoots from the base.
If your abutilon is becoming too tall or leggy, cut back the longest stems by half. This forces the plant to redirect energy into shorter, bushier growth with more flowering sites. Avoid over-pruning—never remove more than one-third of the plant’s total foliage in a single session.
✂️ Step 4: Encourage Blooms with Strategic Trims
To keep flowers coming, pinch back new growth in early summer when stems reach 6-8 inches tall. This redirects energy into lateral buds, producing more branches and blooms. Look for new shoots emerging from the leaf axils—these are your future flowering sites. Trim just above a set of leaves to promote branching.
Throughout the season, deadhead spent blooms by cutting back to the nearest leaf node. This prevents the plant from wasting energy on seed production and encourages more flowers. You’ll notice new buds forming within 2-3 weeks after a light trim—this is your reward for staying on top of maintenance.
💧 Step 5: Post-Pruning Care for Strong Recovery
After pruning, water deeply to help the plant recover. The roots need moisture to support new growth, but avoid overwatering—let the top inch of soil dry out between waterings. Fertilize with a balanced, water-soluble fertilizer (10-10-10) to give the plant the nutrients it needs to bounce back quickly.
Place your abutilon in bright, indirect light for the first week after pruning. This reduces stress and helps the plant focus on regrowing. Once new shoots appear (usually within 2-3 weeks), you can gradually reintroduce it to full sun. Keep an eye out for new leaves unfurling—this is your sign that the pruning was successful.
Tips & tricks for perfect abutilon pruning
A few strategic adjustments can transform your abutilon from a leggy, sparse bloomer into a lush, year-round flowering powerhouse.
Timing Secret: The early spring window is your golden opportunity—this is when your abutilon's energy reserves are fully replenished from winter. I've seen dramatic differences when pruning at this exact time versus waiting until summer. If you miss spring, don't panic, but avoid heavy cuts after mid-summer as the plant needs time to harden off before dormancy. Think of it like giving your plant a fresh start rather than a mid-season makeover.
Visual Cue for Pruning: In Step 1, when you're looking for new buds at leaf nodes, focus on the ones that appear slightly swollen or plump compared to the rest. These are your growth signals. I learned this the hard way after pruning too early and getting sparse regrowth. The buds should be visible but not yet open—this indicates the plant is ready for shaping.
Cutting Technique: That 45-degree angle in Step 2 isn't just for looks—it's a water-shedding strategy. The angled cut prevents water from pooling at the cut site, which reduces rot risk. When trimming back to leaf nodes, make sure you're cutting just above a set of healthy leaves that face outward. This creates an open growth habit that improves airflow and light penetration throughout the plant's interior.
Recovery Strategy: After your pruning session, the first week of bright indirect light is absolutely critical. I've seen plants that struggled because they were immediately moved back to full sun. The bright light helps the plant focus its energy on regrowth rather than trying to protect itself from potential sunburn. You'll know you're on the right track when you see those first new leaves unfurling within 2-3 weeks.
Pro Tips for Pruning Abutilon Plants
- A few strategic adjustments can transform your abutilon from a leggy, sparse bloomer into a lush, year-round flowering powerhouse.
- Timing Secret: The early spring window is your golden opportunity—this is when your abutilon's energy reserves are fully replenished from winter.
- Visual Cue for Pruning: In Step 1, when you're looking for new buds at leaf nodes, focus on the ones that appear slightly swollen or plump compared to the rest.
Frequently asked questions
When is the best time to prune my abutilon?
Prune your abutilon twice a year: once in early spring (just as new growth starts) to shape the plant and encourage bushiness, and again in late summer/early fall (after blooming) to remove spent flowers and leggy stems. Avoid heavy pruning in winter—your plant’s resting!
How much can I cut back my abutilon without harming it?
You can be bold! Cut back up to 1/3 of the plant’s height in spring to promote dense growth and more blooms. For mature plants, don’t hesitate to trim 2/3 of the leggy stems—they’ll bounce back with vigorous new shoots. Just avoid over-pruning in one session to prevent shock.
My abutilon isn’t blooming after pruning. Did I do it wrong?
Not necessarily! Abutilons need 6+ hours of sunlight daily and regular fertilization (use a balanced 10-10-10 or bloom booster) to reward you with flowers. If you pruned too late in the season, blooms may not form until next year. Also, check for pests (like spider mites) or underwatering, which can stress the plant.
Can I propagate my abutilon from pruned cuttings?
Pruning is a free way to multiply your plants. Dip 4–6 inch cuttings in rooting hormone (or cinnamon for a natural boost), then place them in moist potting mix or water. Keep them in bright, indirect light and maintain humidity (a plastic bag works!). Roots should form in 2–4 weeks.
What should I do if my abutilon looks sad after pruning?
Don’t panic! Abutilons are resilient. If your plant looks wilting or droopy, it might be adjusting. Water lightly (avoid soggy soil) and place it in bright, indirect light for a few days. If yellow leaves appear, it could signal over-pruning—trim less aggressively next time. A foliar spray with seaweed fertilizer can also help it recover faster.
Pro Tip:
Label your pruned cuttings! Abutilons come in dozens of colors (orange, pink, red, even bicolor), and it’s easy to mix them up. Use toothpicks and masking tape to keep track—your future garden (and Instagram feed) will thank you!
Wrapping up and next steps
Pruning your abutilon plants doesn’t have to be intimidating—with the right timing, tools, and techniques, you’ll unlock a cascade of vibrant blooms all year long! 🌸 Remember, consistency is key: light trims in spring, shaping cuts in summer, and strategic pruning in fall will keep your plant lush and flowering.
Whether you’re a seasoned gardener or just starting out, a little patience and practice will yield stunning results.
Now that you’re armed with knowledge, grab those shears and get pruning! Watch your abutilon thrive, and don’t forget to share your progress—your green thumb is about to shine brighter than ever. 🌿✨