Container Gardens
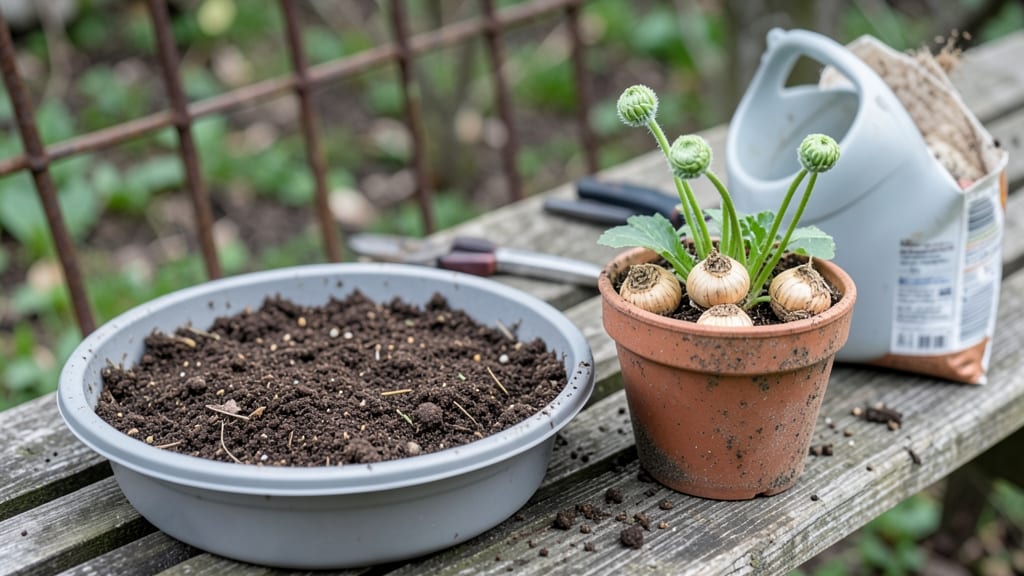
Planting ranunculus tubers unlocks a spring explosion of papery blooms that look like they belong in a fairy tale. ✨ I’ve planted them every year since my first container garden, and they’re the secret weapon for instant color—no waiting for seeds to sprout.
The key is getting those little tubers in the ground at the right time and depth, which is where most beginners trip up.
You’ll need well-draining soil mix, containers with drainage holes, and a sunny spot that gets at least 6 hours of light daily. Ranunculus tubers aren’t like seeds—they need to be planted 2-3 inches deep, with the pointed end up (trust me, this matters).
The best time to plant is 4-6 weeks before your last frost, so they’ll bloom by late spring or early summer.
After planting, keep the soil lightly moist but never soggy—these tubers hate wet feet. In 6-8 weeks, you’ll see those first shoots pushing through the soil, and by early summer, you’ll have football-sized clusters of blooms in shades of pink, red, and white.
The secret to repeat blooms? Deadhead spent flowers and fertilize lightly every few weeks.
Containers work perfectly for ranunculus because they drain well and let you move them to the best spot. Just avoid overcrowding—space tubers 2-3 inches apart in the pot. If you’ve ever struggled with finicky annuals, these tubers are the easy fix for long-lasting, drama-worthy blooms with almost no fuss.
📚 In This Guide
- What you need
- Instructions
- Tips and common mistakes
- Wrapping up and next steps
What you need
- ● Ranunculus tubers: 10–15 tubers per container (depending on size; larger containers = more tubers). Choose certified disease-free tubers from a reputable supplier.
- ● Well-draining potting mix: 2–3 gallons (adjust based on container size). Opt for a blend with perlite or sand (20–30% by volume) to prevent rot.
- ● Containers: 1–2 per planter (12–18" deep, with drainage holes). Terracotta or fabric pots work best for airflow.
- ● Slow-release fertilizer: 1–2 tbsp per container (look for a balanced 10-10-10 or high-phosphorus option like 5-10-10).
- ● Gloves: A pair (gardening or nitrile) to protect your hands from sharp tuber edges.
- ● Trowel or small shovel: For digging and planting tubers gently.
- ● Watering can or spray bottle: With a fine rose nozzle to avoid displacing tubers.
- ● Measuring cup or scoop: For accurate fertilizer and soil portions.
- ● Mulch (straw or pebbles): To retain moisture and regulate soil temp.
- ● Plant labels: To track varieties (e.g., "Buttercup Mix" or "Persian Pink").
- ● Grow lights (if indoors): 12–14 hours of cool-white LED light per day until sprouting.
- ● Epsom salt: 1 tbsp dissolved in water (monthly feed for extra vibrant blooms).
Step-by-step instructions for planting ranunculus tubers
Here's how I transform those tiny, papery tubers into a cascade of spring blooms—foolproof for containers.
🪴 Step 1: Choose and Prepare Containers
Ranunculus tubers need excellent drainage, so I select containers with multiple drainage holes—at least three per pot. For four plants, I use two 8-inch terracotta pots (unglazed, to wick away excess moisture) or a single 12-inch wide shallow container with a saucer. If using saucers, empty them immediately after watering to prevent root rot.
Line the bottom of each pot with a 2-inch layer of pebbles or coarse sand—this prevents tubers from rotting when water pools at the bottom. I avoid plastic pots because they trap too much moisture, but if that's all you have, add an extra inch of gravel for insurance. The key is keeping those tubers dry between waterings.
🌱 Step 2: Plant Tubers at the Right Depth
Fill each pot with 2-3 inches of moistened potting mix, leaving space for the tubers. Ranunculus tubers are tiny and delicate, so I handle them like I would a baby—no squeezing or rough treatment. Place 3-4 tubers per pot, spacing them 1 inch apart in a single layer. The flat side should face down, with the pointed end up (this is where the stems will emerge).
Cover the tubers with just ½ inch of potting mix—no deeper. Press lightly to ensure contact with the soil but don't compact it. Over-burying smothers the tubers and delays blooms. I like to water gently after planting to settle the soil without displacing the tubers, then let the surface dry completely before the next watering.
☀️ Step 3: Provide Cool Conditions for Root Development
Ranunculus tubers need cool temperatures to root properly—50-60°F is ideal. I place my pots in a bright, indirect light spot (like a north-facing window) for the first 6-8 weeks. Avoid direct sunlight or heat sources, which will cause the tubers to dry out or rot. If your home stays warmer than 65°F, consider moving the pots to a cooler basement or garage during this stage.
Water sparingly—just enough to keep the soil lightly moist. Let the top ½ inch of soil dry out between waterings. Overwatering is the #1 killer of ranunculus tubers, so I check moisture by sticking my finger in the soil. If it feels damp past the first inch, wait another day before watering. You'll see tiny green shoots emerge in 4-6 weeks—that's your cue to adjust care.
⏰ Step 4: Transition to Blooming Conditions
Once shoots reach 2-3 inches tall (usually after 6-8 weeks), move the pots to a bright, sunny location with 6+ hours of direct sunlight daily. I gradually increase light exposure over 3-5 days to avoid shocking the plants. Ranunculus love full sun but can scorch if moved too quickly—watch for leaves that look pale or crispy at the edges.
Increase watering slightly during this phase, keeping the soil evenly moist but not soggy. Fertilize lightly with a balanced liquid fertilizer (10-10-10) diluted to half strength every 2 weeks. You'll see buds form in 4-6 weeks after the move, followed by those iconic, layered blooms. Deadhead spent flowers to encourage more blooms, but don't cut stems shorter than 3 inches—this keeps the plant compact and healthy.
Tips & tricks for perfect ranunculus tubers
A few subtle adjustments can transform your ranunculus from struggling tubers to a lush, blooming spectacle. Here's what I've learned after years of trial and error.
Container Material Matters: Terracotta pots are ideal because they breathe and wick moisture away naturally, but if you must use plastic, add that extra inch of gravel at the bottom. I've seen tubers rot within weeks in plastic without this precaution. The key is replicating the well-draining conditions these Mediterranean natives prefer. For extra insurance, I punch additional drainage holes in the bottom of any container that doesn't have them—even if it means using a drill.
Light Transition Strategy: That gradual 3-5 day move to full sun is critical, but don't rush it! I've ruined perfectly healthy plants by moving them too quickly. Start with just 2 hours of morning sun on day one, then add another hour each subsequent day. Watch your plants' leaves—they'll tell you if you're moving too fast. Pale or crispy edges mean you've shocked them, while deep green means they're adapting beautifully.
Temperature Management: The 50-60°F range during root development is non-negotiable, but here's what I do when my home exceeds 65°F: I move the pots to a cooler basement or garage during the day and bring them back to indirect light at night. This mimics the seasonal temperature shifts ranunculus experience in their native habitat. If you can't move them, consider using a small fan on low setting to create gentle airflow around the pots—just don't let it blow directly on the tubers.
Fertilizer Timing: That half-strength 10-10-10 application every two weeks starts only after you've moved the plants to full sun and seen buds form. Before that, the tubers are still establishing roots and don't need extra nutrients. I actually withhold fertilizer completely during the first 6-8 weeks of root development. Once you see those first buds, though, consistent feeding makes all the difference in bloom quantity and quality.
Pro Tips for Planting Ranunculus Tubers
- A few subtle adjustments can transform your ranunculus from struggling tubers to a lush, blooming spectacle.
- Container Material Matters: Terracotta pots are ideal because they breathe and wick moisture away naturally, but if you must use plastic, add that extra inch of gravel at the bottom.
- Light Transition Strategy: That gradual 3-5 day move to full sun is critical, but don't rush it!
Frequently asked questions
Got questions about planting ranunculus tubers? You’re not alone! Here are some of the most common concerns—plus quick, expert-backed answers to help you grow show-stopping blooms with ease.
When is the best time to plant ranunculus tubers for spring blooms?
Plant ranunculus tubers in late winter to early spring (8–12 weeks before your last frost date) for vibrant spring blooms. In warmer climates, you can even plant in fall for winter color. Just avoid planting too early—they need cool soil to sprout, but not freezing temps.
How deep should I plant ranunculus tubers in containers?
For containers, bury tubers 1–2 inches deep, with the flat side down and the pointy end up. Space them 3–4 inches apart to allow room for growth. In larger pots (12+ inches wide), you can cluster 3–5 tubers together for a fuller look!
Do ranunculus tubers need full sun, or can they grow in partial shade?
While they thrive in full sun (6+ hours/day), ranunculus can tolerate partial shade (4–6 hours). In hot climates, afternoon shade helps prevent wilting. Just expect fewer blooms if they get too little light. Containers make it easy to move them for optimal sun exposure!
What should I do if my ranunculus tubers rot after planting?
Tuber rot usually means too much moisture or poor drainage. Ensure your container has drainage holes and use a well-draining potting mix (like a 50/50 blend of potting soil and perlite). Avoid overwatering—let the top inch of soil dry out between waterings. If rot starts, trim affected areas and replant healthy tubers in fresh soil.
Can I plant ranunculus tubers in the ground, or are containers a must?
While containers are ideal for controlled growing conditions, you can plant ranunculus in well-drained garden beds too! Just amend the soil with compost and sand to improve drainage. In-ground plantings need regular dividing (every 2–3 years) to prevent overcrowding, whereas containers make it easier to reset them annually.
Wrapping up and next steps
Planting ranunculus tubers is your ticket to bursting spring color in containers—just follow the simple steps we’ve shared! With the right soil, timing, and care, these tubers will reward you with lush, papery blooms that brighten up patios, balconies, and small gardens.
Don’t let hesitation hold you back—grab those tubers and get growing!
Ready to level up your container garden? Start by browsing our ranunculus tuber varieties or explore container gardening tips for more inspiration. Happy planting! 🌸✨