Vegetables
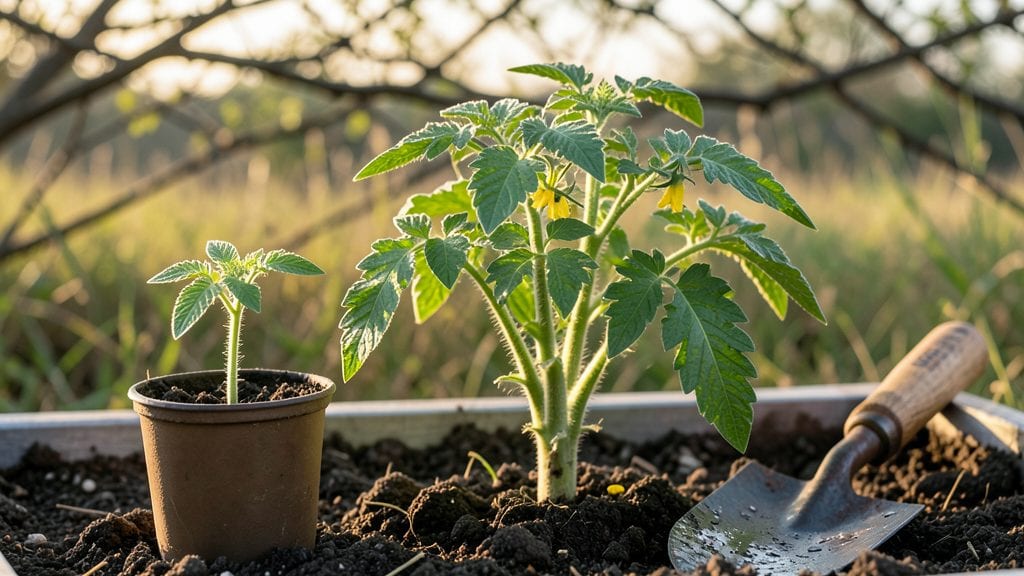
Planting tomatoes outdoors is all about timing—get it right, and you’ll have a garden bursting with juicy, vine-ripened fruit by summer. 🌱 I learned this the hard way after my first-year seedlings bolted in the heat, but now I’ve cracked the code for my zone 7 garden.
The secret isn’t just waiting for warm soil—it’s knowing when to plant based on your last frost date and tomato variety.
You’ll need well-draining soil mixed with compost, sturdy stakes or cages for support, and a sunny spot that gets at least 6-8 hours of direct sunlight daily. Most beginners overlook soil temperature—tomatoes won’t thrive until the ground hits 60°F or warmer.
I use a soil thermometer to check, and it’s saved me from stunted plants every spring.
By transplanting at the right time, you’ll see strong, bushy plants within 2-3 weeks that produce fruit all season long. The key is hardening off seedlings first and avoiding nighttime temps below 55°F—those are the two biggest mistakes I see new gardeners make.
With the right prep, your tomatoes will go from tiny seedlings to heavy vines in no time.
This method works for all tomato varieties—whether you’re growing beefsteaks, cherry tomatoes, or heirlooms—and adapts to zones 3 through 10. Once you master the timing, you’ll never buy store-bought tomatoes again. Let’s get those plants in the ground!
📚 In This Guide
- What you need
- Instructions
- Tips and common mistakes
- Wrapping up and next steps
What you need
- ● Tomato seeds or seedlings: Choose heirloom or hybrid varieties suited to your hardiness zone (e.g., Early Girl for warm climates, Stupice for cooler zones). Start with 4–6 plants for a small harvest.
- ● Well-draining potting mix or garden soil: 5–10 gallons per plant. Amend garden soil with compost (2–3 inches) or a balanced fertilizer (10-10-10) for nutrients.
- ● Containers or garden bed: Containers: 5-gallon pots (minimum) with drainage holes. Use 1 pot per plant for determinate varieties or 2–3 plants per pot for indeterminate types.
- ● Garden bed: 18–24 inches of space between plants (rows should be 3–4 feet apart).
- ● Stakes or cages: 6–8 foot tall for indeterminate varieties (e.g., Sungold) or 4–5 foot for determinate types. Use 1 per plant.
- ● Mulch: 2–3 inches of straw or shredded leaves to retain moisture and suppress weeds.
- ● Watering can or hose with a gentle spray nozzle: 1–2 gallons per plant daily during germination; reduce to 1 gallon every 2–3 days once established.
- ● Row covers or shade cloth: 30–50% shade for seedlings in hot zones or lightweight fabric to protect from pests.
- ● Organic tomato fertilizer: Fish emulsion or compost tea for a mid-season nutrient boost.
- ● Plant clips or twist ties: To secure vines to stakes without damaging stems.
- ● Pruning shears: For trimming suckers (side shoots) to encourage upward growth.
- ● pH test kit: Ideal soil pH for tomatoes is 6.0–6.8. Adjust with lime (to raise pH) or sulfur (to lower) if needed.
How to time your tomato planting for maximum success
Here's the foolproof method I use to grow tomatoes that thrive from day one.
📅 Step 1: Determine Your Last Frost Date and Hardiness Zone
First, find your last average frost date using the USDA hardiness zone map. Tomatoes are frost-sensitive—even a light freeze will kill plants. I always check my local cooperative extension office's frost calendar because online tools sometimes overestimate warmth. For example, Zone 7 typically has a last frost around April 15, while Zone 9 might see frost as late as March 1.
Count back 4-6 weeks from your last frost date—that's when you'll transplant seedlings outdoors. This timing ensures plants mature before fall's first chilly nights. If you're in a cooler zone (like 5 or 6), start seeds indoors 6-8 weeks earlier to give them a head start. You'll know you're ready when nighttime temperatures stay above 50°F consistently.
🌱 Step 2: Prepare the Soil and Planting Site
Tomatoes thrive in loose, well-draining soil with a pH between 6.2 and 6.8. Two weeks before planting, work 2-3 inches of compost into the top 6-8 inches of soil. I like to add a handful of balanced fertilizer (10-10-10) at this stage too—it gives roots a nutrient boost without burning tender seedlings.
Choose a sunny spot that gets 6-8 hours of direct sunlight daily. Tomatoes planted in partial shade produce fewer fruits and are more prone to disease. Test your site by observing where sunlight hits strongest—you'll notice leaves on nearby plants stay vibrant all day. If your soil feels compacted, loosen it with a garden fork to improve root penetration.
☀️ Step 3: Harden Off Seedlings Before Transplanting
Two weeks before your target transplant date, start hardening off seedlings. Place them outside in a sheltered spot for 1-2 hours the first day, gradually increasing time by 1 hour daily. Watch for wilting—if leaves droop, they're not ready. Healthy seedlings will show slight stress (like slightly curled leaves) but bounce back within hours.
By the final day, seedlings should tolerate a full day outside without wilting. I always transplant on an overcast afternoon to reduce transplant shock. Dig holes twice as wide as the root ball but no deeper—planting too deep can suffocate stems. Space plants 18-24 inches apart in rows 3 feet apart for proper airflow.
💧 Step 4: Water and Mulch for Strong Growth
Water deeply at transplanting to settle soil around roots, then water every 2-3 days until the top 2 inches of soil feel dry. Tomatoes need consistent moisture—fluctuations cause blossom-end rot. I water at the base in the morning so leaves dry quickly, reducing disease risk.
Apply 2-3 inches of mulch (like straw or shredded leaves) around plants to retain moisture and suppress weeds. Keep mulch 2 inches away from stems to prevent rot. You'll see stronger stems and more uniform fruit when plants get steady hydration. Avoid wetting leaves when watering—this invites fungal diseases like early blight.
✂️ Step 5: Support and Prune for Bigger Harvests
Install cages or stakes at planting time—tomatoes grow fast, and adding support later damages roots. I use 6-foot stakes for indeterminate varieties and tie stems loosely with soft cloth strips. Prune suckers (the small shoots in leaf axils) regularly to direct energy to fruit production. You'll notice fewer but larger tomatoes when you remove these competing growths.
Remove lower leaves that touch the soil to improve airflow and reduce disease. Pinch off the first flower cluster if seedlings are small—this encourages stronger stem growth before fruiting. Once plants reach 12 inches tall, fertilize lightly with a low-nitrogen (5-10-10) formula to boost flowering and fruiting.
Tips & tricks for perfect tomato planting timing
Getting your tomato planting schedule right makes all the difference between a bountiful harvest and disappointed plants. Here's what I've learned after years of trial and error in my own garden.
Zone-Specific Timing: The 4-6 week countdown from your last frost date is your golden rule, but don't just rely on averages. Check your local cooperative extension office for specific frost data—they often have more accurate records than online tools. For example, I live in Zone 7a where frost can linger until April 20, so I adjust my schedule accordingly. Remember, tomatoes won't survive temperatures below 50°F, so wait until nighttime lows consistently stay above this mark.
Harden Off Gradually: That 1-2 hour start time in Step 3 is crucial, but don't rush the process. I've seen seedlings wilt dramatically when moved too quickly from indoor warmth to outdoor conditions. Watch for slight leaf curling—not wilting—that's the sign your plants are adapting. If leaves droop permanently, they're not ready yet. Pro tip: Place seedlings in a sheltered spot like under a patio cover during their first few days outside to protect them from wind.
Soil Preparation Payoff: The 2-3 inches of compost you work into the soil two weeks before planting creates a nutrient-rich environment that makes all the difference. I like to add a handful of that 10-10-10 fertilizer at this stage too—it gives roots a head start without overwhelming tender seedlings. For compacted soil, rent a tiller for just a few hours—it makes all the difference in root penetration and drainage.
Transplanting Timing: The overcast afternoon recommendation in Step 3 isn't just about reducing shock—it's also about temperature control. Cloud cover helps maintain more stable soil temperatures, which is gentler on young roots. I've found that transplanting between 2-4pm works best in my climate. If you must transplant on a sunny day, do it in the late afternoon when temperatures start to drop.
Pro Tips for Planting Tomatoes Outdoors
- Getting your tomato planting schedule right makes all the difference between a bountiful harvest and disappointed plants.
- Zone-Specific Timing: The 4-6 week countdown from your last frost date is your golden rule, but don't just rely on averages.
- Harden Off Gradually: That 1-2 hour start time in Step 3 is crucial, but don't rush the process.
Frequently asked questions
Got questions about growing your own tomatoes? Here are some of the most common ones—plus quick answers to help you get started!
When is the best time to plant tomatoes outdoors in my zone?
The ideal time depends on your hardiness zone. In Zones 7–10, plant after the last frost (typically late March–May). For Zones 5–6, wait until soil temps hit 50–60°F (usually mid-May–June). Use black plastic mulch or row covers to warm the soil faster in cooler climates.
Can I plant tomatoes too early if I use row covers?
Yes! Row covers protect seedlings from frost and cold snaps, letting you plant 2–4 weeks earlier than usual. Just remove covers when flowers appear to prevent heat stress. Pair them with cold-hardy varieties (like ‘Stupice’ or ‘Mountain Merit’) for extra resilience.
What’s the fastest way to fix leggy tomato seedlings?
Leggy seedlings happen from too much light or heat. Buried stems (gently push soil up to the first leaves) encourage roots to form. Move seedlings to a sunny, shaded spot (60% shade) for a few days, then gradually increase sun. Avoid fertilizing—focus on water and light instead.
How do I keep pests like hornworms and aphids off my outdoor tomatoes?
Start with prevention: Use row covers early on, plant basil or marigolds nearby (natural repellents), and handpick pests daily. For bad infestations, spray with neem oil or introduce parasitic wasps (like Cotesia congregata). Ladybugs also munch on aphids—invite them with dill or fennel!
What do I do if my tomato plants wilt suddenly?
Sudden wilting often means overwatering, root rot, or heat stress. Check soil moisture—if it’s soggy, stop watering and improve drainage. For heat stress, provide afternoon shade and mulch heavily. If roots are mushy, trim affected areas and replant in fresh soil. Fusarium wilt? Remove infected plants immediately.
Can I grow tomatoes in containers if I don’t have a garden?
Choose determinate varieties (like ‘Tiny Tim’ or ‘Patio’) for containers. Use a 5-gallon pot minimum (bigger = better) with well-draining soil and a trellis. Place in full sun (6+ hours/day) and water daily—containers dry out faster. Fertilize every 2 weeks with tomato-specific feed.
Wrapping up and next steps
Planting tomatoes outdoors is a rewarding experience that brings fresh, flavorful harvests straight to your kitchen—as long as you align with your hardiness zone and timing! 🌱 Whether you’re a seasoned gardener or just starting, the key is patience, preparation, and a little local know-how.
With the right tricks, you’ll be enjoying sun-ripened tomatoes in no time.
Ready to take the next step? Start by checking your zone, prepping your soil, and marking your calendar! Grab those seeds, roll up your sleeves, and let your garden grow—your future salads (and bragging rights) will thank you. 🍅✨