Pruning
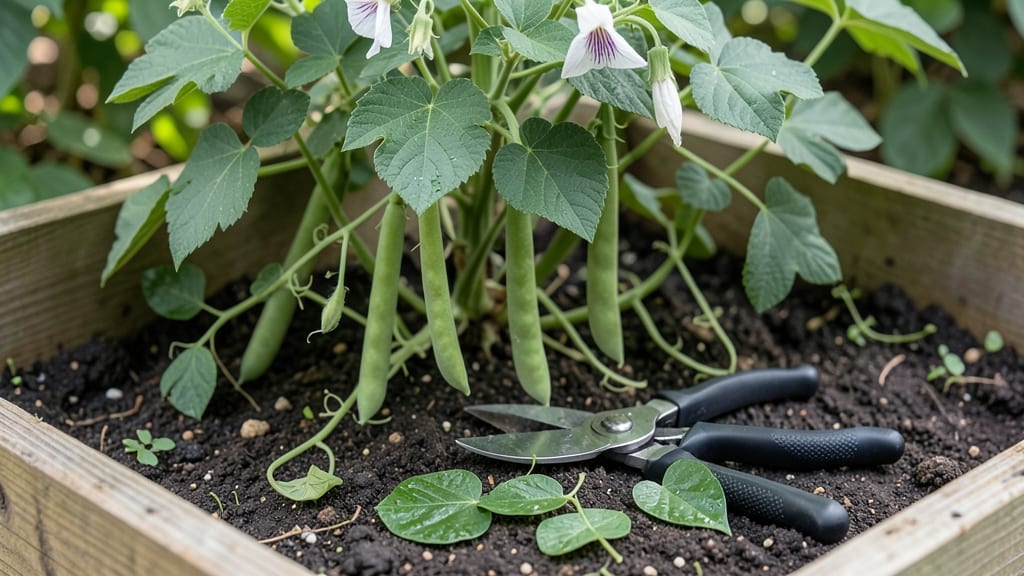
Pruning bean plants transforms a single harvest into a steady supply all season long. 🌱 I’ve gone from one big pick to weeks of fresh beans by mastering three simple trims—each timed to boost growth, not stress the plant.
The key isn’t cutting more, but cutting right, whether you’re growing pole beans or bush varieties.
Most gardeners skip pruning entirely, missing out on bigger yields and healthier plants. You only need sharp pruners, a sunny day, and 15 minutes every few weeks. Pole beans need support and regular trimming to climb, while bush beans benefit from light pinching to encourage branching.
The payoff? More pods, fewer pests, and plants that keep producing until frost.
After just two trims, my pole beans went from leggy vines to bushy, productive factories. The first cut opens up airflow, the second encourages side shoots, and the third—late in the season—extends harvests into fall. Even my black thumb can’t mess this up once you know the timing and technique.
Works for both backyard gardens and container setups, and adapts to any climate. Here’s exactly how to do it without killing your plants—or your patience.
📚 In This Guide
- What you need
- Instructions
- Tips and common mistakes
- Wrapping up and next steps
What you need
- ● Pruning shears: Bypass pruners (sharp, clean, and sterilized with rubbing alcohol or bleach to prevent disease). Recommended: Felco F2 or similar (for precision cuts).
- ● Gloves: Heavy-duty gardening gloves (nitrile-coated for grip and protection from thorns or sap).
- ● Disinfectant: 70% isopropyl alcohol or a 10% bleach solution (1 part bleach to 9 parts water) for tool sanitization.
- ○ Compost bin or bag: For collecting pruned debris (optional but eco-friendly!).
- ● Hand pruners: Smaller shears for delicate trims (great for dwarf varieties).
- ● Garden twine or stakes: To support vining beans post-pruning (if needed).
- ● Plant food: Balanced fertilizer (10-10-10 or organic options like fish emulsion) to replenish nutrients after trimming.
- ● Spray bottle: With water to mist cut stems (reduces stress on the plant).
- ● Healthy bean plants (identify varieties: bush beans, pole beans, or runner beans—each may need slight adjustments!).
- ● Clear weather: Prune on a dry, cloudy day to minimize stress on the plant (avoid midday heat!).
- ● Patience! Observe your plants for 2–3 days post-prune to monitor recovery.
How to prune bean plants for continuous harvests
Three strategic cuts keep your bean plants productive all season long—here's when and how to do it.
✂️ Step 1: Pinch Early Flowers for Bushier Plants
When your bean plants reach 6-8 inches tall and show their first true leaves, pinch off any blossoms you see. This might seem counterintuitive, but removing these early flowers redirects the plant's energy into growing a stronger framework of stems and leaves. I always do this with my pole beans—they need a sturdy structure to support their weight later.
Use clean pruning shears or your fingers to gently remove the flower clusters. Look for small buds forming near the main stem; these are your target. You'll see new side shoots emerge within 7-10 days—this is your signal that the plant is responding. This step prevents the plant from putting all its energy into producing beans too early, which can make the plants weak and prone to disease.
✂️ Step 2: Trim Leggy Growth Mid-Season
Once your bean plants start flowering heavily, check for stems that have grown too long and spindly. These leggy growths often appear on the lower parts of the plant and can become tangled or weak. Trim these back to just above a leaf node—this is where new growth will sprout from. I usually do this when the plants are about 18-24 inches tall.
Leggy growth is a sign the plant isn't getting enough light or has too much shade. By cutting these stems, you encourage the plant to focus on producing more beans on the stronger, healthier parts. After trimming, water the plants well to help them recover. You'll notice new side shoots forming within 5-7 days, which will produce more flowers and beans.
✂️ Step 3: Deadhead Spent Blooms for Extended Harvest
After your beans have formed and started to mature, you'll see pods that have turned brown and dried out. These are your spent blooms, and they need to be removed to keep the plant producing new flowers. Pinch or cut off the entire stem just above the next set of leaves. I do this regularly throughout the growing season—it's the key to keeping my bean plants productive for months.
Deadheading spent blooms prevents the plant from wasting energy on seed development inside the dried pods. Instead, it focuses on producing new flowers and beans. You'll see a fresh flush of blossoms within 3-5 days after deadheading. This step is especially important for bush beans, which have a shorter growing season than pole beans. By keeping the plant in continuous bloom, you extend your harvest window significantly.
⏰ Step 4: Prune for Winter Hardiness (Cold Climates Only)
If you're growing beans in a climate with cold winters, prune back the entire plant once the first frost hits. Cut the stems down to about 2-3 inches above the ground. This helps protect the roots from freezing and makes it easier to cover the plants with mulch or row covers in winter. I've found that this step is crucial for overwintering beans in Zone 6 and colder.
After pruning, remove all plant debris from the area to prevent pests and diseases from overwintering. In spring, you'll see new shoots emerge from the base of the plant, ready to start growing again. This method works best with bush beans, which are more cold-tolerant than pole beans. With proper winter care, you can sometimes get a second harvest the following year.
Tips & tricks for pruning bean plants like a pro
Mastering these pruning techniques will transform your bean harvest—here's how to get it right every time.
The Right Time for Step 1: Don't wait until your plants are too tall! Pinch those early flowers when plants reach 6-8 inches and have their first true leaves. I've seen gardeners skip this step because they think more flowers mean more beans, but trust me—this redirects energy to stronger stems that'll support bigger harvests later. Look for those tiny buds near the main stem, and you'll see new side shoots in just 7-10 days.
Tool Selection Matters: While fingers work for small jobs, invest in clean pruning shears for larger plants. Sterilize your tools with rubbing alcohol between cuts to prevent spreading disease. I always carry a small pair in my gardening apron—you never know when you'll spot those leggy growths at 18-24 inches. Cut just above a leaf node (where new growth emerges) to encourage bushier plants.
Deadheading Strategy: Those brown dried pods signal it's time to act! Remove the entire stem just above the next set of leaves, not just the pod. This might seem drastic, but you'll see fresh blossoms within 3-5 days. For bush beans, I do this every 5-7 days during peak production—it's the secret to extending your harvest window by weeks.
Winter Prep for Cold Climates: When the first frost hits, cut back bush beans to 2-3 inches above ground. For pole beans, you can be more aggressive—trim to 4-6 inches since they won't regrow as vigorously. Remove ALL plant debris immediately to prevent overwintering pests. I've had bush beans surprise me with second harvests the following spring after this treatment!
Pro Tips for Prune Bean Plants
- Mastering these pruning techniques will transform your bean harvest—here's how to get it right every time.
- The Right Time for Step 1: Don't wait until your plants are too tall!
- Tool Selection Matters: While fingers work for small jobs, invest in clean pruning shears for larger plants.
Frequently asked questions
Got questions about keeping your bean plants productive with strategic pruning? Here are some of the most common concerns—and their answers—to help you grow like a pro!
When is the best time to prune bean plants for maximum yield?
Prune pole beans when they reach 6–12 inches tall to encourage bushier growth, then again after flowering to redirect energy to pods. For bush beans, a light trim after the first harvest (when pods are 2–3 inches long) keeps production going. Always prune in the morning on a dry day to avoid disease.
How often should I prune my bean plants?
Pole beans benefit from 3 seasonal trims: early growth (6–12 in.), post-flowering, and late summer for a final harvest push. Bush beans only need 1–2 light prunings—after the first harvest and again if growth slows. Over-pruning stresses plants, so stick to 10–20% of the plant per trim.
What’s the difference between pinching and pruning bean plants?
Pinching
(removing the top 2–3 inches) encourages branching in young plants, while pruning targets specific stems or leaves. For beans, pinch pole varieties early to create a bushier framework, then prune later to remove spent flowers or overcrowded pods. Bush beans rarely need pinching—just trim damaged foliage.
My bean plants look sad after pruning—what did I do wrong?
If plants wilt or stop producing, you may have cut too aggressively or damaged the main stem. Always prune above a leaf node (where leaves meet the stem) to promote regrowth. Avoid pruning more than 30% of the plant at once, and water deeply afterward. Yellow leaves? Check for overwatering or disease.
Can I prune beans to extend the harvest season?
Prune pole beans in late summer to remove old pods and encourage new growth, giving you a second flush of harvests 2–3 weeks later. For bush beans, trim back any leggy stems after the first harvest to stimulate compact, productive regrowth. Just remember: prune early in the day to let wounds heal before evening moisture sets in.
Wrapping up and next steps
Pruning your bean plants isn’t just about maintenance—it’s your secret weapon for bountiful harvests all year long! 🌱 By mastering the three seasonal trims, you’ll boost airflow, encourage stronger growth, and keep pests at bay.
With the right tools and techniques, you’re well on your way to a thriving garden.
Ready to take the next step? Start by scheduling your first trim—whether it’s shaping young plants or reviving mature ones. Grab your shears, roll up your sleeves, and enjoy the rewards of your hard work. Happy pruning!