Pruning
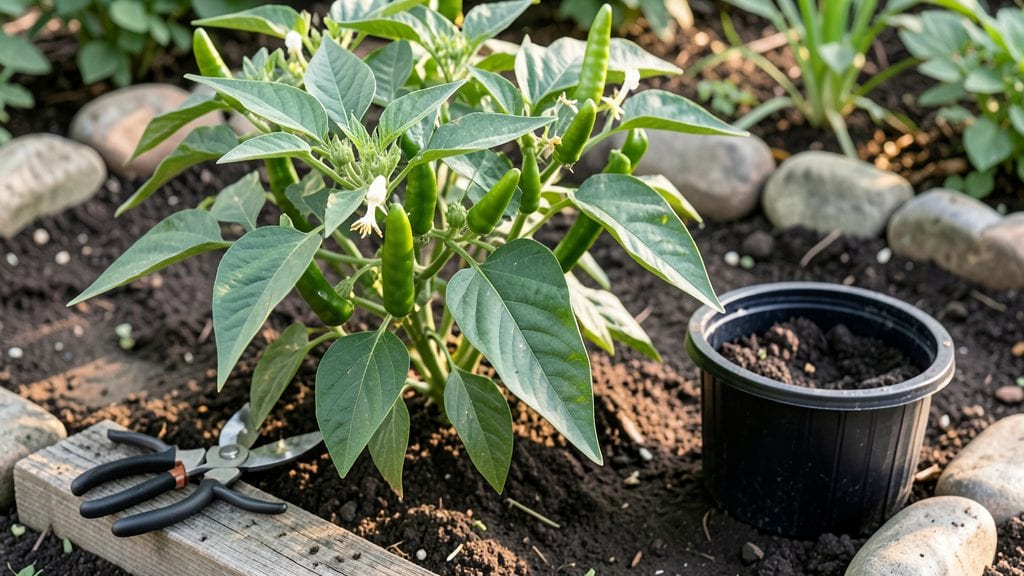
The right cuts now mean a harvest that stretches from July to first frost. ✨ Pruning chilli plants isn't just about shaping—it's about redirecting energy from leafy growth into the peppers you'll be canning, freezing, or turning into sauces all winter.
I learned this the hard way after letting my plants grow wild and producing half as many peppers as my neighbor's pruned ones.
You only need three basic cuts to transform a leggy plant into a productive bush: the initial shaping cut, the sucker removal, and the late-season cleanup. Grab sharp pruning shears and a pair of gloves—clean tools prevent disease from spreading through open wounds.
The key is timing: prune early to establish structure, mid-season to encourage branching, and late to remove spent flowers and damaged leaves.
By the time you're harvesting, your plants will be compact, well-ventilated, and loaded with peppers instead of just foliage. The first batch of peppers will be ready in 60-75 days from transplanting, but with proper pruning, you'll keep getting new flowers and fruit right up until frost.
The air circulates better, pests have fewer hiding spots, and every cut you make today means more peppers tomorrow.
This method works for all chilli varieties—from small hot peppers to large sweet ones—whether you're growing in pots or in the ground. The only rule? Never prune more than one-third of the plant at once, or you'll shock the roots and stall production. Let's get those shears ready!
📚 In This Guide
- What you need
- Instructions
- Tips and common mistakes
- Wrapping up and next steps
What you need
- ● Sharp pruning shears or scissors: Bypass pruners (for clean cuts) or small garden scissors. Must be sterilized with rubbing alcohol or bleach to prevent disease.
- ○ Gloves: Heavy-duty gardening gloves (optional but highly recommended—chilli plants can irritate skin!).
- ● Disinfectant: 1-part bleach to 9-parts water (for sterilizing tools between cuts).
- ● Twine or plant ties: Soft, flexible twine (¼ inch wide) to support pruned branches if needed.
- ○ Small pruning saw (optional but helpful): For thicker stems (½ inch or larger).
- ● Rooting hormone: For propagating cuttings (if you want to clone your best plants!).
- ● Small pots or trays: 4-6 inch pots for propagating new plants from pruned cuttings.
- ● Plant food or compost: A balanced fertilizer (like 10-10-10) to boost recovery after pruning.
- ● Spray bottle: With water to mist cuttings if propagating.
- ● Notebook & pen: To track pruning dates and plant responses.
How to prune chili plants for bigger harvests
Here's the simple 3-cut method I use to boost fruit production—no guesswork, just proven results.
✂️ Step 1: Remove Lower Leaves and Suckers Early
Start when your plants reach 12-18 inches tall. Use clean, sharp pruning shears to snip off any leaves touching the soil—these get damp and rot. I also remove "suckers" (those little shoots growing where the main stem meets a branch) because they drain energy from fruit production.
Focus on the bottom third of the plant first. You'll see more branches and flowers appear higher up after this cut. Never remove more than 20% of the foliage at once—this keeps the plant healthy and growing strong.
✂️ Step 2: Prune for Airflow Mid-Season
When plants hit 24-36 inches tall, it's time for the second cut. Look for crowded branches where leaves rub together—this invites disease. Trim back any branches growing inward or crossing over others. I also pinch off any flowers on the bottom half of the plant to focus energy upward.
This step happens around 6-8 weeks after transplanting. You'll notice new side branches forming where you made cuts—that's where future fruit will develop. If a branch looks weak or yellowing, remove it entirely to prevent spreading problems.
✂️ Step 3: Top and Thin for Final Harvest Boost
Late in the season, when plants are fully loaded with fruit, make your final cuts. Trim the very top of the main stem to encourage bushier growth lower down. Also, remove any fruit clusters that are smaller than a pencil eraser—this redirects energy to bigger, healthier peppers.
This last pruning happens 8-10 weeks after transplanting. You'll see more flowers appear in the pruned areas within 2-3 weeks. Stop pruning completely once flowers appear—now it's time to let those peppers grow!
🌿 Step 4: Clean Up and Prevent Problems
After each pruning session, collect all cuttings and dispose of them in the trash—not the compost. Chili plant debris can harbor diseases that might reinfect your plants. I also wipe my pruning shears with rubbing alcohol between cuts to prevent spreading anything.
Water deeply after pruning to help plants recover. You'll notice new growth appearing within 5-7 days if you've done it right. The key is patience—don't over-prune, and always make cuts just above a leaf node where new growth can emerge.
Tips & tricks for perfect chili plant pruning
These simple secrets will help you maximize your chili harvest without stressing your plants.
Timing is Everything: The 6-8 week mark for Step 2 isn't just arbitrary—it's when your plants have enough energy stored to handle the second pruning. Watch for new growth after the first cut (around 5-7 days) before proceeding. If your plants are still recovering from transplant shock, hold off on Step 2 until they're clearly established.
Visual Cues Over Rules: Instead of memorizing "20% foliage," focus on this: after Step 1, your plant should still have plenty of leaves that aren't touching the soil. You want it to look like a bushy tree, not a bare stick. For Step 3, when thinning fruit clusters, hold them up to a pencil—if they're smaller than the eraser, they're not worth keeping.
Pruning Shears Matter: Don't cut corners (literally) with dull shears—they crush stems instead of making clean cuts. I invest in a good pair of bypass pruners for clean cuts that heal faster. Always sterilize between plants to prevent spreading diseases. A quick wipe with rubbing alcohol between cuts keeps your tools ready for the next plant.
Growth Response Timeline: The 2-3 week window for new flowers after Step 3 is your reward for patience. If you don't see new growth within 7 days, you might have pruned too aggressively. Remember, chili plants are resilient but not magical—give them time to recover between cuts. Water deeply after each pruning to help them bounce back faster.
Pro Tips for Pruning Chilli Plants
- These simple secrets will help you maximize your chili harvest without stressing your plants.
- Timing is Everything: The 6-8 week mark for Step 2 isn't just arbitrary—it's when your plants have enough energy stored to handle the second pruning.
- Visual Cues Over Rules: Instead of memorizing "20% foliage," focus on this: after Step 1, your plant should still have plenty of leaves that aren't touching the soil.
Frequently asked questions
Got questions about pruning your chilli plants? You’re not alone—this step can feel tricky at first! Below, we’ve answered the most common queries to help you grow healthier, more productive peppers all season long.
When is the best time to prune chilli plants?
Prune your chilli plants after they’ve established 4–6 true leaves (usually 4–6 weeks after germination). Avoid pruning during flowering or fruiting unless removing damaged growth—this can stress the plant and reduce yields. Early pruning encourages bushier growth, while late-season cuts focus on airflow and pest control.
How much should I trim off at once?
Start conservatively! Remove no more than 25–30% of the plant’s foliage in a single session. For example, pinch off just the top set of leaves or trim back a few side shoots. Over-pruning shocks the plant, slowing recovery. Think of it like a haircut—gradual adjustments yield the best results.
Can I prune chilli plants too late in the season?
Yes, but with caution. Late-season pruning (after flowering) should focus on dead, yellow, or pest-damaged leaves to improve airflow and prevent disease. Avoid heavy cuts—this can halt fruit development. If your plant is still producing peppers, limit trimming to 1–2 small branches at a time.
Do I need to sterilize my pruners between cuts?
Absolutely!
Sterilizing pruners with rubbing alcohol or a 10% bleach solution between cuts prevents the spread of bacterial or fungal diseases (like anthracnose or powdery mildew). Wipe them down before and after each plant, especially if switching between sickly and healthy plants. A few seconds of prep saves hours of heartache later!
What if my chilli plant doesn’t bounce back after pruning?
If your plant looks wilted or stops growing after pruning, it may be under stress. Check for:
- Overwatering (yellow leaves = soggy roots)
- Underwatering (crispy edges = thirsty plant)
- Pests (aphids or spider mites sucking sap)
- Nutrient deficiency (pale leaves = needs fertilizer)
Wrapping up and next steps
Pruning your chilli plants isn’t just about shaping—it’s about unlocking their full potential! By mastering the three strategic cuts (apical, lateral, and cleanup), you’ll boost yield, improve airflow, and keep your plants thriving all season. 🌱 With the right tools, timing, and technique, even beginners can become pruning pros.
Ready to take the next step? Start small—pick one plant to practice on, then expand your skills. Before you know it, you’ll be harvesting bountiful, flavor-packed chillies like a seasoned gardener. Happy pruning! 🌶️✨