Planting
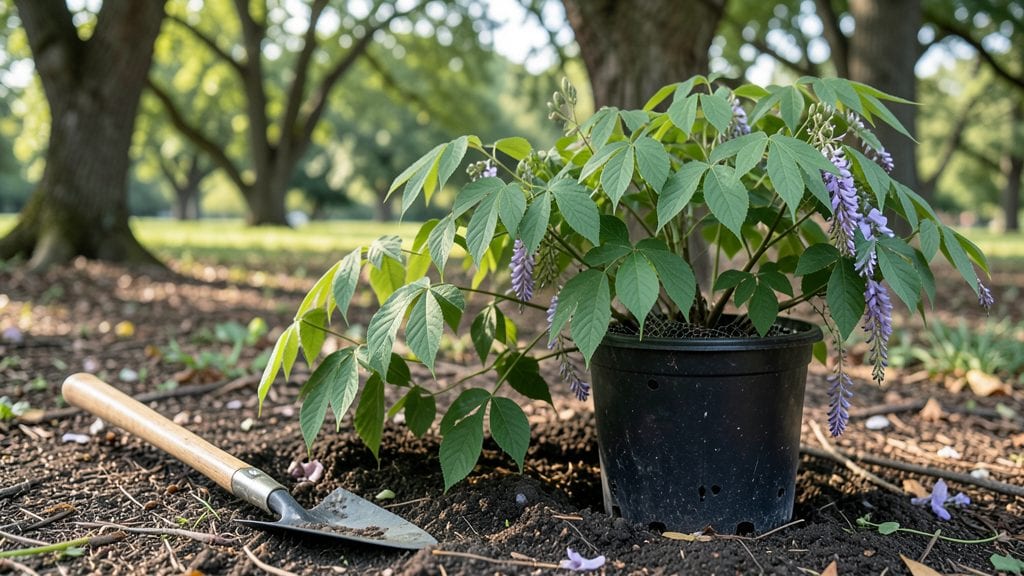
Transplanting wisteria plants in spring can turn a struggling, root-bound mess into a thriving vine that climbs and blooms for decades.
I’ve moved wisteria twice now—once from a cramped container to the ground, another time to a new support structure—and the key was timing it right, when the plant was still dormant but about to wake up.
You’ll need sharp pruners, a wheelbarrow for soil, and a sturdy post or trellis ready for its new home. The secret weapon? Root pruning before you dig—this encourages new growth and prevents shock.
Water the plant deeply the day before moving it, and keep a bucket of water nearby for after the transplant.
After planting, the first few weeks are critical. Keep the soil consistently moist but not soggy, and watch for new leaves—they’re your sign that the roots are settling in.
By midsummer, your wisteria will be putting on fresh growth, and within a year, you’ll have a lush, fragrant vine that outshines anything from a nursery.
Works best in zones 5-9, but even in cooler climates, transplanting in early spring gives the roots time to establish before winter. The payoff? A plant that lives for generations and rewards you with spring’s most intoxicating blossoms.
📚 In This Guide
- What you need
- Instructions
- Tips and common mistakes
- Wrapping up and next steps
What you need
- ● Healthy wisteria plant – Choose a root-bound specimen with thick, woody roots (ideal for spring transplanting).
- ● Garden shovel or spade – A sharp, heavy-duty shovel (16–18 inches wide) for digging.
- ● Pruning shears or loppers – Bypass pruners (for clean cuts) or loppers (for thicker stems).
- ● Garden hose or watering can – For deep watering before and after transplanting.
- ● Compost or well-aged manure – 2–3 gallons to enrich the new planting hole.
- ● Mulch (wood chips, straw, or pine bark) – 3–4 inches to retain moisture and regulate soil temp.
- ● Garden gloves – Heavy-duty, cut-resistant (wisteria thorns are no joke!).
- ○ Staking system (optional but helpful) – 3–4 sturdy stakes + soft ties (if your wisteria needs support post-transplant).
- ● Root stimulator powder – Mycorrhizal fungi or seaweed extract to boost root growth.
- ● Soil test kit – To check pH (6.0–7.0 ideal) and nutrient levels before planting.
- ● Epsom salt (magnesium sulfate) – 1 tablespoon per gallon of water for a post-transplant nutrient boost.
- ● Planting hole liner (landscape fabric) – To prevent weed intrusion around the base.
- ● Anti-transpirant spray – Helps reduce stress on leaves during the move.
Instructions for transplanting wisteria plants in spring
Spring is the ideal time to move wisteria—here’s how to do it right.
Prepare the New Location and Dig the Hole
Choose a spot with full sun and space for wisteria’s sprawling growth—these vines need 15-20 feet of horizontal room to thrive. Dig a hole twice as wide as the root ball but only as deep as the container’s height. Wisteria roots are shallow but extensive, so avoid deep planting.
Loosen the soil at the bottom of the hole with a garden fork to prevent compaction. Mix in 2 inches of compost from the ingredients list into the native soil—this improves drainage and provides nutrients for recovery. If your soil drains poorly, add a 2-inch layer of coarse sand at the bottom before backfilling.
Prune and Remove the Wisteria from Its Container
Water the wisteria 24 hours before transplanting to reduce stress. Trim back one-third of the oldest stems to encourage new growth and redirect energy toward root establishment. Cut just above a bud or leaf node, using clean pruners to avoid ragged edges.
Gently remove the plant from its container, tapping the sides if roots are tightly bound. If roots are circling, use a sharp knife to make 2-3 vertical cuts along the root ball to encourage outward growth. This prevents girdling, which can strangle the plant over time.
Plant and Secure the Wisteria in Its New Home
Place the wisteria in the hole so the top of the root ball sits 1 inch above ground level. This prevents soil from settling and burying the stem, which can cause rot. Backfill with the amended soil, pressing lightly to eliminate air pockets but avoiding compaction.
Create a watering basin around the base by mounding soil outward. This directs water straight to the roots. Secure the plant with 3-4 stakes, tying the main stems loosely to support upright growth. Avoid tight ties—they can damage the bark as the vine thickens.
Water and Mulch for Recovery
Water deeply immediately after planting to settle the soil and eliminate air pockets. Keep the soil evenly moist (not soggy) for the first 4-6 weeks, which is critical for root establishment. Use a soaker hose or drip irrigation to avoid disturbing the soil surface.
Spread 3 inches of mulch over the root zone, keeping it 6 inches away from the stem to prevent rot. Use organic mulch like wood chips or shredded bark—this retains moisture, regulates soil temperature, and suppresses weeds. Replenish mulch as it breaks down over the season.
Monitor and Prune for Long-Term Health
Check the plant weekly for signs of stress, like wilting or yellowing leaves. Wisteria is resilient but may drop some foliage during transplant shock. Fertilize lightly 6 weeks after planting with a balanced, slow-release fertilizer to support new growth without overwhelming the roots.
In late spring, prune again to remove any dead, damaged, or crossing branches. This improves airflow and sunlight penetration, reducing disease risk. Wisteria blooms on old wood, so avoid heavy pruning in the first year—focus on shaping and encouraging a strong structure for future flowering.
Tips & tricks for transplanting wisteria plants
Moving wisteria successfully takes more than just digging a hole—these insider tricks will help your plant thrive after transplanting.
Timing is Everything: The 24-hour watering before transplanting is crucial. This ensures the roots are hydrated but not waterlogged, which can make them more fragile. I’ve seen wisteria plants struggle when transplanted right after a dry spell, so don’t skip this step—it’s the difference between a healthy recovery and transplant shock. Watering also helps loosen the root ball, making removal from the container easier.
Root Ball Revival: When you notice circling roots in Step 2, those 2-3 vertical cuts along the root ball are game-changers. This technique, called root pruning, prevents girdling—a common issue where roots grow in tight circles and eventually strangle the plant. I’ve had to dig up wisteria plants years later to fix this problem, so taking the time to make those cuts now saves future headaches. Use a sharp knife to make clean cuts, and don’t worry about damaging roots—this actually encourages new, outward growth.
Planting Position Matters: Positioning the root ball just 1 inch above ground level in Step 3 might seem counterintuitive, but it’s essential. Wisteria roots are shallow, and burying the stem can lead to rot. Over time, the soil will settle, so this small elevation prevents the stem from being buried too deeply. After planting, gently press the soil around the base to eliminate air pockets, but avoid compacting it—this can suffocate the roots.
Watering Wisdom: The 4-6 week window for keeping soil evenly moist is critical, but don’t drown the plant. Use a soaker hose or drip irrigation to deliver water directly to the roots without disturbing the soil surface. I’ve seen wisteria plants suffer from overwatering, which can lead to root rot. Aim for consistency—water deeply enough to moisten the soil 6-8 inches down, then let it dry slightly before watering again. This balance is key to helping the roots establish without stress.
Pro Tips for Transplanting Wisteria Plant
- Moving wisteria successfully takes more than just digging a hole—these insider tricks will help your plant thrive aft...
- Timing is Everything: The 24-hour watering before transplanting is crucial. This ensures the roots are hydrated but n...
- Root Ball Revival: When you notice circling roots in Step 2, those 2-3 vertical cuts along the root ball are game-cha...
Frequently asked questions
Got questions about transplanting wisteria? You’re not alone! Here are some of the most common concerns—and their solutions—to help you tackle your project with confidence.
When is the best time to transplant wisteria?
The ideal window is early spring (just as new growth begins) or late fall (after leaves drop but before hard frost). Avoid transplanting in summer heat or winter dormancy—roots need active growth to recover. For container-grown wisteria, spring is your best bet!
How do I know if my wisteria is root-bound before transplanting?
Check for circular roots wrapping tightly around the pot or protruding from drainage holes. Gently loosen the root ball—if roots are matted and struggling to spread, it’s root-bound. Pro tip: Soak the pot for 24 hours before transplanting to reduce shock!
Can I transplant wisteria in full sun or shade?
Wisteria thrives in full sun (6+ hours/day), but young transplants may need partial shade (morning sun, afternoon shade) for the first 2–3 weeks to ease stress. Once established, move it to its permanent sunny spot. Avoid deep shade—it weakens growth and blooms.
What should I do if my wisteria leaves turn yellow after transplanting?
Yellowing leaves often signal transplant shock or root damage. Water deeply but avoid over-saturating soil. Trim any wilted leaves and apply a balanced fertilizer (10-10-10) 4–6 weeks post-transplant. If yellowing persists, check for pests or fungal issues (like powdery mildew).
Is it better to transplant wisteria bare-root or in a container?
Bare-root transplanting (selling roots only) works best for dormant season moves, but container-grown wisteria is easier for spring transplants. If using bare roots, soak them for 1–2 hours before planting. Containers reduce shock—just ensure the root ball stays intact and well-mulched!
Wrapping up and next steps
Transplanting wisteria can feel daunting, but with the right timing, tools, and care, your plant will thrive in its new home! Remember, spring is your best friend—patience and preparation are key to reviving root-bound wisteria and encouraging lush, fragrant blooms.
Now that you’re armed with expert tips, roll up your sleeves and get ready to give your wisteria the fresh start it deserves.
Ready to take the next step? Mark your calendar for early spring, gather your supplies, and start planning your transplanting adventure. Your future garden (and future fragrance-filled summers!) will thank you! 🌱✨