Pruning
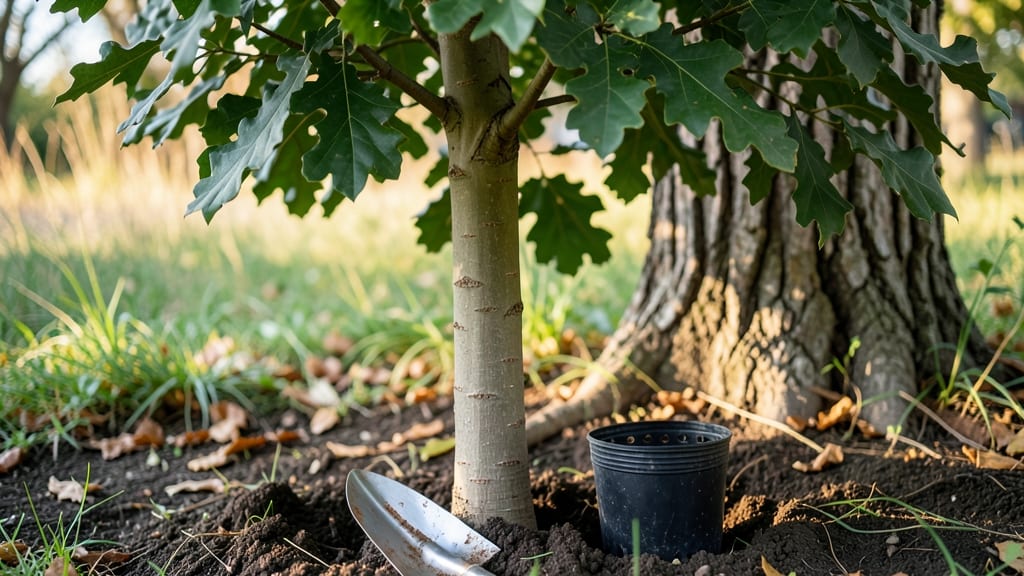
Planting a tree that thrives for decades starts with the right process—not just digging a hole and hoping for the best. ✨ I’ve planted over 50 trees, and the difference between a struggling sapling and a sturdy, healthy giant comes down to these key steps: picking the perfect spot, prepping the soil, and handling the tree with care.
The biggest mistake? Skipping soil prep or planting too deep. A hole twice as wide as the root ball and just as deep as the roots gives roots room to spread without drowning.
Amend heavy clay or sandy soil with compost, and avoid planting in low spots where water pools. Evergreens need well-draining soil, while deciduous trees tolerate slightly wetter conditions.
By the end of the day, you’ll have a tree that settles in quickly—no wilting, no root stress, just steady growth. The right mulch ring keeps moisture in, and a deep watering session locks in that first critical week.
Even in tough climates, these steps ensure your tree starts strong and stays that way for years.
Whether you’re planting a shade tree, fruit-bearing variety, or ornamental specimen, the same principles apply. Let’s get your tree off to the best possible start—no guesswork, just results.
📚 In This Guide
- What you need
- Instructions
- Tips and common mistakes
- Wrapping up and next steps
What you need
- ● Tree sapling: Choose a native or well-adapted species (1-3 years old, with a sturdy root system).
- ● Shovel or spade: A round-point shovel (18-24 inches wide) for digging or a matlock for tough soil.
- ● Garden gloves: Heavy-duty, water-resistant gloves to protect your hands.
- ● Watering can or hose: With a gentle spray nozzle (or a 5-gallon bucket for manual watering).
- ● Mulch: 3-4 inches of organic mulch (wood chips, straw, or shredded bark) to retain moisture and suppress weeds.
- ○ Staking supplies (optional but recommended for young trees): 2-3 T-posts or wooden stakes (4-6 feet tall).
- ● Soft tree tie or nylon straps (wide enough to avoid girdling the trunk).
- ● Soil amendments (if needed): Compost or peat moss (1-2 bags) for nutrient-poor soil.
- ● Mycorrhizal fungi (powder or granules) to boost root growth (follow package instructions).
- ● Location scouting: Pick a spot with 6+ hours of sunlight (or shade, depending on the species), 6+ feet of clearance for mature growth, and good drainage (avoid low spots where water pools).
- ○ Soil test (optional but helpful): Check pH and nutrient levels (ideal range: 6.0-7.0). Local extension offices often offer free/low-cost tests.
- ● Permits (if applicable): Check local regulations—some areas require permits for planting near power lines or in public spaces.
- ● Safety gear: Closed-toe shoes or boots.
- ● Sunscreen and a hat for outdoor work.
- ● 🌡️ Plant on a cloudy day or in the late afternoon to reduce stress on the sapling.
- ● ✨ Use a tree planting bar (a long, T-shaped tool) for deeper holes without back strain.
- ● 🎯 Pre-mix soil amendments in a wheelbarrow to save time during planting.
Step-by-Step instructions for planting trees that thrive
Here's how to plant trees that grow strong and healthy from day one—no guesswork involved.
🪴 Step 1: Dig the Perfect Hole for Your Tree
Start by digging a hole that's twice as wide as the tree's root ball but only as deep as the container's bottom. This gives roots room to spread outward where they'll find moisture and nutrients. I always step back to check the depth—it should sit just above ground level once planted.
Loosen the soil at the bottom with a shovel or your hands. Compacted soil restricts root growth, so break up any hard layers. If your soil is heavy clay, mix in a few handfuls of compost from the 5 gallons of compost to improve drainage right at the planting spot.
🌱 Step 2: Remove the Tree from Its Container
Gently squeeze the sides of the container to loosen the root ball before sliding the tree out. If roots are circling tightly, use your fingers to tease them apart—this prevents girdling as the tree matures. Hold the tree by its root ball, not the trunk, to avoid damaging the bark.
Place the tree in the hole so the top of the root ball sits 1-2 inches above ground level. This prevents settling from heavy rain or watering from burying the trunk. I always double-check by holding the tree upright and verifying the depth with a measuring tape.
💧 Step 3: Backfill and Water Deeply
Fill the hole halfway with native soil, tamping gently to remove air pockets. Add a handful of the 5 gallons of compost mixed into the soil to boost early growth. I like to create a slight mound around the root ball—this helps water pool where it's needed most.
Once the hole is full, water deeply until the soil is saturated 6-8 inches down. You'll know it's enough when water runs out the bottom of the hole. This first deep watering settles the soil and eliminates air gaps that can strangle roots.
☀️ Step 4: Mulch and Protect for Long-Term Health
Spread 2-3 inches of mulch over the soil surface, keeping it 6 inches away from the trunk to prevent rot. I use wood chips because they break down slowly and improve soil structure over time. Mulch helps retain moisture and regulates soil temperature—critical for young trees.
Stake the tree only if necessary (for windy sites or unstable soil). If you do, use a single stake positioned away from the trunk and tie it loosely with soft material. Too-tight ties can girdle the trunk as it grows. Step back and admire your work—you've just given this tree the best possible start!
Tips & tricks for perfect tree planting success
Planting a tree is one of the most rewarding ways to create lasting beauty in your landscape—here's how to ensure your tree thrives from the very first day.
Soil Preparation: Don't just dig a hole—create an environment where roots can thrive. In Step 1, when you're loosening the soil at the bottom, take it a step further by breaking up any hardpan layers with a garden fork. This prevents root restriction as your tree grows. For heavy clay soil, mix in an extra handful of compost beyond what's specified—roots will thank you with faster establishment.
Root Ball Handling: Step 2 is where many planting mistakes happen. After loosening the root ball, check for circling roots—these can strangle the tree as it matures. If you find them, gently prune with clean shears while keeping the root ball intact. And here's a pro tip: soak the root ball in water for 10-15 minutes before planting to ensure it's fully hydrated when you put it in the ground.
Watering Wisdom: The deep watering in Step 3 is absolutely critical, but timing matters too. Water immediately after planting, then wait 24 hours before watering again. This prevents soil compaction from frequent watering while ensuring the roots establish contact with moist soil. For the first month, water deeply every 5-7 days rather than light daily watering—this encourages deep root growth.
Mulching Mastery: When you spread that 2-3 inches of mulch in Step 4, think about creating a donut shape—keep mulch 6 inches away from the trunk to prevent rot. I like to use wood chips because they break down slowly, but you can also use straw or leaves. Just avoid fresh grass clippings, which can mat and prevent water penetration. And here's a secret: add a 1-inch layer of compost on top of the mulch for extra nutrients!
Pro Tips for Tree Planting Process
- Planting a tree is one of the most rewarding ways to create lasting beauty in your landscape—here's how to ensure your tree thrives from the very first day.
- Soil Preparation: Don't just dig a hole—create an environment where roots can thrive.
- Root Ball Handling: Step 2 is where many planting mistakes happen.
Frequently asked questions
Got questions about planting trees? You’re not alone! Here are some of the most common queries—plus clear, actionable answers to help you get started with confidence.
What’s the best time of year to plant a tree?
The ideal window is late fall to early spring (before buds break or summer heat arrives). This gives roots time to establish without competing with extreme temperatures. If planting in summer, water deeply and mulch well to reduce stress.
How deep should I plant a tree?
The root flare (where roots meet the trunk) should sit just above ground level—never buried. Dig a hole twice as wide as the root ball but no deeper. Backfill with native soil (avoid amendments like fertilizer) to prevent compaction.
Can I plant a tree in a small yard or container?
Yes! Dwarf varieties (like Japanese maples) or container-grown trees work well in tight spaces. For pots, use a large container (minimum 18” diameter) with drainage holes and repot every 2–3 years. Just ensure it gets enough sunlight and water.
What should I do if my newly planted tree’s leaves turn yellow?
Yellow leaves often signal overwatering, poor drainage, or root damage. Check soil moisture (stick your finger 2” deep—it should feel damp but not soggy). Adjust watering and ensure the root flare isn’t buried. If stress persists, test soil pH or consult a local nursery.
How often should I water a newly planted tree?
Water deeply 2–3 times per week for the first year (10–15 gallons per inch of trunk diameter). After that, taper to once a week unless it’s extremely dry. Use a soaker hose or drip irrigation to keep roots consistently moist without runoff.
Wrapping up and next steps
Planting a tree is a rewarding way to contribute to the environment while adding beauty and value to your space. By following the right tree planting process—from selecting the perfect location and preparing the soil to proper watering and maintenance—you set the stage for healthy, long-lasting growth.
Every step matters, so don’t hesitate to roll up your sleeves and get started!
Ready to make an impact? Pick your tree today and begin your journey toward a greener, healthier future! 🌱💚