Pruning
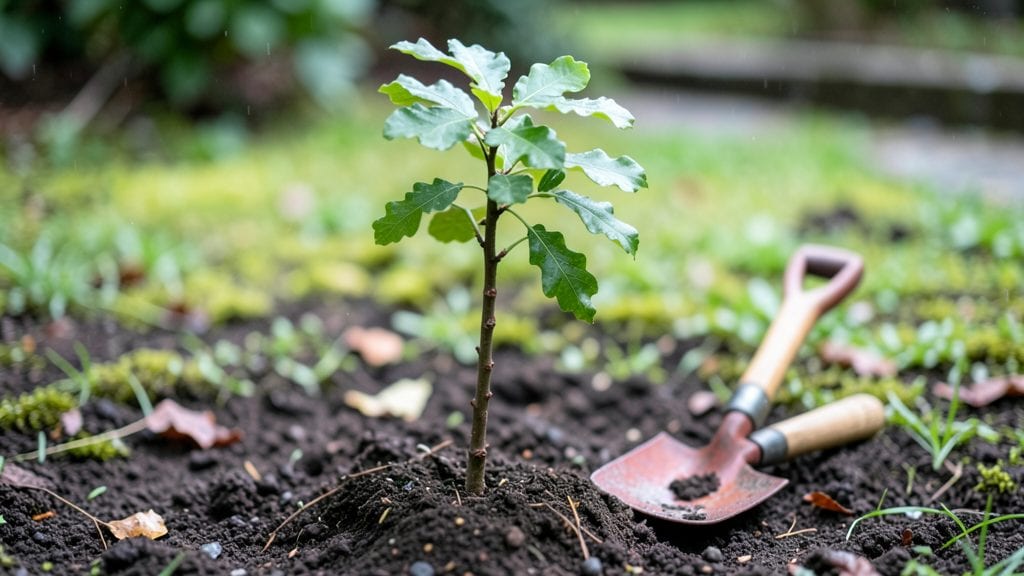
Mastering these essential tree planting tips ensures your tree grows strong for decades—no green thumb required. 🌱 I’ve watched my own trees go from wobbly saplings to sturdy shade providers, and the secret isn’t luck, but knowing how to handle the soil, roots, and water right from day one.
The right tree in the right spot means fewer headaches and more shade, fruit, or beauty for years to come.
You’ll need basic tools—a shovel, gloves, and a sturdy post to stake young trees—and a clear understanding of your tree’s needs. Most people overlook soil prep or watering depth, but those details make the difference between a tree that struggles and one that takes off.
Even in tough climates, the right technique ensures roots spread deep and strong from the start.
By the end, you’ll have a tree planted with confidence, its roots settled in loose, nutrient-rich soil and watered just enough to encourage growth without rot.
The first year is critical, but with these steps, you’ll avoid the most common mistakes—like planting too deep or ignoring mulch—that turn good intentions into wasted effort.
Works for fruit trees, shade trees, or even small ornamentals—just adjust the spacing and care based on the variety. Let’s get that tree growing right the first time.
📚 In This Guide
- What you need
- Instructions
- Tips and common mistakes
- Wrapping up and next steps
What you need
- ● Tree sapling – Choose a healthy, well-rooted tree (size depends on species; typically 1-3 feet tall for small trees).
- ● Shovel or spade – A round-point shovel (18-24 inches wide) works best for digging.
- ● Garden gloves – Protect your hands from dirt, thorns, and rough bark.
- ● Watering can or hose – A soaker hose or drip irrigation is ideal for deep watering.
- ● Mulch (2-4 inches) – Use organic mulch (wood chips, straw, or shredded bark) to retain moisture and suppress weeds.
- ● Pruning shears – For trimming dead or damaged branches post-planting.
- ○ Stakes & ties (optional but helpful) – Use biodegradable stakes (if your tree is top-heavy or in windy areas).
- ● Soil amendment – Mix in compost or peat moss if your soil is poor or clay-heavy.
- ● Tree guard or collar – Protects young trunks from pests and lawnmowers.
- ● Post-hole digger – For deeper planting holes (if needed for large trees).
- ● pH testing kit – Ensures your soil is optimal for your tree’s needs.
- ● Fertilizer (slow-release) – Only use if your tree requires extra nutrients (follow package instructions!).
Instructions for planting trees that grow strong and healthy
Here’s the straightforward method I’ve used to plant trees that thrive from day one.
🌱 Step 1: Choose the Right Spot and Dig the Perfect Hole
Pick a location with 6+ hours of sunlight (unless planting a shade tree) and space for mature growth—trees need room to spread their roots and branches. Avoid low spots where water pools after rain. Dig a hole twice as wide as the root ball but only as deep as the container or root ball itself. This prevents burying the trunk too deeply, which can suffocate roots.
Loosen the sides of the hole with a shovel or hands to remove compacted soil. If your soil is heavy clay, mix in 2-3 inches of compost into the bottom of the hole. This improves drainage and gives roots a nutrient boost right away. Real talk: Skipping this step means roots struggle to establish in poor soil.
🪴 Step 2: Prepare the Tree and Root Ball
Remove the tree from its container and gently loosen the root ball with your fingers—this encourages roots to spread outward instead of circling. If planting bare-root trees, soak the roots in water for 1-2 hours before planting to hydrate them fully. For container-grown trees, let the root ball sit in water for 10-15 minutes to settle the soil.
Check the root flare—the point where the roots meet the trunk. It should sit just above the surrounding soil line, never buried. If the root ball is wrapped in burlap, leave the wrap on but remove any twine or wire that could girdle the trunk as it grows. This is the moment that matters: getting the depth right ensures the tree grows upright and stable.
💧 Step 3: Plant the Tree and Water Deeply
Place the tree in the hole so the root flare is level with the surrounding ground. Fill the hole with soil, tamping it down lightly every 2-3 inches to remove air pockets. Don’t pack it too tightly—roots need room to breathe. Once the hole is half-filled, water the tree deeply to settle the soil around the roots. This prevents gaps that could dry out or trap air.
Finish filling the hole and create a 2-3 inch deep basin around the base to direct water straight to the roots. Water again until the soil is moist 12 inches deep. You’ll know it’s right when water drains away within 30 minutes. Overwatering now causes rot, but deep watering once helps roots establish faster.
☀️ Step 4: Mulch and Protect the Tree
Spread 2-3 inches of mulch (wood chips or shredded bark) in a circle around the tree, keeping it 6 inches away from the trunk. Mulch locks in moisture and blocks weeds, but too close to the trunk invites rot. Use a rake to spread it evenly and avoid piling it against the trunk.
Install a tree stake only if needed—young trees in windy areas benefit from support. If staking, use a soft tie (like a strip of old T-shirt) to attach the tree to the stake loosely. Too-tight ties strangle the trunk as it grows. Here’s the thing—most trees don’t need staking if planted in stable soil.
⏰ Step 5: Monitor and Maintain Through the First Year
Water the tree once a week (more in hot/dry weather) until it’s established. Check soil moisture by sticking your finger 2 inches deep—if it’s dry, water deeply. Avoid shallow watering, which encourages roots to stay near the surface where they dry out faster.
Keep the mulch layer intact and remove any weeds that pop up—they compete with your tree for water and nutrients. In the first year, focus on root growth. You’ll see new leaves and steady growth as a sign the tree is thriving. Don’t fertilize yet; new roots need time to spread before they can handle extra nutrients.
Tips & tricks for planting trees that grow strong and healthy
A few simple tricks can make all the difference between a tree that thrives and one that struggles. Here's what I've learned from planting dozens of trees over the years.
Soil Preparation Secret: In Step 1, when you're loosening the sides of the hole, take an extra minute to break up any hardpan layers deeper than 6 inches. Roots need loose soil to penetrate easily, especially in the first year. If your soil is particularly compacted, consider digging a bit deeper than the root ball and mixing in more compost—this creates a nutrient-rich environment that encourages roots to grow downward rather than circling.
Root Ball Technique: During Step 2, when you're loosening the root ball, don't just scratch the surface—gently work your fingers all the way to the edges. The goal is to create small tears in the root mass, which encourages new root growth outward. For container-grown trees, if the root ball feels completely solid when you press it, soak it for the full 10-15 minutes and check again before planting. A well-hydrated root ball settles better and reduces transplant shock.
Watering Wisdom: The deep watering in Step 3 is where most people go wrong. After your second watering, stick your finger 2 inches deep into the soil—it should feel damp but not soggy. If water pools on the surface, you're overdoing it. For the first month, I recommend checking soil moisture daily during hot weather. The key is to establish a deep root system early, not just keep the surface wet.
Mulch Matters: When you're applying that 2-3 inch layer of mulch in Step 4, think about creating a donut shape rather than a mound. The mulch should be thickest near the outer edge of the tree's reach and taper toward the trunk. This prevents moisture from pooling against the bark, which can cause rot. Also, consider using a mulch with larger chunks—it breaks down more slowly and maintains its moisture-retaining properties longer.
Pro Tips for Tree Planting Tips
- A few simple tricks can make all the difference between a tree that thrives and one that struggles.
- Soil Preparation Secret: In Step 1, when you're loosening the sides of the hole, take an extra minute to break up any hardpan layers deeper than 6 inches.
- Root Ball Technique: During Step 2, when you're loosening the root ball, don't just scratch the surface—gently work your fingers all the way to the edges.
Frequently asked questions
Got questions about planting trees like a pro? Here are some of the most common ones—plus quick, actionable answers to keep your new greenery growing strong!
When is the best time to plant a tree?
The ideal window is late fall or early spring when temperatures are mild, and the ground isn’t frozen. This gives roots time to establish before extreme heat or cold sets in. Avoid planting in summer—roots can dry out quickly, and young trees struggle in scorching temps. Pro tip: If you must plant in summer, water deeply 2-3 times a week to mimic natural rainfall.
How deep should I dig the hole for my tree?
The hole should be twice as wide as the root ball but no deeper—planting too deep can suffocate roots. Loosen the soil at the bottom to encourage root growth into surrounding soil. If your tree comes in a container, check for a root flare (the bulge where roots meet the trunk) and plant so it’s slightly above ground level. This prevents rot and promotes stability.
How often should I water a newly planted tree?
Water thoroughly right after planting, then 1-2 times per week for the first year (more in extreme heat or drought). Aim for 10-15 gallons of water per inch of trunk diameter. Use a soaker hose or drip irrigation to keep moisture deep in the soil. Signs of overwatering: Yellow leaves, mold, or soggy soil. Adjust based on rainfall—your goal is consistently moist, not soggy soil.
Can I plant a tree in a small yard or container?
Choose dwarf or columnar varieties (like Japanese maples or columnar apple trees) for tight spaces. For containers, pick a large pot (at least 18 inches deep) with drainage holes and use well-draining soil. Container trees need more frequent watering and may require winter protection in cold climates. Bonus: Some edible trees (like dwarf citrus) thrive in pots!
What do I do if my tree’s leaves turn brown or yellow?
Brown/yellow leaves often signal underwatering, overwatering, or pest issues. First, check the soil moisture—stick your finger 2 inches down; if dry, water deeply. If leaves are crispy and brown, it’s likely drought stress. Yellowing leaves could mean overwatering or nutrient deficiency (try a balanced fertilizer). Pests? Look for holes, webs, or sawdust-like frass. Treat with neem oil or insecticidal soap if needed.
Should I stake my newly planted tree?
Only stake if your tree is top-heavy, in a windy area, or very young. Use soft ties (like tree ties or old t-shirts) to avoid girdling the trunk. Remove stakes after 1-2 years to encourage natural trunk strength. Rule of thumb: If the tree can sway 10-15 degrees without falling, it doesn’t need support!
Wrapping up and next steps
Planting a tree isn’t just about digging a hole—it’s about nurturing a future that thrives for generations. 🌱 Whether you’re a seasoned gardener or a first-time planter, these tree planting tips give you the confidence to start strong.
From choosing the right spot to watering wisely, every step matters in helping your tree grow deep roots and flourish.
Now that you’re equipped with the know-how, take action! Grab your shovel, pick a sunny day, and give back to the planet—one tree at a time. Your green thumb (or newbie enthusiasm) is all it takes to make a lasting impact. Happy planting! 🌳✨