Transplanting
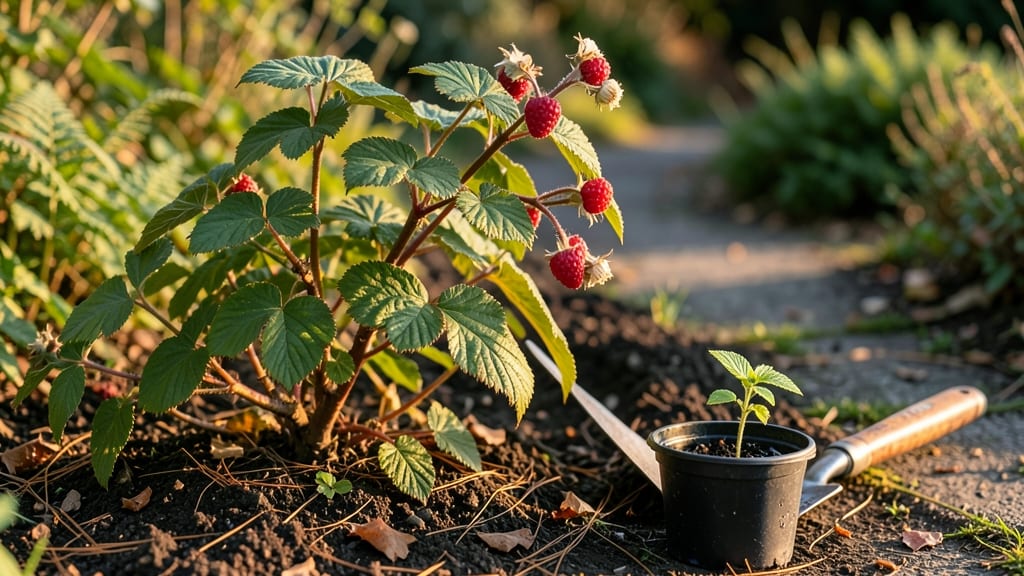
Planting Willamette raspberries in your garden means years of easy-care harvests with minimal fuss—these cold-hardy canes thrive in zones 5-8 where winter chills actually improve next year's fruit.
I learned the hard way that skipping soil prep or crowding plants cuts yields by half, but once you nail the basics, these bushes practically grow themselves.
The secret starts with sunny, well-draining soil—they hate soggy roots—and spacing canes 3-4 feet apart so they don’t compete for nutrients. Plant crowns just above soil level (never bury them), and water deeply right after to settle the roots.
Most beginners overwater at first, but Willamettes are forgiving once established—just keep soil moist but not soaked for the first month.
By summer, you’ll see vibrant green canes shooting up, and if you prune just the dead wood in early spring, the bushes reward you with sweet, firm berries that ripen all at once.
The real magic? These plants keep producing for 10+ years with almost no maintenance after that first growing season. Here’s exactly how to set them up for success.
Works in backyard beds, raised gardens, or even containers with proper drainage. The only rule? Don’t rush—Willamettes take 2 years to hit full production, but once they do, you’ll wonder why you ever bought store berries. Let’s get those canes in the ground right.
📚 In This Guide
- What you need
- Instructions
- Tips and common mistakes
- Wrapping up and next steps
What you need
- ● Willamette raspberry canes: 3–5 plants (bare-root or 1-gallon pots) for optimal pollination and yield.
- ● Well-draining soil: Mix of native soil + 2–3 inches of compost or aged manure (pH 5.5–6.5).
- ● Sunlight: Full sun (6+ hours/day) in a sheltered spot (windbreaks help!).
- ● Water: Drip irrigation or soaker hose (avoid overhead watering to prevent disease).
- ● Mulch: 2–3 inches of straw or wood chips to retain moisture and suppress weeds.
- ● Fertilizer: Balanced 10-10-10 or organic options (like fish emulsion) at planting and mid-season.
- ● Gloves & pruners: Sharp, clean pruners (sterilize with rubbing alcohol) and heavy-duty gloves.
- ● Support system: T-posts, trellis, or wire fence (3–4 feet tall) for vertical growth.
- ● Soil test kit to check pH/nutrients before planting.
- ● Epsom salt (for magnesium boost if leaves yellow).
- ● Row covers (frost protection for early spring/late fall).
- ● Disease-resistant spray (like neem oil) for preventive care.
- ● Plant tags to track varieties and planting dates.
Step-by-step instructions for planting Willamette raspberries
This variety thrives with the right site selection and planting technique—here's how to set them up for years of low-maintenance harvests.
Prepare the Planting Site for Optimal Growth
Willamette raspberries demand full sun—choose a location receiving at least 6-8 hours of direct sunlight daily. I always test the spot by observing how sunlight moves across the area throughout the day, especially in early morning and late afternoon when shade can be deceiving. The soil should drain well but retain moisture; if your yard has heavy clay, amend it with 2-3 inches of compost mixed into the top 12 inches of soil.
Raspberries are shallow-rooted, so focus on the top 6 inches of soil quality. Work in 1 cup of balanced 10-10-10 fertilizer per planting hole to give the canes a nutrient boost without overwhelming them. Avoid fresh manure—it burns tender roots and can introduce pathogens. Instead, use well-aged compost or a slow-release organic fertilizer. The planting hole should be 12-18 inches wide and just as deep, allowing roots to spread comfortably without crowding.
Plant Bare-Root Canes at the Right Depth and Spacing
Soak the bare-root canes in lukewarm water for 1-2 hours before planting to rehydrate the roots. This step is critical—dry roots struggle to establish in the first 2-3 weeks, and you’ll see stunted growth if you skip it. Plant 4 canes per hole, spacing them 6 inches apart in a loose cluster. The crown (where roots meet the cane) should sit 1 inch below soil level—burying it deeper risks rot, while planting too high leads to weak top growth.
Spread the roots outward gently, ensuring they fan into the soil naturally. Fill the hole halfway with soil, then water deeply to settle it around the roots. Once the water drains, finish filling the hole, pressing lightly to eliminate air pockets. Mulch with 3 inches of straw or wood chips, keeping it 6 inches away from the canes to prevent rot. This mulch layer conserves moisture and suppresses weeds, two of the biggest early challenges with raspberries.
Water and Support Newly Planted Canes
Water the newly planted canes deeply every other day for the first 2 weeks, then taper to once a week once the soil is established. You’ll know the moisture is right when the top 2 inches of soil feel damp but not soggy—raspberries hate waterlogged roots. Install 4-foot tall stakes or a wire trellis immediately to support the canes as they grow. Willamette raspberries produce primocanes (first-year canes) that fruit in their second year, so sturdy support prevents them from flopping over under fruit weight.
Prune only the damaged or crossing canes at planting—this variety handles minimal pruning, but removing any canes growing toward the center of the cluster improves airflow and reduces disease risk. Avoid heavy pruning in the first year; focus on establishing a strong root system. You’ll see new growth within 3-4 weeks if the site and care are right—watch for bright green leaves and flexible canes as signs of healthy establishment.
Monitor and Maintain Through the First Season
Fertilize lightly in early spring with ½ cup of 10-10-10 fertilizer per plant, then again after harvest. Willamette raspberries are vigorous but not heavy feeders—over-fertilizing leads to excessive foliage at the expense of fruit. Water deeply once a week during dry spells, aiming for 1 inch of water per week. You’ll notice the canes bend slightly under fruit weight—this is normal, but if they sag excessively, add more support or thin some fruit clusters to reduce load.
Watch for Japanese beetles or spider mites in late summer—they target raspberries aggressively. A neem oil spray applied every 2 weeks keeps pests in check without harming beneficial insects. By late fall, the canes will turn yellow and die back naturally. Leave the mulch in place over winter; it insulates roots and protects against temperature swings. The following spring, you’ll see new primocanes emerging from the base—these will become next year’s fruiting canes.
Tips & tricks for thriving Willamette raspberry canes
A few key strategies will help you establish strong, productive raspberry canes that require minimal pruning for years to come.
Sunlight Strategy: The 6-8 hours of daily sunlight requirement is non-negotiable for Willamette raspberries. I've learned the hard way that even partial shade—especially in late afternoon—can reduce fruit quality. Test your site by observing sunlight patterns throughout the day, particularly in early morning and late afternoon when shade can be deceiving. If you notice areas receiving less than 6 hours of direct sunlight, consider planting in a raised bed or container garden where you can control the growing environment more precisely.
Root Establishment Technique: That critical 1-2 hour soaking of bare-root canes before planting is where many gardeners go wrong. I recommend using lukewarm water (around 70°F) rather than cold water, as it helps prevent shock to the roots. After planting, maintain consistent moisture for the first 2-3 weeks by watering deeply every other day—this mimics natural rainfall patterns and encourages strong root development. The goal is to establish a robust root system before the canes focus on above-ground growth.
Mulching Insight: The 3-inch layer of straw or wood chips serves multiple purposes beyond just suppressing weeds. This mulch acts as a moisture barrier, reducing evaporation by up to 40% during hot summer months. I've found that maintaining a 6-inch gap between the mulch and canes prevents rot while still providing excellent weed control. In particularly dry climates, you might want to increase this to 4 inches of mulch during the first growing season to help conserve moisture during the critical establishment period.
Pest Prevention: The neem oil spray recommendation is one of the most effective organic pest control measures for raspberries. Japanese beetles and spider mites are particularly aggressive in late summer, but I've found that applying neem oil every 2 weeks starting in early July provides excellent protection. The key is to apply it in the early morning when bees are less active, and always follow the instructions on the product label for proper dilution. This proactive approach can prevent infestations before they become problematic, saving you from potential crop loss.
Pro Tips for Willamette Raspberry Planting
- A few key strategies will help you establish strong, productive raspberry canes that require minimal pruning for year...
- Sunlight Strategy: The 6-8 hours of daily sunlight requirement is non-negotiable for Willamette raspberries. I've lea...
- Root Establishment Technique: That critical 1-2 hour soaking of bare-root canes before planting is where many gardene...
Frequently asked questions
Got questions about planting Willamette raspberries? You’re not alone! Here are some of the most common concerns—and straightforward answers—to help you get started with confidence.
When is the best time to plant Willamette raspberries in my region?
The ideal window is early spring (March–April) or fall (September–October), when soil temps are cool but frost isn’t a threat. In warmer climates (Zones 7–9), avoid summer planting—heat stress can stunt young canes. Check your last frost date for precision!
Do Willamette raspberries need cross-pollination, or can I grow them solo?
Great news: Willamettes are self-pollinating, so you don’t need a second plant for fruit! Just ensure they get 6+ hours of sunlight and good airflow to prevent diseases. One bush = one happy harvest.
Why aren’t my Willamette raspberries fruiting after planting?
Patience is key—primocanes (first-year canes) won’t bear fruit; they store energy for next year. Focus on floricane (second-year canes), which produce berries. If no canes emerge, check for poor soil drainage or overwatering (root rot is a sneaky culprit!).
Can I replant Willamette raspberries if my first attempt failed?
Start fresh with healthy bare-root plants from a reputable nursery. Amend the soil with compost and balanced fertilizer (10-10-10), and space canes 3–4 feet apart to improve airflow. Avoid the same spot if diseases like cane blight were an issue.
Are there low-maintenance alternatives to Willamette raspberries?
If pruning feels overwhelming, try Heritage® raspberries (disease-resistant) or Boyne Golden raspberries (thornless, easy-care). Willamettes are minimal-prune (just remove dead canes!), but these varieties require even less fuss. Just match your climate!
Wrapping up and next steps
Planting Willamette raspberries is a rewarding journey that combines ease with delicious results—especially when you embrace their minimal-pruning nature!
With the right location, soil prep, and a little patience, these hardy canes will thrive year after year, gifting you with juicy, flavorful berries with far less effort than traditional varieties. 🌱
Ready to turn your patch of earth into a raspberry haven? Start small—grab those bare-root plants or potted canes, dig in, and watch your garden transform! And if you’re feeling inspired, share your progress or ask questions in gardening forums—every expert was once a beginner. Happy planting! 🍓