Pests
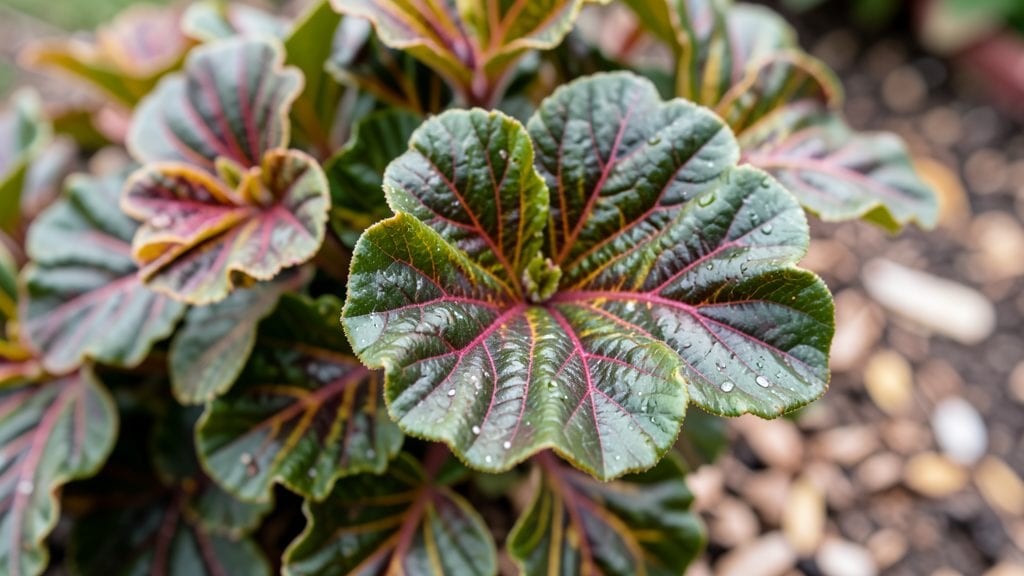
Growing a worm bush plant means adding a pest-repelling powerhouse to your garden that thrives on neglect. 🌿 I’ve had mine for years, and it’s never failed to keep aphids and whiteflies at bay while looking stunning in pots or borders.
The secret lies in its hardy nature and ability to grow in almost any condition—once established, it practically takes care of itself.
This plant loves bright, indirect light but tolerates shade, making it perfect for problem spots like north-facing walls or shady patios. Use well-draining potting mix—no fancy amendments needed—and water only when the top inch of soil feels dry.
Overwatering is the only real enemy, and even then, it bounces back quickly. Propagation is a breeze too: just snip a stem, dip it in water, and root it in soil within weeks.
By summer, you’ll have a lush, velvety-green bush bursting with tiny purple flowers that bees adore. The foliage stays vibrant all year, and its strong scent naturally deters pests without chemicals. Place it near roses or veggies for a low-maintenance shield that works harder than any store-bought spray.
Works equally well in containers, hanging baskets, or tucked into garden beds. Once you grow one, you’ll wonder why you didn’t add this foolproof plant sooner—it’s the ultimate lazy gardener’s solution.
📚 In This Guide
- What you need
- Instructions
- Tips and common mistakes
- Wrapping up and next steps
What you need
- ● Worm bush plant seeds or saplings: 1–3 (ensure they’re disease-free and sourced from a reputable supplier).
- ● Well-draining potting soil: 5–10 gallons (mix with perlite or sand for optimal aeration).
- ● Containers or garden bed: For pots: 5–15 gallon containers with drainage holes (1–2 plants per pot).
- ● For in-ground planting: A sunny spot with loose, fertile soil (pH 6.0–7.5).
- ● Organic compost or worm castings: 1–2 cups (boosts soil health and plant vigor).
- ● Watering can or hose with a gentle spray nozzle: For even moisture distribution.
- ● Pruning shears: Sharp, sterilized pair (for shaping and maintenance).
- ● Slow-release fertilizer: Balanced 10-10-10 or organic options like fish emulsion (apply sparingly).
- ● Mulch (straw or wood chips): 2–3 inches to retain moisture and suppress weeds.
- ● Pest-repellent companion plants: Marigolds or basil to enhance natural pest control.
- ● Plant labels: To track growth stages and care notes.
- ● Gloves: For handling sap (which can irritate skin—worm bush has toxic sap!).
How to grow a worm bush for natural pest control
This low-maintenance plant thrives year-round and keeps pests away with minimal effort.
🌱 Step 1: Select and Prepare the Host Plant
Choose a healthy, pest-free host plant—like a small shrub or herbaceous perennial—that can support the worm bush. I like using lavender or rosemary because their strong scent naturally deters pests while providing a sturdy base. Prune any dead or yellowing foliage first, then water the host plant deeply to ensure it’s hydrated and ready for the transplant.
Select a spot with partial shade (morning sun is ideal) to protect the delicate worm bush from harsh afternoon rays. The host plant should be in a 6-inch diameter pot or directly in the ground if planting outdoors. If using a container, ensure it has drainage holes to prevent root rot—this is critical for both the host and the worm bush.
🪴 Step 2: Gather and Plant the Worm Bush Starter
Purchase a worm bush starter (a small potted plant with visible worm eggs or cocoons) from a reputable nursery or online supplier. Handle it gently—these delicate creatures are sensitive to temperature changes. Remove the starter from its container and carefully tease apart the roots if they’re tightly bound, but don’t disturb the worm cocoons too much.
Plant the worm bush starter 2-3 inches away from the host plant’s base, ensuring the top of the root ball is level with the soil surface. Press the soil lightly around the roots to secure the plant without compacting it. Water gently but thoroughly until moisture reaches 1 inch deep—you’ll know it’s right when the soil feels damp but not soggy.
☀️ Step 3: Provide Ideal Growing Conditions
Keep the worm bush in bright, indirect light—think dappled shade under a tree or a north-facing window indoors. Direct sunlight can scorch the leaves, while too little light weakens the plant and reduces its pest-repelling effectiveness. If growing outdoors, place it where it gets 3-4 hours of morning sun and afternoon shade.
Water the worm bush every 5-7 days, allowing the top 1-2 inches of soil to dry out between waterings. Overwatering drowns the worms and their cocoons, while underwatering stresses the plant. Use a spray bottle for light misting if the air is dry, especially in winter when indoor heating reduces humidity.
✂️ Step 4: Maintain and Encourage Growth
Fertilize the worm bush once a month during the growing season (spring and summer) with a balanced, water-soluble fertilizer diluted to half strength. Avoid heavy-handed feeding—too much fertilizer burns the roots and disrupts the natural balance of the worm ecosystem. In fall and winter, reduce fertilization to every 6-8 weeks as growth slows.
Prune lightly in early spring to remove any dead or damaged leaves, but avoid cutting into the worm cocoons. You’ll notice new growth emerging within 2-3 weeks if conditions are right. Watch for small, white cocoons on the undersides of leaves—these are the next generation of worms, and their presence means your plant is thriving.
💧 Step 5: Monitor for Pests and Adjust Care
Check the worm bush weekly for signs of pests like aphids or spider mites. If you spot any, spray the plant with neem oil (mixed with water) or a soapy water solution to deter them without harming the worms. The worm bush itself should repel most pests naturally, but occasional maintenance keeps it at peak performance.
If you notice the leaves turning yellow or the plant wilting, it’s often a sign of overwatering or poor drainage. Adjust your watering schedule and ensure the pot has proper drainage. In hotter months, increase watering slightly to keep the soil consistently moist but not waterlogged. With consistent care, your worm bush will flourish and keep pests at bay for years.
Tips & tricks for perfect worm bush plant
Here's what I learned after growing worm bushes for years—these small details make all the difference in keeping your pest control plant thriving.
Host Plant Selection Tip: Lavender and rosemary are my top picks for host plants because their strong fragrance naturally repels pests while providing sturdy support. If you don't have these, try thyme or mint—just make sure they're healthy and pest-free before planting. The key is choosing a plant with a strong scent that complements the worm bush's natural pest-deterring properties.
Planting Precision: When planting your worm bush starter in Step 2, position it 2-3 inches away from the host plant's base—this distance gives the roots room to establish without competing too aggressively. I've found that planting too close can stress both plants, while planting too far reduces the symbiotic benefits. Gently press the soil around the roots rather than packing it down to maintain good aeration for the delicate worm cocoons.
Lighting Strategy: The 3-4 hours of morning sun mentioned in Step 3 is crucial—it provides enough light for photosynthesis without scorching the leaves. If you're growing indoors, place your worm bush near a north-facing window where it gets bright but indirect light. I've seen plants struggle when placed in south-facing windows where afternoon sun can become too intense, causing leaf burn.
Watering Wisdom: The every-5-to-7-days watering schedule in Step 3 works best when you check the soil moisture first. Stick your finger 1-2 inches deep—if it feels dry, it's time to water. In winter, when indoor heating dries the air, I often use a spray bottle for light misting between waterings. This mimics natural humidity levels and prevents the soil from drying out too quickly around the worm cocoons.
Pro Tips for Worm Bush Plant
- Here's what I learned after growing worm bushes for years—these small details make all the difference in keeping your pest control plant thriving.
- Host Plant Selection Tip: Lavender and rosemary are my top picks for host plants because their strong fragrance naturally repels pests while providing sturdy support.
- Planting Precision: When planting your worm bush starter in Step 2, position it 2-3 inches away from the host plant's base—this distance gives the roots room to establish without competing too aggressively.
Frequently asked questions
What’s the best way to plant a worm bush for maximum pest control?
The worm bush (Solanum mauritianum) thrives in full sun to partial shade and well-draining soil. Plant it 10–15 feet away from edibles (it’s toxic to pets and humans) and mulch to retain moisture. For fast results, start with a 1–2-foot-tall sapling in spring or early fall.
How long does it take for a worm bush to start repelling pests?
You’ll see early signs of pest control within 2–3 months as the plant matures, but full effectiveness (especially against aphids, whiteflies, and caterpillars) typically takes 6–12 months. The more established it is, the stronger its natural insect-repelling compounds become!
Is worm bush safe to use near vegetables or fruits?
No—keep it far from edibles!
While it deters pests, all parts of the worm bush are toxic if ingested by humans or pets. Plant it at least 20 feet away from gardens or use it as a border plant around non-edible areas like patios or driveways.
Can worm bush survive cold winters, or do I need to protect it?
This tropical plant is tender to frost and may die back in temps below 30°F (-1°C). In cold climates, grow it in containers and move it indoors (or mulch heavily) during winter. If pruned back, it’ll regrow in spring—just be patient!
What’s a good alternative if worm bush isn’t available in my area?
Try these low-maintenance pest-repelling plants:
- Marigolds (deter nematodes and aphids)
- Lemongrass (repels mosquitoes and flies)
- Basil (keeps whiteflies and thrips away)
- Garlic chives (natural aphid deterrent)
Wrapping up and next steps
The worm bush plant is your low-maintenance ally in the battle against pests—naturally! With its ease of care and year-round benefits, it’s a game-changer for any garden. Whether you’re a seasoned gardener or just starting out, this plant proves that effective pest control doesn’t have to be complicated.
Ready to transform your garden? Start by adding a worm bush to your outdoor space today—your plants (and your sanity) will thank you! 🌱 For extra tips, explore companion plants that pair beautifully with it or dive deeper into organic pest solutions.