Fertilization
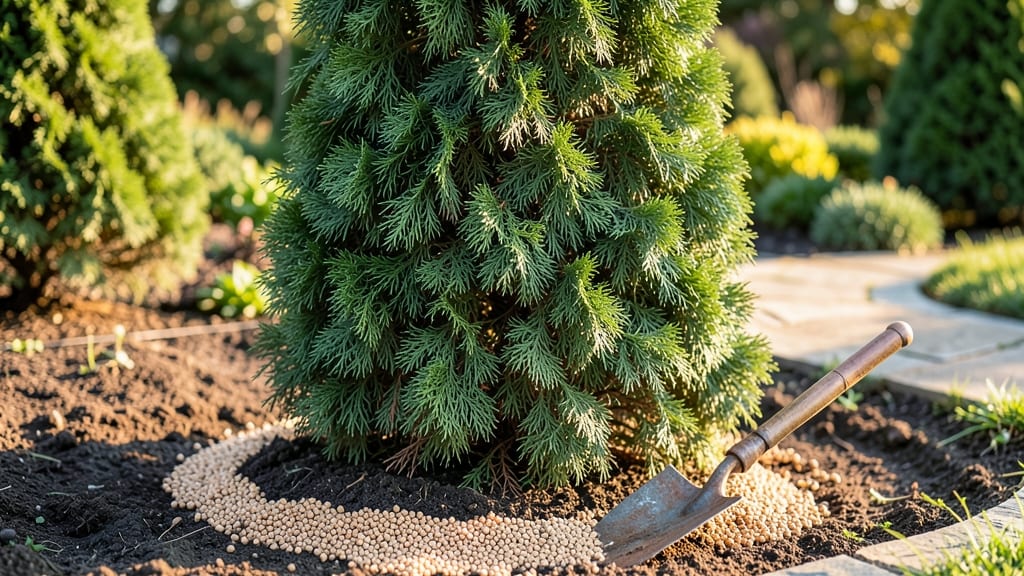
Feeding your arborvitae with the right plant food transforms it from a struggling hedge into a year-round green wall—thick, vibrant, and resistant to browning. I learned the hard way that arborvitae don’t respond to heavy feeding like annuals; they need slow-release nutrients that mimic natural soil conditions.
The difference between a lanky, yellowing hedge and one that stays dense and glossy comes down to what you feed it—and when.
Start with a balanced, slow-release fertilizer (10-10-10 or 12-12-12) designed for evergreens, applied in early spring before new growth begins. Organic options like composted manure or fish emulsion work too, but they require more frequent applications.
Overdoing it causes needle burn—something I’ve seen too many times after enthusiastic (but misguided) spring feedings. The key is patience: arborvitae thrive on steady, low doses rather than quick fixes.
Watch for signs your plant is hungry: dull, yellowing needles or sparse growth mean it’s time to feed again, usually in late summer for a fall boost. A well-fed arborvitae stays deep green, dense, and bushy, with new growth emerging uniformly along the stems.
Even in winter, the roots stay active if the soil stays unfrozen—so a light application in mild climates can prevent spring shock. Think of it as a slow-release insurance policy against winter stress.
For DIY gardeners, compost tea or well-aged manure spread around the root zone works wonders—just avoid fresh manure, which can scorch roots. And here’s the golden rule: less is more.
Arborvitae are low-maintenance plants that reward consistency over intensity. With the right food and timing, your hedge will look like it’s been professionally pampered—without the monthly upkeep.
📚 In This Guide
- What you need
- Instructions
- Tips and common mistakes
- Wrapping up and next steps
What you need
- ● Slow-release arborvitae fertilizer – Look for a balanced, slow-release formula (e.g., 12-12-12 or 16-4-8 NPK ratio) with micronutrients like iron and manganese. Aim for 1–2 pounds per 100 sq. ft. of soil.
- ○ Organic mulch (optional but recommended) – 2–4 inches of pine straw, wood chips, or shredded bark to retain moisture and regulate soil temp.
- ● Garden gloves – A durable pair to protect your hands from soil and sharp mulch.
- ○ Hand trowel or garden fork – For gentle soil aeration (optional but helpful for compacted soil).
- ● Watering can or hose with a soaker nozzle – To hydrate deeply after fertilizing (avoid overhead sprinklers).
- ● Soil pH test kit – Arborvitae thrive in slightly acidic soil (pH 6.0–7.0). Adjust with lime (to raise pH) or sulfur (to lower pH) if needed.
- ● Broadcast spreader – For even fertilizer distribution (especially useful for large shrubs).
- ● Pruning shears – Trim dead or overgrown branches before fertilizing to boost absorption.
- ● Compost or worm castings – Mix 1 cup per sq. ft. into the top 2–3 inches of soil for extra organic matter.
Step-by-Step guide to feeding arborvitae for long-term health
This method ensures your arborvitae stays vibrant with minimal effort—just follow the seasonal timing and application techniques I’ve perfected over years of maintaining these evergreens.
Test Soil pH Before Applying Fertilizer
Arborvitae thrive in slightly acidic soil with a pH between 5.0 and 7.0. Use a soil test kit to check your current levels before adding fertilizer. If your soil tests above 7.0, amend it with sulfur or peat moss before proceeding—alkaline soil locks out essential nutrients like iron and manganese, causing yellowing needles even with proper feeding.
Take samples from 3-4 inches deep around the plant’s dripline (the edge of its canopy). Mix the soil with water in a clean container, then follow the test kit instructions. If you’re in doubt, aim for a neutral to slightly acidic range—6.0-6.5 is ideal for most arborvitae varieties. Adjusting pH now prevents wasted fertilizer later.
Apply Slow-Release Fertilizer in Early Spring
Spread a 10-10-10 slow-release granular fertilizer evenly over the soil surface, extending 6-12 inches beyond the plant’s dripline. Use about ½ cup per year of plant maturity—so a 5-year-old arborvitae gets 2½ cups, while a 10-year-old needs 5 cups. Avoid piling fertilizer near the trunk; instead, work it into the top 2-3 inches of soil lightly with a rake.
Water the area deeply after application to activate the granules. This timing—4-6 weeks before new growth begins—lets roots establish before the growing season. Skip fertilizing in late summer or fall; arborvitae go semi-dormant, and excess nutrients can lead to weak, winter-damaged growth.
Supplement with Organic Matter Annually
Mix 2-3 inches of compost or well-aged pine bark fines into the topsoil around the plant’s root zone. Arborvitae benefit from organic matter’s slow nutrient release and improved soil structure. Spread the compost in a 3-inch-wide band around the dripline, then lightly scratch it into the soil with a garden fork.
This step mimics natural forest conditions and reduces the risk of salt buildup from synthetic fertilizers. I recommend doing this in early spring, right after the initial fertilizer application. Avoid fresh manure—it can burn roots and disrupt soil pH quickly.
Monitor for Nutrient Deficiencies Year-Round
Check for yellowing needles (often a sign of iron or nitrogen deficiency) or brown tips (usually from over-fertilization or drought stress). If needles turn yellow between the veins, it’s likely chlorosis from high pH or iron deficiency—apply chelated iron in early spring. For general browning, reduce watering slightly and avoid fertilizing until the following spring.
Prune any dead branches in late winter or early spring before new growth starts. Healthy arborvitae should have dark green, firm needles with no excessive shedding. If you notice stunted growth despite proper feeding, the plant may need more space—arborvitae often outgrow their planting sites within a decade.
Adjust Feeding for Mature Trees
Once your arborvitae reaches 10 years or more, reduce fertilizer applications to every other year unless you notice nutrient deficiencies. Over-fertilizing mature trees leads to salt buildup, which damages roots over time. Instead, focus on mulching with 2-3 inches of organic matter annually to maintain soil health.
For large specimens, use a broadfork to loosen compacted soil in the root zone every 2-3 years. This improves water and nutrient uptake without the need for frequent feeding. If your arborvitae is part of a windbreak or hedge, divide the fertilizer amount by half—these plants compete more aggressively for resources.
Tips & tricks for perfect arborvitae feeding
These practical insights will help you maintain your arborvitae's health with precision and confidence—avoiding common pitfalls that compromise growth.
Soil pH Precision: When testing soil pH in Step 1, take multiple samples from different directions around the plant's dripline. Soil pH can vary dramatically even within a few feet, so average your results rather than relying on a single reading. If your test kit doesn't include a pH meter, consider sending samples to a local agricultural extension office—they often provide free or low-cost testing with more accurate results.
Fertilizer Application Technique: In Step 2, use a spreader for the 10-10-10 fertilizer to achieve even distribution across the 6-12 inch band. I've seen many gardeners create fertilizer "hot spots" by hand-spreading, which can burn roots. For young arborvitae (under 5 years), reduce the fertilizer amount by 25%—their root systems are still developing and can't handle full-strength applications. Always water immediately after application to prevent granules from blowing away.
Organic Matter Integration: For Step 3, focus on the quality of your compost or pine bark fines. Avoid fresh wood chips or untreated sawdust—they can compact and prevent proper aeration. Instead, use well-aged compost that has broken down into a dark, crumbly texture. When mixing into the soil, work it in gently—arborvitae roots are shallow and can be damaged by aggressive tilling. A garden fork is ideal for this delicate operation.
Deficiency Diagnosis: The yellowing between veins mentioned in Step 4 is a classic sign of iron chlorosis. If you confirm this diagnosis, apply chelated iron in early spring as directed, but also consider adding a thin layer of sulfur to lower soil pH gradually. For brown tips specifically, check your watering habits—arborvitae prefer consistently moist but not soggy soil. The ideal moisture level should feel like a wrung-out sponge when you squeeze a handful of soil.
Pro Tips for Arborvitae Plant Food
- These practical insights will help you maintain your arborvitae's health with precision and confidence—avoiding common pitfalls that compromise growth.
- Soil pH Precision: When testing soil pH in Step 1, take multiple samples from different directions around the plant's dripline.
- Fertilizer Application Technique: In Step 2, use a spreader for the 10-10-10 fertilizer to achieve even distribution across the 6-12 inch band.
Frequently asked questions
Got questions about keeping your arborvitae thriving with the right plant food?
You’re not alone! Here are answers to the most common concerns—from timing to troubleshooting—so you can give your evergreens the perfect slow-release boost.
When is the best time to fertilize arborvitae?
Apply arborvitae plant food in early spring (March–April) when new growth begins, and again in late fall (October–November) to support root development over winter. Avoid fertilizing in extreme heat or drought—roots need moisture to absorb nutrients efficiently. For slow-release options, one application in spring may suffice!
What if my arborvitae turns brown after fertilizing?
Brown needles can signal over-fertilization (too much salt) or drought stress. Flush the soil with water to dilute excess salts, and reduce watering temporarily to let roots recover. If brown patches persist, switch to a low-salt, organic fertilizer and monitor moisture levels closely.
Can I use regular lawn fertilizer on arborvitae?
Not ideal! Arborvitae thrive on balanced, slow-release nutrients (like 10-10-10 or 12-4-8) with micronutrients. Lawn fertilizers are often high in nitrogen, which can burn tender evergreen roots. Opt for evergreen-specific or acid-loving plant food instead—it’s gentler and mimics natural soil conditions.
How often should I fertilize established arborvitae?
For mature trees, once a year (spring) is usually enough with slow-release fertilizer. Younger trees (under 3 years) may need a light application in spring and fall. Skip fertilizing in the first year after planting—focus on watering and root establishment first. Over-fertilizing can harm more than help!
What’s the difference between synthetic and organic arborvitae plant food?
| Synthetic | Organic |
|---|---|
| Fast-acting, precise nutrient ratios (e.g., 12-4-8). Best for quick fixes or drought conditions. | Slow-release, improves soil health long-term (e.g., compost, fish emulsion). Great for eco-friendly gardens. |
| May contain salts—use cautiously in dry climates. | Safer for pets/kids but requires more frequent reapplication. |
Pro tip: Mix both for a balanced approach!
Wrapping up and next steps
Choosing the right arborvitae plant food with slow-release nutrients is the secret to keeping your evergreens thriving year-round! 🌿 Whether you opt for organic options like compost or fish emulsion or prefer the convenience of synthetic fertilizers, consistency is key.
With the right care, your arborvitae will reward you with vibrant foliage and robust growth for seasons to come.
Now that you’re armed with the knowledge, take the next step—head to your garden center or order online to stock up on the perfect fertilizer for your arborvitae. Happy gardening! 🌱