Planting
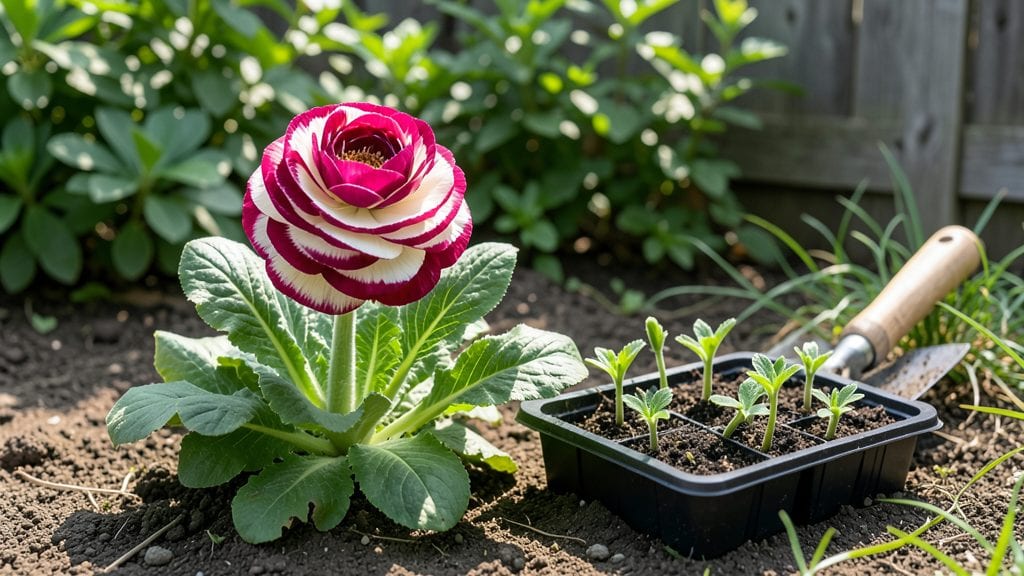
Planting ranunculus bulbs in the fall guarantees those shockingly lush, papery blooms by Mother’s Day—something I’ve done for five years now with zero failures.
The key is timing: in USDA zones 3-9, bulbs need to hit the ground 6-8 weeks before your first frost, when soil temps drop below 60°F. I’ve learned the hard way that planting too early means rot, while waiting too long risks weak growth.
You’ll need a sunny spot with well-draining soil—ranunculus bulbs hate soggy feet—and a handful of supplies: bulbs (available at garden centers now), a trowel, and a light layer of mulch.
The process takes 20 minutes for a small bed, and the bulbs can even go in containers if you’re short on ground space. My first attempt used garden soil straight from the yard, but amending with compost makes all the difference.
By spring, you’ll be rewarded with clusters of blooms that last for weeks, in colors from buttery yellow to deep magenta. The secret? A light top-dressing of bulb food in early spring jumpstarts growth, and cutting spent blooms keeps the plant focused on producing more.
These aren’t just pretty—they’re neighbor-jealousy levels of showstopping.
Works in zones 3-9, though southern gardeners can plant as late as December. Northerners? Start earlier, around October 1st. The same method applies to both in-ground beds and containers—just adjust spacing. Here’s how to nail it every time.
📚 In This Guide
- What you need
- Instructions
- Tips and common mistakes
- Wrapping up and next steps
What you need
- ● Ranunculus bulbs (corms): 1–2 lbs (per 10 sq ft of garden bed) – choose mixed colors for a dazzling display!
- ● Pre-chilled corms (or untreated if you’ll chill them yourself—see tips below).
- ● Well-draining soil: Loamy soil with amended compost (or a mix of 60% garden soil + 40% perlite/sand for heavier clay).
- ○ pH 6.0–7.5 (test kit optional but helpful!).
- ● Garden tools: Trowel or hand fork (for planting corms 2–3 inches deep).
- ● Garden rake (to loosen soil).
- ● Watering can or hose with a gentle spray nozzle (avoid blasting corms!).
- ● Fertilizer: Balanced 10-10-10 or 5-10-10 granular fertilizer (apply lightly at planting).
- ● Cold frame or refrigerator (for 6–8 weeks of chilling if corms aren’t pre-chilled).
- ● Mulch (straw or shredded leaves to insulate corms over winter).
- ● Plant labels (to track varieties—trust us, you’ll forget!).
- ● Garden twine or stakes (for tall varieties to prevent flopping).
- ● Slow-release fertilizer (like osmocote) for spring blooms.
How to plant fall ranunculus for stunning spring color
Here's the method I've used for years to get those lush, layered ranunculus blooms every spring.
Prepare the Planting Site for Fall Success
Choose a location with full sun exposure—at least 6 hours of direct sunlight daily—since ranunculus needs plenty of light to store energy for spring blooming. The soil should drain exceptionally well; ranunculus roots rot quickly in soggy conditions. If your garden soil is heavy clay, amend it with 2-3 inches of coarse sand or perlite mixed into the top 12 inches of soil.
Work the soil to a loose, crumbly texture, breaking up any compacted layers. A simple fork test tells you if drainage is adequate: poke a fork into the ground—if water pools around it after 10 minutes, your soil needs more sand or gravel. I like to add 1 cup of bone meal per 10 square feet at this stage to provide slow-release phosphorus, which encourages strong root development during dormancy.
Divide and Plant Ranunculus Corms in Fall
Ranunculus corms should be planted 6-8 weeks before the first hard frost in your area. If you're using a package of corms, separate them gently—each corm should have one or two "eyes" (small dimples or buds) where shoots will emerge. Plant corms 2 inches deep and 3-4 inches apart in rows spaced 6 inches apart.
Position the corms with the eyes facing upward; this ensures the shoots grow toward the surface in spring. If you're planting in containers, use a well-draining mix of 50% potting soil and 50% perlite. Water lightly after planting to settle the soil but avoid soaking, as excess moisture can cause rot before dormancy sets in.
Mulch and Protect Through Winter
After planting, apply a 2-3 inch layer of straw mulch to insulate the corms and protect them from freezing temperatures. This mulch layer should cover the soil but not the corms themselves. In colder climates, consider adding an extra 4-6 inches of leaves or straw on top of the mulch for deeper insulation.
Water the area lightly again to help settle the mulch, but avoid overwatering—ranunculus corms need to stay dry during dormancy. If your region experiences heavy rain or snowmelt, ensure the mulch isn’t compacting into a waterproof barrier. A quick check with your finger should reveal dry soil beneath the mulch.
Monitor and Prepare for Spring Growth
In late winter, 4-6 weeks before your last frost date, remove the mulch to allow sunlight to reach the soil. This signals the corms to begin growing. You’ll notice green shoots emerging in 2-3 weeks, indicating it’s time to water lightly to encourage root development. Once shoots reach 2-3 inches tall, apply a balanced, water-soluble fertilizer (10-10-10) at half strength to promote lush growth.
Watch for first true leaves—these will appear 3-4 weeks after shoots emerge. At this stage, increase watering slightly to support the plant’s rapid growth. If you notice any yellowing leaves, it’s often a sign of overwatering or poor drainage, so adjust your care accordingly.
Stake and Support for Full Bloom Season
As the plants grow taller—typically 6-8 weeks after shoots emerge—they’ll need support. Install 4-6 inch tall stakes or small cages around each clump to prevent the delicate stems from bending or breaking under the weight of blooms. Ranunculus flowers are heavy and can cause stems to flop if unsupported.
Continue fertilizing every 2-3 weeks with the same diluted fertilizer to maintain vibrant blooms. Deadhead spent flowers by pinching them off just above the next set of leaves to encourage continuous blooming. By following these steps, you’ll have vibrant, long-lasting ranunculus blooms that last 6-8 weeks in spring.
Tips & tricks for perfect fall-planted ranunculus
These insider strategies will help you transform your fall planting into a spring spectacle of vibrant ranunculus blooms.
Soil Preparation Insight: The 10-minute fork test in Step 1 is your best friend for determining drainage. If water remains pooled around the fork after that time, you're dealing with compacted soil that will suffocate ranunculus roots. For even better results, consider adding a handful of horticultural charcoal to your amended soil—it improves drainage while providing beneficial microbes that protect against rot.
Planting Timing Strategy: The 6-8 week window before your first hard frost is critical, but don't stress if you're just slightly late. Ranunculus corms are remarkably resilient and can still establish themselves up to 4 weeks before frost. Simply adjust your spring care timeline accordingly—you may need to extend your winter mulch protection by a few weeks if planting late.
Winter Protection Technique: When applying that 2-3 inch straw mulch in Step 3, create small ventilation channels through the mulch layer. This prevents moisture buildup while maintaining insulation. In particularly snowy regions, I recommend adding a layer of frost cloth over the mulch during the coldest months—it allows sunlight penetration while providing extra wind protection.
Spring Growth Monitoring: The 2-3 week window for shoot emergence in Step 4 is when most gardeners make their first mistake—overwatering. Instead of watering immediately when you see shoots, wait until the soil surface feels dry to the touch. Ranunculus corms need to break dormancy gradually, and too much moisture at this stage can trigger rot before roots establish properly.
Pro Tips for Fall Planted Ranunculus
- These insider strategies will help you transform your fall planting into a spring spectacle of vibrant ranunculus blooms.
- Soil Preparation Insight: The 10-minute fork test in Step 1 is your best friend for determining drainage.
- Planting Timing Strategy: The 6-8 week window before your first hard frost is critical, but don't stress if you're just slightly late.
Frequently asked questions
Got questions about growing fall-planted ranunculus for stunning spring blooms?
Here are the answers to the most common ones—so you can plant with confidence and avoid surprises!
When is the exact best time to plant ranunculus in fall?
Plant 4–6 weeks before your first hard frost (typically late September to early November in most U.S. zones). This gives roots time to establish before winter dormancy. Pro tip: Check your local frost dates—aim for soil temps around 40–50°F for ideal germination.
Will ranunculus survive a harsh winter?
Yes! Ranunculus is hardy in zones 3–9 when planted in fall. Mulch with 2–3 inches of straw or shredded leaves to insulate roots. Avoid heavy mulch that could rot bulbs—just enough to protect without suffocating. Bonus: Snow acts like a natural blanket!
Can I plant ranunculus in containers or just gardens?
Use well-draining containers (at least 6 inches deep) with a mix of potting soil and perlite. Place pots in a sheltered spot (like a garage or under eaves) if winters are brutal. Tip: Label containers—spring blooms pop up fast, and you’ll forget what’s what!
What do I do if my ranunculus bulbs rot or mold?
Rot usually means too much moisture or poor drainage. If you spot mushy bulbs, discard them immediately to prevent spreading. For future plants, soak bulbs in a fungicide solution (like copper fungicide) for 10 minutes before planting. Always plant in raised beds or sandy soil if drainage is a concern.
Are there any low-maintenance alternatives to ranunculus for spring color?
If ranunculus seems fussy, try tulips, crocus, or daffodils—they’re equally easy to plant in fall and thrive with minimal care. For longer-lasting blooms, consider anemones or hyacinths. Just remember: Ranunculus’s delicate, paper-like flowers are worth the extra love!
Wrapping up and next steps
Growing fall-planted ranunculus is your secret to a burst of vibrant spring color with minimal effort! By following these simple steps—choosing the right tubers, timing your fall planting, and providing proper care—you’ll enjoy stunning blooms in just 6 weeks.
Whether you’re a seasoned gardener or a beginner, this low-maintenance flower delivers high rewards.
Ready to transform your garden? Grab your tubers, mark your calendar for late fall, and get planting! 🌸 With a little patience, you’ll be rewarded with a dazzling display that brightens up spring like never before.