Propagation
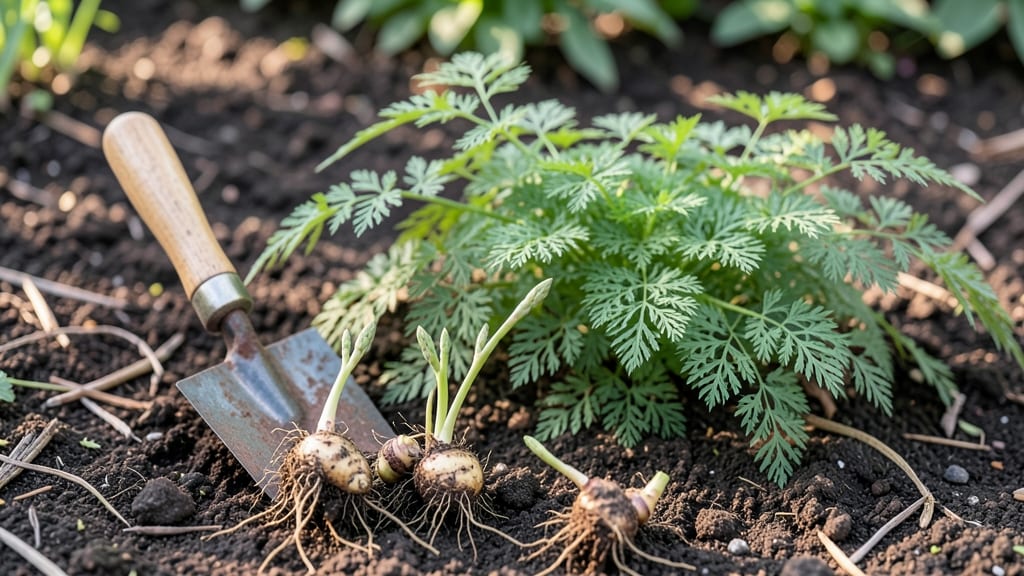
Propagating asparagus plants from established crowns is the fastest way to get your own perennial harvest—two years from division to spears thick enough to eat.
I’ve dug up more asparagus patches than I can count, and crown division is the method that actually works, not the wishful thinking of seed catalogs. The key isn’t just chopping roots—it’s timing, soil prep, and giving those new plants the right start so they don’t waste energy struggling.
You’ll need a mature asparagus patch (3-5 years old) to divide, a sharp spade, and well-draining soil mixed with compost—no sandy loam will do.
The best time to dig is late summer or early fall, when the plants are slowing down for winter but still have energy to establish. Even if you’ve never propagated anything before, asparagus crowns are forgiving: they’ll send up shoots next spring whether you’re perfect or just “close enough.”
By next year, you’ll see new fern-like growth instead of spears—don’t panic, that’s normal. The real payoff comes in year three, when you’ll harvest 10-15 spears per plant if you’ve given them enough space (12-18 inches apart) and consistent water.
The trick is patience: asparagus rewards long-term care with decades of harvests, unlike annuals that fizzle out after one season.
Works in zones 3-10, though southern gardeners should aim for fall division to avoid summer heat stress. The same method applies whether you’re splitting a neighbor’s overgrown patch or rescuing a struggling bed. Here’s how to do it without losing your first crop to impatience—or worse, weeds.
📚 In This Guide
- What you need
- Instructions
- Tips and common mistakes
- Wrapping up and next steps
What you need
- ● Asparagus crowns or fern cuttings: 1–3 healthy, disease-free crowns (from a mature asparagus patch, 2–3 inches in diameter)
- ● OR 6–12-inch fern cuttings (from the current year’s growth, taken in early fall)
- ● Garden soil: Well-draining, fertile soil with a pH of 6.5–7.5 (amend with compost if needed)
- ● Garden fork or trowel: For digging trenches (6–8 inches deep) or planting holes
- ● Organic mulch: Straw, wood chips, or compost (2–3 inches) to retain moisture and suppress weeds
- ● Watering can or hose with a gentle spray nozzle: For consistent moisture (avoid soaking the soil)
- ○ Plant tags or markers: To label beds and track growth (optional but helpful!)
- ● Slow-release fertilizer: Balanced 10-10-10 or compost tea to boost early growth
- ● Row cover or shade cloth: To protect young plants from harsh sun or pests
- ● Rooting hormone: For fern cuttings (speeds up root development)
- ● Soil test kit: To check pH and nutrient levels before planting
- ● Garden gloves: To keep hands clean while handling soil and plants
Instructions for propagating asparagus plants
Here's the method I've used to establish healthy asparagus crowns that produce harvests in just two seasons.
Select Healthy Asparagus Crowns
Choose mature asparagus crowns from a healthy, disease-free garden. Look for crowns with at least 6-8 healthy stalks and no signs of rot or insect damage. The best time to dig is in early spring, just as new shoots begin to emerge but before they break through the soil.
Gently dig around the crown with a spade, lifting it carefully to avoid damaging the roots. Shake off excess soil to inspect the roots—healthy roots should be firm and white, not mushy or brown. If you're propagating from store-bought asparagus, select spears with thick, firm bases and no signs of wilting.
Divide and Prepare the Crowns
Using a sharp, sterilized knife, divide the crown into sections, ensuring each has 3-5 healthy buds and a portion of the root system. This ensures each new plant has enough energy to establish itself. Discard any damaged or diseased sections immediately to prevent spreading problems.
Trim any long, woody roots back to 4-6 inches to encourage new root growth. Soak the divided crowns in a 1% hydrogen peroxide solution (1 part 3% hydrogen peroxide to 29 parts water) for 10 minutes to disinfect and promote root health. This step is critical—it prevents fungal infections that can kill young plants before they take hold.
Plant the Divided Crowns
Dig a trench 6-8 inches deep and 12 inches wide, spacing each crown 18 inches apart in rows 3 feet apart. Asparagus needs room to spread, so don’t crowd the plants. Place each divided crown in the trench with the buds facing upward, ensuring the top of the crown sits 2 inches below the soil surface. This depth protects the crown from freezing in winter.
Backfill the trench with amended garden soil mixed with 2 inches of compost, tamping lightly to remove air pockets. Water deeply until the soil is evenly moist to a depth of 6 inches. Avoid overwatering—soggy soil can rot the crowns before they establish roots. Mulch the area with 2-3 inches of straw to retain moisture and suppress weeds.
Provide Care During Establishment
For the first two growing seasons, resist the urge to harvest any spears. Instead, allow the plants to focus on building a strong root system. Cut back any spears that emerge to 4 inches above ground level to redirect energy into root and crown growth. This might feel counterintuitive, but it’s essential for long-term productivity.
Water the plants deeply once a week during dry spells, ensuring the soil remains consistently moist but not waterlogged. Asparagus is drought-tolerant once established, but young plants need steady moisture to develop. Fertilize lightly in early spring with a balanced 10-10-10 fertilizer, applying 1 pound per 100 square feet. Avoid high-nitrogen fertilizers—they encourage spear growth at the expense of root development.
Transition to Harvest in the Third Season
By the third growing season, your asparagus crowns will be fully established. Begin harvesting in early spring, cutting spears when they reach 6-8 inches tall and before the buds at the tips open. Harvest for 2-3 weeks to avoid weakening the plants, then allow the foliage to grow and replenish the roots for next year’s harvest.
Continue to mulch annually with 2-3 inches of organic matter to protect the crowns in winter and retain moisture. Asparagus is a perennial crop, so with proper care, it will produce for 10-15 years. The key is patience—skipping harvests in the first two years ensures a bountiful yield for decades to come.
Tips & tricks for perfect asparagus propagation
These insights will help you avoid common pitfalls and maximize your success with asparagus propagation.
Selection is Everything: In Step 1, when selecting crowns, prioritize those with a robust root system and at least 6-8 healthy stalks. I've learned the hard way that crowns with fewer than 5 stalks often fail to establish properly. Look for crowns where the roots are firm and white—not stringy or brown. This is particularly important if you're working with store-bought asparagus, where the quality can vary significantly. The crown's health at this stage determines your entire propagation success.
Disinfection Matters: The 10-minute hydrogen peroxide soak in Step 2 is non-negotiable for me. I've seen fungal infections wipe out entire propagation attempts when this step was skipped. The 1% solution (1 part 3% hydrogen peroxide to 29 parts water) creates an effective barrier against pathogens without harming the plant. For best results, use a clean container and ensure the entire crown is submerged. This simple precaution has saved me countless hours of frustration over the years.
Planting Depth is Critical: When placing your divided crowns in Step 3, remember that the top should sit just 2 inches below the soil surface. I've noticed that crowns planted too shallowly (less than 1.5 inches) often heave out of the ground during freeze-thaw cycles, while those buried too deeply (more than 3 inches) struggle to emerge. The 2-inch depth provides the perfect balance of winter protection and spring emergence. This detail makes all the difference in early-season growth.
Root Development Strategy: The two-season establishment period in Step 4 is where most gardeners fail. I've seen many impatient gardeners harvest spears in the first year, only to have their plants produce poorly for years. The key is to cut back any emerging spears to just 4 inches above ground level. This might seem counterintuitive, but it redirects all the plant's energy into building a robust root system rather than producing spears. Think of it as investing in your plant's future harvest potential.
Pro Tips for Propagating Asparagus Plants
- These insights will help you avoid common pitfalls and maximize your success with asparagus propagation.
- Selection is Everything: In Step 1, when selecting crowns, prioritize those with a robust root system and at least 6-8 healthy stalks.
- Disinfection Matters: The 10-minute hydrogen peroxide soak in Step 2 is non-negotiable for me.
Frequently asked questions
Got questions about growing asparagus from cuttings or crowns? Here are answers to the most common concerns—so you can confidently start your own patch!
How do I know if my asparagus crowns are healthy enough to propagate?
Look for firm, plump crowns with no signs of rot, mold, or soft spots. Healthy crowns should have multiple white, fleshy buds (called "crown eyes") and a diameter of at least 1–2 inches. Avoid crowns with yellowing or shriveled tips—they won’t root well.
Can I propagate asparagus from store-bought spears?
Nope! Store-bought asparagus is typically harvested from mature plants and won’t regrow. You’ll need to start with crowns (the woody base) or crown divisions from an existing healthy asparagus patch. Save money by asking local gardeners for spare crowns!
What’s the best time of year to plant asparagus crowns?
Plant crowns in early spring (as soon as the soil is workable, around 50°F) or late summer/early fall (6–8 weeks before frost). Avoid planting in freezing or waterlogged soil—crowns need time to establish roots before winter.
Why are my asparagus ferns turning yellow or dying after planting?
Yellowing ferns often signal overwatering, poor drainage, or root rot. Ensure soil drains well (mix in compost or sand if needed) and water only when the top 1–2 inches of soil are dry. If ferns wilt, trim them back to redirect energy to root growth.
How long does it take for propagated asparagus to produce spears?
Patience is key! While mature asparagus plants yield spears in 3–4 years, propagated crowns may take 2–3 years to produce harvestable spears. Avoid cutting spears in the first year—let the plant focus on root growth for a bountiful future harvest.
Can I propagate asparagus in containers instead of the ground?
Yes! Use a large container (at least 12" deep) with well-draining soil and organic matter. Choose a pot with drainage holes, and place it in full sun. Container-grown asparagus may produce slightly smaller spears but thrives with proper care—just rotate the pot yearly for even growth.
Wrapping up and next steps
Propagating asparagus plants is a rewarding journey that pays off with years of fresh, homegrown harvests! 🌱 By following these simple steps—whether through crown division, seed sowing, or root cuttings—you’ll soon enjoy a thriving perennial garden staple.
The key is patience and consistency, as asparagus rewards long-term care with delicious, nutrient-packed spears for decades.
Ready to take the next step? Start by marking your garden plot and prepping the soil this fall—your future harvest will thank you! For extra tips, explore our guide on asparagus care to keep your plants happy and productive.