Propagation
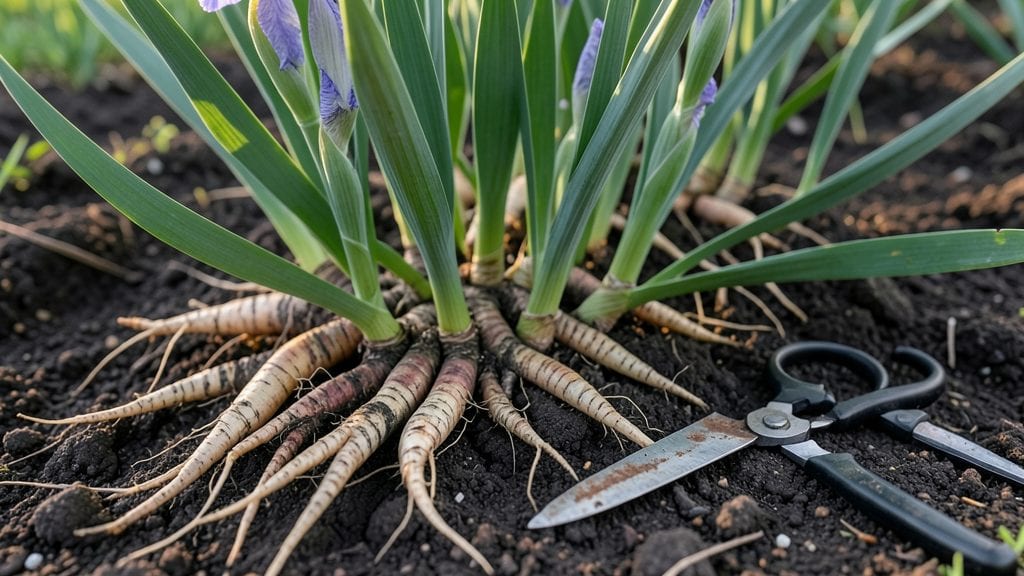
Propagating iris plants lets you multiply your best blooms with just a shovel and a sunny afternoon. 🌿 I’ve turned a single clump into dozens of thriving plants by mastering the simple art of division—no green thumb required, just patience and timing.
The key is waiting for the right moment after blooming, when the rhizomes are plump and ready to split without stress.
You’ll need basic tools: a sharp knife or spade, clean gloves, and a sunny spot with well-draining soil. The process takes about 30 minutes, but the payoff is years of vibrant blooms.
Even if you’ve never propagated before, iris rhizomes are forgiving—just avoid damaging the growing points, and you’ll have healthy new plants in no time.
After dividing, your new iris clumps will establish roots within 4-6 weeks, with blooms arriving the following spring. The secret to success? Planting them shallowly and spacing them properly—too deep, and they rot; too shallow, and they dry out. Water lightly at first, then let nature take over.
This method works for both bearded and Siberian iris varieties, and it’s perfect for gardeners who want to expand their collection without spending a dime. Once you’ve mastered it, you’ll be sharing divisions with neighbors—because who wouldn’t want a garden full of these showstopping blooms?
📚 In This Guide
- What you need
- Instructions
- Tips and common mistakes
- Wrapping up and next steps
What you need
- ● Healthy iris rhizomes: Choose mature, disease-free rhizomes with at least 3–5 fans (leaf clusters) each.
- ● Sharp garden knife or pruners: Sterilized to prevent contamination (bleach wipe works!).
- ● Gloves: Heavy-duty to protect against thorns and soil-borne pathogens.
- ● Well-draining potting mix or garden soil: Amend with perlite or sand (1:1 ratio) for aeration.
- ● Compost or balanced fertilizer (5-10-10): 1–2 tbsp per planting hole for nutrient boost.
- ○ Mulch (optional): Straw or shredded bark to retain moisture and suppress weeds.
- ● Rooting hormone: Speeds up rhizome establishment (gel or powder form).
- ● Spray bottle: For gentle watering post-planting.
- ● Plant tags: Label varieties to track growth.
- ● Shade cloth (30–50% coverage): Protects newly planted rhizomes from intense sun.
Step-by-Step instructions for propagating iris plants
Here’s the foolproof way to multiply your irises—just dig, divide, and replant at the right time.
🌱 Step 1: Choose the Right Time and Healthy Rhizomes
Timing is everything with irises. I always dig up clumps in late summer or early fall, when the foliage starts yellowing but hasn’t fully died back. This gives new roots time to establish before winter. Look for rhizomes (those thick, fleshy stems) that are plump and firm, not shriveled or mushy—those are signs of rot or pests.
Gently lift the entire clump with a garden fork, shaking off excess soil to expose the rhizomes. You’ll see fan-shaped leaves attached to each one. If you spot any with black spots or soft spots, toss those aside—they’ll spread disease to your healthy divisions.
✂️ Step 2: Divide the Rhizomes Carefully
Use a clean, sharp knife or pruners to separate the rhizome clump into smaller sections, ensuring each piece has at least one fan of leaves and a healthy growing tip. I like to make cuts between the rhizomes where natural divisions already exist—this minimizes damage. If you’re working with a large clump, aim for 3-5 rhizomes per division to give each new plant enough energy to thrive.
Discard any rhizomes that are smaller than a quarter or show signs of damage. The larger the rhizome, the better the chances of strong blooms next season. After dividing, let the sections dry out for 1-2 hours in a shady spot. This helps prevent rot when you replant.
💧 Step 3: Prepare the New Planting Site
Iris roots need well-draining soil—they hate soggy conditions. Amend your garden bed with 2-3 inches of coarse sand or perlite mixed into the top 6 inches of soil if it’s heavy clay. Choose a spot with full sun (at least 6 hours daily) and dig holes 1 inch deeper than the rhizome—this ensures the top stays exposed to sunlight, which prevents rot.
Space the holes 12-18 inches apart to give each division room to grow. If you’re planting in containers, use a pot with drainage holes and fill it with a mix of 50% potting soil and 50% perlite. The rhizome’s top should peek just above the soil line—never bury it completely.
🪴 Step 4: Plant and Water for Establishment
Place each rhizome division into its prepared hole, pressing the soil lightly around the base but leaving the top exposed. Water deeply right after planting to settle the soil and encourage root growth. After that, keep the soil moist but not soggy for the first 2-3 weeks. Overwatering now can drown the new roots before they’ve had a chance to establish.
I like to mulch around the base with 1 inch of gravel or coarse sand—this keeps moisture levels steady and prevents soil from splashing onto the rhizomes, which can cause rot. Avoid using organic mulch like wood chips, as it can smother the rhizome over time.
☀️ Step 5: Monitor and Maintain Through the First Season
Your newly planted iris divisions won’t bloom right away—they’ll focus on root and leaf growth first. Water once a week if rainfall is light, but cut back in late summer to encourage dormancy. By next spring, you’ll see strong, healthy foliage and—if you’re lucky—some tentative blooms. If not, don’t worry; irises often take 2-3 years to fully mature after division.
Watch for yellowing leaves in early summer—that’s a sign of overwatering or fungal issues. If you see it, reduce watering and improve drainage immediately. By late fall, the leaves will die back naturally, and you can trim them back to 2 inches tall to keep the bed tidy. Your irises are now set for years of vibrant blooms!
Tips & tricks for perfect iris propagation
Here's what I've learned after propagating irises for years—these tricks will help you avoid common pitfalls and get the best results.
Timing is Everything: In Step 1, don't rush the late summer/early fall window. If you dig too early, the roots won't have time to establish before winter. I've seen gardeners dig in early summer and end up with weak, stunted divisions that never flourish. Look for that perfect "yellowing but not dead" foliage—it's your golden cue.
The Technique That Changed Everything: When dividing in Step 2, I now use a sterilized knife and make clean cuts between natural divisions. The key is to work quickly—don't linger with any one section. I've ruined perfectly good rhizomes by leaving them exposed too long while I worked. Keep a small bowl of water nearby to dip your knife between cuts to prevent disease transfer.
Soil Preparation Wisdom: In Step 3, don't skip the sand or perlite amendment if you have heavy clay soil. I learned this the hard way when my first iris divisions rotted because their roots couldn't breathe. For containers, I've found that the 50/50 potting soil/perlite mix works even better than regular garden soil—it drains so much faster and prevents that dreaded soggy bottom.
Watering Rescue Strategy: The 2-3 week moist-but-not-soggy rule in Step 4 is critical. I've seen gardeners either drown their new divisions or let them dry out completely. Here's my trick: I use a moisture meter to check soil moisture. If it's dry 1 inch down, that's when I water—no guessing. And always water at the base, never overhead, to prevent fungal issues.
Pro Tips for Propagating Iris Plants
- Here's what I've learned after propagating irises for years—these tricks will help you avoid common pitfalls and get the best results.
- Timing is Everything: In Step 1, don't rush the late summer/early fall window.
- The Technique That Changed Everything: When dividing in Step 2, I now use a sterilized knife and make clean cuts between natural divisions.
Frequently asked questions
When is the best time to divide iris plants?
The ideal time to divide irises is early spring (just as new shoots emerge) or late summer (after flowering but before frost). Avoid dividing in winter or during extreme heat—this gives rhizomes time to establish roots before stress. For bearded irises, spring division is safest, while sibirtas and Louisiana irises can tolerate summer division better.
What if my iris rhizomes are soft or mushy?
Soft, mushy rhizomes signal rot, often from overwatering, poor drainage, or fungal issues. Trim away the affected areas with a sterile knife, then dust the cuts with fungicide (like copper-based spray). Let the healthy portions dry for 1–2 days before replanting in well-draining soil. Pro tip: If most of the rhizome is rotten, discard it to prevent spreading disease.
Can I propagate iris from seeds instead of division?
Yes! Iris seeds are easy to collect after flowering (they form in pods). Sow them fresh in late summer or store them in a cool, dry place until spring. Germination takes 1–3 years—be patient! Seed-grown irises may not match the parent plant’s traits, but they’re great for experimenting with new varieties. Division is faster for clones, though.
How often should I divide my iris plants?
Divide irises every 3–4 years to prevent overcrowding, which reduces blooms and weakens plants. Look for crowded rhizomes (less than 1 inch between them) or smaller flowers as signs it’s time. Younger plants (under 3 years) don’t need dividing—let them focus on root growth first!
Do iris rhizomes need sunlight after division?
Iris rhizomes thrive in full sun (6+ hours daily). After dividing, replant them in a sunny spot with well-draining soil. If you notice yellowing leaves or fewer blooms, they might be getting too much shade. A little afternoon shade in hot climates can help, but morning sun is ideal for most varieties.
What’s the fastest way to revive a struggling iris division?
If your newly divided iris looks weak, trim leaves to 6 inches and water lightly (rhizomes rot in soggy soil). Place them in a bright, sheltered spot (like a cold frame) for 2–3 weeks to reduce stress. Avoid fertilizing until new growth appears—focus on root establishment first. Most divisions bounce back in 4–6 weeks!
Wrapping up and next steps
Propagating iris plants is a rewarding way to expand your garden with stunning blooms—and it’s easier than you think! By dividing rhizomes and providing the right care, you’ll soon enjoy lush, thriving patches of irises.
Whether you’re a beginner or a seasoned gardener, this method ensures healthy growth with minimal effort.
Now that you’re armed with the know-how, grab your gloves and get dividing! Start small, observe your plants’ progress, and soon you’ll be sharing (or gifting!) these vibrant beauties with fellow gardeners. Happy planting! 🌸