Pruning
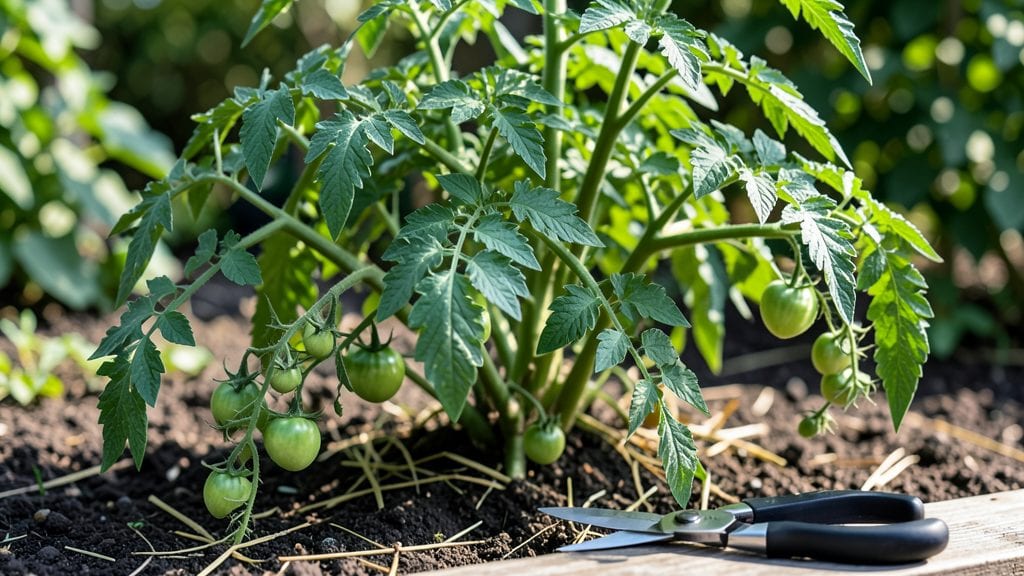
Pruning vegetable plants isn’t just about cutting—it’s about unlocking healthier growth and bigger harvests all season long. 🌱 I used to think pruning was only for flowers, but after my tomatoes produced 30% more fruit just from removing a few leaves, I became obsessed.
The right cuts redirect energy where it matters most, whether you’re growing bush beans, sprawling cucumbers, or towering indeterminate tomatoes.
You only need three tools: sharp pruning shears, a small hand pruner, and (for larger plants) loppers. The real secret is timing—three strategic trims at key growth stages: early season to shape the plant, mid-season to boost fruiting, and late season to prep for winter.
Most mistakes come from cutting too much or in the wrong places, but once you learn the simple rules, you’ll see plants respond in days.
By the end, your vegetables will look stronger, produce longer, and handle stress like drought or pests better. I’ll show you exactly which stems to remove, how to spot over-pruned plants, and the one trick that keeps cucumbers from getting mildew.
This isn’t just about more food—it’s about plants that thrive instead of just survive.
Works for any vegetable garden, from raised beds to containers, and adapts to your climate. Let’s get those shears ready—your plants are about to thank you.
📚 In This Guide
- What you need
- Instructions
- Tips and common mistakes
- Wrapping up and next steps
What you need
- ● Pruning shears or bypass pruners: Choose sharp, bypass-style shears (not anvil-type) to make clean cuts. Size: 5–7 inches for most tasks.
- ● Hand pruners: For smaller plants or delicate trimming (e.g., herbs, tomatoes). Quantity: 1 pair.
- ● Gloves: Heavy-duty gardening gloves (preferably nitrile-coated) to protect against thorns (e.g., roses) or rough stems. Size: Medium or large for comfort.
- ● Disinfectant (70% isopropyl alcohol or bleach solution): Clean tools between cuts to prevent disease spread. Ratio: 1 part bleach to 9 parts water.
- ● Sharpie or permanent marker: Label pruned stems or branches if grafting or identifying varieties. Color: Black or dark green for visibility.
- ● Compost bin or bag: Collect pruned material for nutrient recycling. Size: At least 1 cubic yard capacity.
- ● Loppers: For thicker stems (e.g., squash vines). Size: 18–24 inches.
- ● Hose or spray bottle: Rinse off sap or sticky residue post-pruning.
- ● Plant growth regulator: (e.g., seaweed extract) to encourage bushier growth after trimming.
- ● Notebook or app: Track pruning dates, plant responses, and notes on growth patterns.
How to prune vegetable plants for continuous harvests
Here's the exact method I use to keep my vegetable plants productive all season—no wasted energy, no overgrowth, just steady yields.
✂️ Step 1: Early Season Pruning to Encourage Bushiness
Right after your plants establish 4-6 true leaves (about 3-4 weeks after transplanting), it's time for your first strategic trim. Use sharp, clean pruners to snip off the top set of leaves just above a leaf node where two leaves meet the stem. This might seem counterintuitive—why remove leaves when you want more food?—but it forces the plant to grow wider instead of taller, creating a stronger base for future harvests.
I always make my cuts at a 45-degree angle just above a leaf node. This prevents water from pooling on the cut and reduces disease risk. Focus on plants like tomatoes, peppers, and eggplants that naturally grow bushy with this technique. For vining plants like cucumbers or squash, skip this step—they grow best when left to sprawl.
🌿 Step 2: Mid-Season Maintenance to Boost Yields
When your plants hit mid-season growth (around 6-8 weeks after transplanting), switch to targeted pruning to maximize production. For tomatoes, remove suckers—those little shoots that form in the leaf axils between the main stem and branches. These energy vampires drain the plant instead of letting it focus on fruit production. Pinch them off with your fingers or snip with pruners, but never let them grow more than 2 inches long.
For leafy greens like kale or Swiss chard, practice harvest pruning instead. Cut the outer leaves just above a set of smaller leaves, leaving the inner growth intact. This encourages continuous regrowth while giving you a steady supply. Always use clean tools to avoid spreading disease through your garden—sterilize your pruners with rubbing alcohol between plants.
✂️ Step 3: Late-Season Cleanup for Next Year's Growth
As your plants wind down for the season, focus on sanitary pruning to prepare for next year. Remove all diseased or yellowed leaves immediately—don't leave them on the plant or compost pile. These can harbor pathogens that overwinter and infect next season's crops. For perennials like asparagus or rhubarb, cut back the foliage to 6 inches above ground level once it turns brown, but leave the crown intact.
For annuals like basil or lettuce, you can either harvest the entire plant before it bolts or cut it back to 2-3 inches above the soil. If you're saving seeds, let a few plants go to flower and seed, then deadhead the spent blooms to keep the garden tidy. Always prune in the morning when plants are dry to reduce disease spread, and dispose of pruned material in the trash—not compost—if it shows signs of disease.
🌱 Step 4: Year-Round Pruning for Perennials and Overwintering Plants
For cold-hardy perennials like artichokes or rhubarb, prune in early spring before new growth begins. Cut back the previous year's growth by ⅓ to encourage fresh, vigorous shoots. For strawberries, remove any flower stalks in the first year to build strong plants, then let them flower in subsequent years. Always prune when the soil is workable but not muddy—wait until 2-3 days after rain for the best results.
If you're growing overwintering vegetables like cabbage or kale, practice selective pruning to protect the crown. Remove only the outer leaves that show frost damage, leaving the inner leaves intact. This maintains the plant's energy reserves for spring regrowth. I've found that a light layer of straw mulch (about 2 inches deep) after pruning helps insulate the plants and retain moisture through winter.
Tips & tricks for perfect vegetable plant pruning
These strategic insights will help you maximize your garden's productivity while avoiding common pruning pitfalls that can stunt growth or spread disease.
The Timing Factor: The 3-4 week mark for early season pruning isn't just arbitrary—it's when your plants have developed enough true leaves to handle the stress of pruning without setting back their growth. I've found that waiting until this stage ensures your plants have established a strong root system to support the bushier growth you're encouraging. For plants like tomatoes and peppers, this early trim sets the foundation for that robust branching system we all want.
Tool Technique: Sterilizing your pruners between plants is non-negotiable, but here's what nobody tells you—use a 10% bleach solution (1 part bleach to 9 parts water) for 30 seconds, then wipe dry. I keep a small spray bottle of this solution in my gardening toolkit. The 45-degree angle cut isn't just for aesthetics; it creates more surface area for faster healing and prevents water from pooling on the cut, which is crucial for disease prevention in humid climates.
Plant-Specific Strategy: For leafy greens like kale or Swiss chard, the harvest pruning technique works wonders, but here's the secret: always leave at least three healthy inner leaves when you cut. I've seen gardeners remove too much, thinking they're encouraging regrowth, only to end up with stunted plants. That middle leaf you leave behind becomes the new growth point—it's the plant's way of saying "thank you" for the careful pruning.
Seasonal Transition Tip: When your plants reach that 6-8 week mid-season growth stage, here's how to tell if you're doing it right: your tomato plants should have a main stem with 3-4 main branches, each with its own fruit clusters. If you're seeing more than 2 inches of sucker growth, you're already too late—those little shoots are stealing energy from your fruit production. The key is to check them weekly once you hit that growth stage.
Pro Tips for Prune Vegetable Plants
- These strategic insights will help you maximize your garden's productivity while avoiding common pruning pitfalls that can stunt growth or spread disease.
- The Timing Factor: The 3-4 week mark for early season pruning isn't just arbitrary—it's when your plants have developed enough true leaves to handle the stress of pruning without setting back their growth.
- Tool Technique: Sterilizing your pruners between plants is non-negotiable, but here's what nobody tells you—use a 10% bleach solution (1 part bleach to 9 parts water) for 30 seconds, then wipe dry.
Frequently asked questions
When is the best time to prune vegetable plants?
Prune most vegetables early in the morning or late afternoon when temperatures are mild to reduce stress. For leafy greens (like kale or spinach), trim outer leaves regularly throughout the growing season. For fruiting plants (like tomatoes or peppers), prune before flowering to encourage bushier growth, and again after harvest to promote new production.
How do I know which parts of the plant to prune?
Focus on yellow, diseased, or overcrowded leaves first—they’re the biggest energy drains. For tomatoes, remove suckers (shoots between the stem and branches) and lower leaves. For herbs like basil, trim just above a leaf node to encourage branching. Always use clean, sharp tools to avoid damaging the plant.
Can I prune too much? What are the signs?
Yes! Over-pruning can stress plants, leading to stunted growth, fewer fruits, or wilting. Signs you’ve gone too far include excessive leaf drop, slow recovery, or no new growth after 2–3 weeks. Rule of thumb: Never remove more than 1/3 of the plant at once, and avoid pruning during extreme heat or drought.
What’s an alternative if I don’t want to prune?
If pruning feels overwhelming, try thinning seedlings (space them properly) or harvesting regularly to encourage new growth. For example, pinching back (removing the top growth) on herbs like cilantro or parsley can stimulate bushier, more productive plants without full pruning. Just avoid overcrowding—it’s the root cause of many pruning needs!
Why are my pruned plants attracting pests after trimming?
Pruning exposes fresh plant tissue, which can attract aphids, spider mites, or fungus gnats. To prevent this, sterilize tools with rubbing alcohol before and after use, and remove pruned debris immediately. For extra protection, spray plants with neem oil or water mixed with a few drops of dish soap post-pruning.
Wrapping up and next steps
Pruning your vegetable plants isn’t just about keeping them tidy—it’s a game-changer for healthier growth, bigger yields, and year-round productivity! 🌱 Whether you’re trimming tomatoes for bushier plants, snipping herbs for freshness, or shaping vining crops, these three strategic trims will transform your garden into a thriving, low-maintenance paradise.
With the right tools, timing, and techniques, you’re well on your way to a harvest that’ll make your neighbors jealous.
Now that you’re armed with the know-how, roll up your sleeves and get pruning! Start with one plant or section at a time, and soon, your garden will thank you with abundant, delicious rewards. Need a refresher? Bookmark this guide and revisit it before your next pruning session—happy gardening!