How To
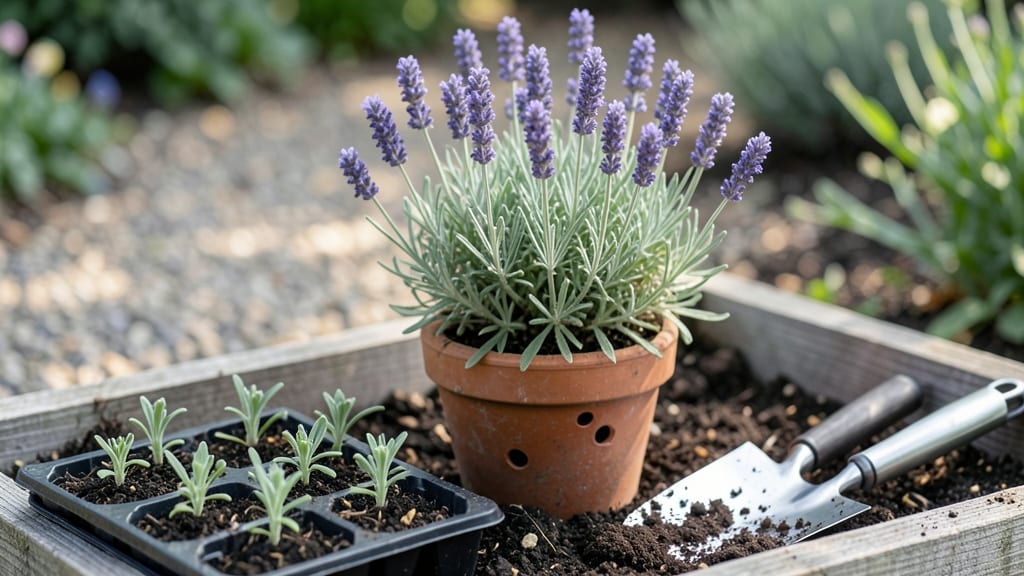
Martha Stewart’s planting techniques turn even the most hesitant green thumbs into confident gardeners. 🌱 I’ve used her methods for years—starting with a simple herb garden and now growing a full vegetable patch—and the difference is undeniable: plants thrive, blooms multiply, and the garden feels like a well-oiled machine.
The secret isn’t just the plants themselves, but how they’re placed, nurtured, and given space to grow.
Her approach starts with soil prep—loose, well-draining, and rich in compost—because healthy soil means healthy plants. She swears by companion planting, pairing tomatoes with basil to repel pests or marigolds with vegetables to deter nematodes.
Spacing is another game-changer: overcrowded plants compete for nutrients, while proper spacing ensures airflow and reduces disease. And yes, she even has a trick for container gardening that makes small spaces work like pros.
What you’ll end up with is a garden that looks effortless—lush foliage, vibrant blooms, and vegetables that keep producing all season. The key is paying attention to the details: watering at the base (not overhead), mulching to retain moisture, and deadheading spent blooms to encourage more flowers.
It’s not about perfection; it’s about creating an environment where plants can do their best work.
Whether you’re planting flowers, herbs, or vegetables, these techniques adapt to any garden size or style. The beauty of Martha’s methods is that they’re foolproof once you understand the basics—no green thumb required. Let’s get those plants in the ground the right way!
📚 In This Guide
- What you need
- Instructions
- Tips and common mistakes
- Wrapping up and next steps
What you need
- ● Seeds or seedlings: Choose native plants, herbs, or veggies suited to your climate (e.g., tomatoes, basil, marigolds). Pro tip: Start with 5–10 plants for beginners!
- ● High-quality potting soil: 1–2 bags (sterile, well-draining mix like Miracle-Gro or FoxFarm).
- ● Containers or garden beds: Containers: 5–10 pots (5–10 inches deep, with drainage holes).
- ● Garden beds: 4’x8’ plot (or smaller if space is limited).
- ● Watering can or hose with nozzle: 1–2 gallons capacity for precision watering.
- ● Gloves: 1 pair (gardening gloves to protect hands).
- ● Hand trowel: 1 (for digging small holes).
- ● Pruners: 1 pair (sharp, bypass-style for clean cuts).
- ● Garden fork or spade: 1 (for loosening soil in beds).
- ● Measuring tape: 1 (to space plants 12–24” apart).
- ○ Mulch (optional but recommended): 1 bag (straw or shredded bark to retain moisture).
- ● Decorative garden markers (chalkboard or wooden labels).
- ● Compost or organic fertilizer (e.g., Fish emulsion for a nutrient boost).
- ● Knee pad or stool (for comfort during long planting sessions).
- ● Sunlight meter (to check plant placement accuracy).
Step-by-step instructions for Martha Stewart's signature planting method
Martha Stewart’s approach focuses on precision, timing, and soil health—here’s how to replicate her signature technique for a garden that thrives.
🌱 Step 1: Prepare the Soil with Precision
Start by testing your soil’s pH—Martha insists on 6.0 to 6.5 for most plants. If your soil is heavy clay or compacted, amend it with 2 inches of compost (she swears by well-aged manure or leaf mold) and till it in 6 inches deep. This ensures roots have room to spread without battling resistance.
Loosen the soil in a 12-inch square around each planting spot using a broadfork or trowel. Avoid walking on freshly tilled beds—you’ll compact the soil just when you’ve loosened it. For containers, mix equal parts potting mix and perlite to mimic loose, aerated garden soil.
☀️ Step 2: Time Planting for Optimal Conditions
Martha plants on overcast days or in the late afternoon to reduce transplant shock. Dig holes twice as wide as the root ball but only as deep as the container’s base. This prevents burying stems too deeply, which can suffocate roots. Gently remove the plant from its container and tease apart any circling roots with your fingers.
Place the plant in the hole so the top of the root ball sits level with the surrounding soil. Press the soil firmly around the roots—Martha uses her hands to create a snug fit, eliminating air pockets. Water deeply right after planting to settle the soil and eliminate gaps.
💧 Step 3: Mulch Strategically for Moisture and Weed Control
Spread 2-3 inches of organic mulch (she prefers shredded bark or straw) over the soil surface, keeping it 2 inches away from plant stems to prevent rot. Mulch conserves moisture, regulates soil temperature, and suppresses weeds—Martha’s secret to low-maintenance gardens. Replenish mulch as it breaks down, especially in hot climates.
Water deeply once a week (or more in extreme heat) to encourage deep root growth. You’ll know you’re doing it right when the soil stays evenly moist 2 inches below the surface but never soggy. Overwatering is Martha’s biggest pet peeve—it leads to weak stems and fungal issues.
✂️ Step 4: Maintain with Pruning and Feeding
Deadhead spent blooms immediately to redirect energy into new growth—Martha’s rule is "prune while you think about it." Use clean, sharp shears to cut just above a leaf node or bud. For leafy plants like basil or mint, pinch back the tips to encourage bushier growth. This keeps plants compact and productive.
Feed plants every 4-6 weeks with a balanced 10-10-10 fertilizer (diluted to half strength). She avoids synthetic chemicals, opting instead for compost tea or fish emulsion for a natural boost. Always water before fertilizing—this prevents root burn and ensures nutrients soak into the soil where they’re needed.
🌿 Step 5: Monitor and Adjust for Seasonal Changes
Check plants weekly for pests like aphids or powdery mildew—Martha’s go-to remedy is neem oil or insecticidal soap. Act fast: a few days of neglect can turn a minor issue into a full-blown infestation. In late summer, reduce watering slightly to harden off plants before fall dormancy.
As seasons shift, adjust mulch depth and fertilizing schedules. For perennials, cut back dead foliage in early spring but leave 3-4 inches of stems—this protects the crown from frost and gives roots a head start. Martha’s gardens thrive because she treats each plant as an individual, not just another green thing in the ground.
Tips & tricks for perfect Martha Stewart planting
Martha Stewart’s planting method isn't just about putting plants in the ground—it's a science of precision and patience that makes all the difference. Here's what nobody tells you about replicating her signature approach.
Soil Preparation Secret: The 6.0 to 6.5 pH range isn't arbitrary—it's optimal for most garden plants because it maximizes nutrient availability. I learned this the hard way after struggling with stunted growth in my acidic soil. Test your soil with a kit from your local garden center, and if it's outside this range, amend it gradually. For clay-heavy soils, mix in 2 inches of compost and till it in 6 inches deep—this creates the perfect balance of aeration and moisture retention that Martha swears by. The key is patience: let the amended soil sit for at least 2 weeks before planting to allow microbial activity to stabilize.
Planting Timing Technique: Martha's preference for overcast days or late afternoon planting isn't just about avoiding harsh sun—it's about reducing transplant shock by minimizing temperature fluctuations. When you're digging those holes twice as wide as the root ball, here's the trick: use a garden trowel to loosen the sides of the hole first. This creates a "root highway" that encourages roots to spread outward rather than circling (which happens when roots hit compacted soil). After planting, give the soil a gentle press with your hands—Martha's method ensures no air pockets remain, which could lead to rot.
Mulch Mastery: The 2-3 inches of organic mulch isn't just for looks—it's a moisture regulator, temperature stabilizer, and weed suppressor all in one. I've seen gardeners use too little mulch and end up with parched plants, or too much and create a suffocating environment. Keep that 2-inch clearance from stems to prevent rot, and always use organic materials like shredded bark or straw. Pro tip: Refresh your mulch every spring—what was 2-3 inches last year might have decomposed to just 1 inch by planting season.
Seasonal Adjustment Strategy: That 3-4 inches of stem left on perennials in early spring might seem counterintuitive, but it's Martha's way of protecting the crown from late frosts while still allowing sunlight to reach new growth. For seasonal adjustments, I've found that a simple rule works: if your area gets below 20°F, increase that stem length to 4-5 inches for extra protection. And when it comes to watering, the deeply once a week guideline works for most gardens, but adjust for your local climate—desert areas might need every 2 weeks, while humid regions could require every 3-4 days.
Pro Tips for Martha Stewart Planting
- Martha Stewart’s planting method isn't just about putting plants in the ground—it's a science of precision and patience that makes all the difference.
- Soil Preparation Secret: The 6.0 to 6.5 pH range isn't arbitrary—it's optimal for most garden plants because it maximizes nutrient availability.
- Planting Timing Technique: Martha's preference for overcast days or late afternoon planting isn't just about avoiding harsh sun—it's about reducing transplant shock by minimizing temperature fluctuations.
Frequently asked questions
Got questions about Martha Stewart’s legendary planting techniques? Here are answers to the most common ones—whether you're a beginner or a seasoned gardener looking to refine your skills!
What’s the best time of year to plant according to Martha Stewart?
Martha recommends following your local climate and plant hardiness zone (check the USDA zone map). Generally, spring and fall are ideal for most vegetables and flowers—spring after the last frost, fall 6-8 weeks before the first frost. For perennials, early spring or fall works best. Pro tip: She often plants cool-season crops (like kale or spinach) in early spring and warm-season crops (tomatoes, peppers) after Memorial Day!
Can I use Martha’s methods for container gardening?
Martha frequently uses containers for herbs, tomatoes, and even small fruit trees. Key tips: Choose pots with drainage holes, use well-draining potting mix, and select compact or dwarf varieties. She often adds a layer of gravel or perlite at the bottom to prevent root rot. Herbs like basil and thyme thrive in containers—just place them in sunny spots!
How often should I water plants using Martha’s approach?
Martha emphasizes consistency over quantity. Most plants need 1 inch of water per week, including rainfall. For containers, water when the top inch of soil feels dry. She suggests mulching (with straw or shredded leaves) to retain moisture. Morning watering is best to reduce evaporation and fungal risks. Drip irrigation or soaker hoses are her preferred methods for efficiency!
What’s the best way to troubleshoot plant problems like Martha?
Martha’s go-to steps:
- Identify the issue (yellow leaves? Check watering or nutrients).
- Inspect for pests (aphids, slugs) under leaves or in soil.
- Adjust care—overwatering? Let soil dry out.
- Use organic fixes like neem oil (for pests) or Epsom salt (for magnesium-deficient plants). She never recommends harsh chemicals—prevention (healthy soil, companion planting) is key!
Are there any “no-fail” plants Martha recommends for beginners?
Martha’s top picks for newbies:
- Herbs (basil, parsley, chives) – Fast-growing, forgiving, and great for containers.
- Cherry tomatoes – Productive, compact, and perfect for pots or gardens.
- Zinnias or marigolds – Bright, low-maintenance flowers that attract pollinators.
- Green beans or lettuce – Easy to harvest and thrive in loose, fertile soil.
Wrapping up and next steps
Martha Stewart’s approach to planting blends timeless wisdom with practical know-how—whether you’re tending a lush vegetable patch or a vibrant flowerbed. The key? Preparation, patience, and a little green thumb love. From choosing the right soil to mastering seasonal timing, her methods ensure your garden thrives like a pro’s.
Ready to roll up your sleeves? Start small—pick one bed or container, gather your tools, and dive in! 🌱 Soon, you’ll be harvesting confidence (and maybe a few homegrown tomatoes) like Martha herself. Happy planting!